See also: XBot ID Management
Change XID Modes
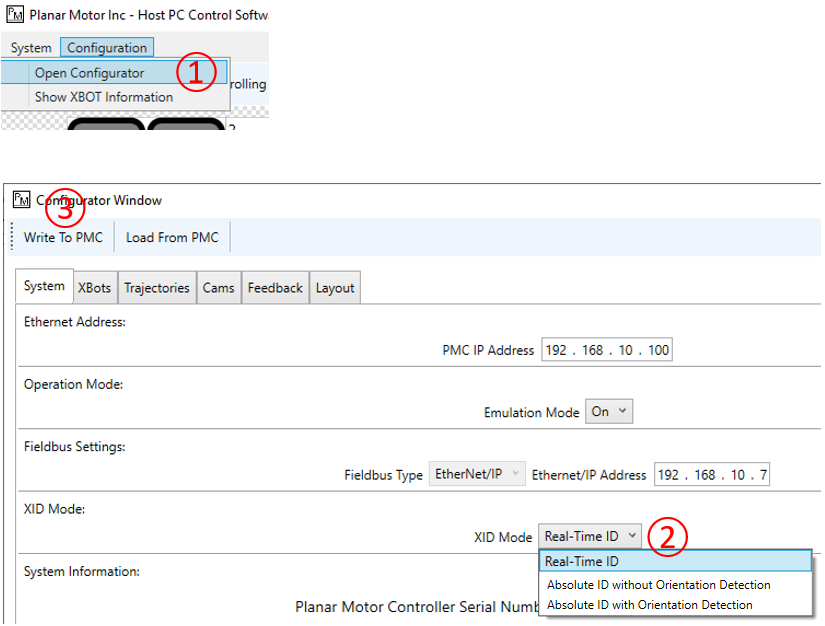
① Open Configurator
② Select Real-Time ID Mode or Absolute-ID Mode.
-
Real-Time ID: XBots do not maintain their IDs through power cycles. They are assigned new IDs when the system is powered off and on again
-
Absolute ID without Orientation Detection: XBots maintain their IDs through power cycles but ignore if their orientation has changed
-
Absolute ID with Orientation Detection: XBots maintain their IDs through power cycles and their orientation is also determined. The default orientation is with the orientation marking on the XBot facing the +X direction.
③ Write settings to PMC
Change XBot IDs in Absolute ID Mode
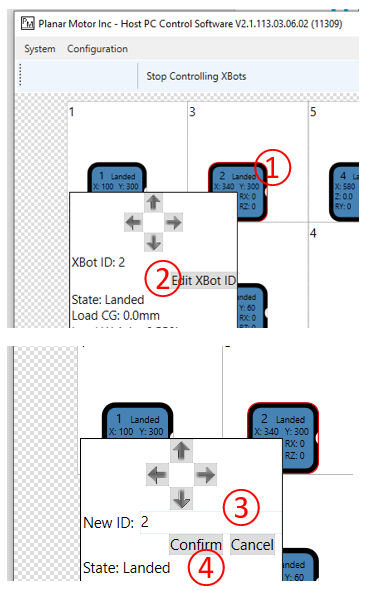
Before you start, make sure the system is set to Absolute ID mode
① Click on the XBot that you want to change the ID for
② Click Edit XBot ID
③ Enter the new desired ID. It can be between 1 and 78, but cannot be a duplicate of another XBot’s absolute ID, even if that XBot is not currently installed on the system
④ Click Confirm for the change to take effect
Delete Previously Assigned XBot IDs

Before you start, make sure the system is set to Absolute ID mode
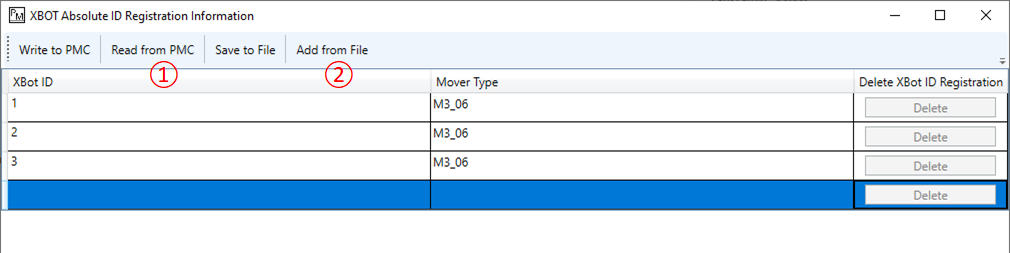
① Click “XBOT Absolute ID Registration” to display the Absolute ID Information window
② Click "Delete" to to remove the assigned ID for a particular XBot
③ Click "Write to PMC" to write the changes to the PMC
Note: before "Write to PMC", user can undo a delete by clicking "Read from PMC".
Saving and Merging ID Configuration Files
Sometimes you might want to save an ID Configuration to a file for future use, or combine ID Configurations from multiple systems into one (e.g. when using Flyway Cluster Linking feature). Follow the steps below:
Before you start, make sure the system is set to Absolute ID mode, and emulation mode is off
Saving ID Configuration to PC

① Click "XBOT Absolute ID Registration" to display the Absolute ID Information window
② Click "Read from PMC" to get the current configuration; if you get an empty list, exit this window and activate all the XBots, then try again
③ Click "Save to File" to save the file to local disk
Merging ID Configuration
You can merge multiple ID Configuration files into one.
① Click "Read from PMC" to get the current ID Configuration
② Click "Add from File" to add a previously saved ID Configuration to the current one
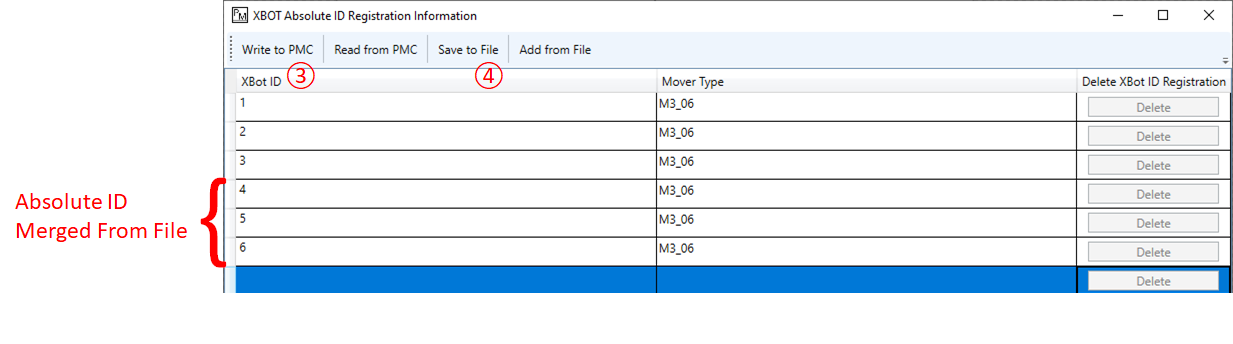
③ Review the merged ID Configuration, then click "Write to PMC" to save the new ID Configuration to the system
④ If you would like to share the file to other systems, click "Save to File" to save it to PC
NOTE: Keep in mind the following behavior:
-
When each file has unique physical XBots and none of the XBot IDs repeat, the two files will simply merge together into a single file; as shown in the example above, "1,2,3" and "4,5,6" merged into "1,2,3,4,5,6"
-
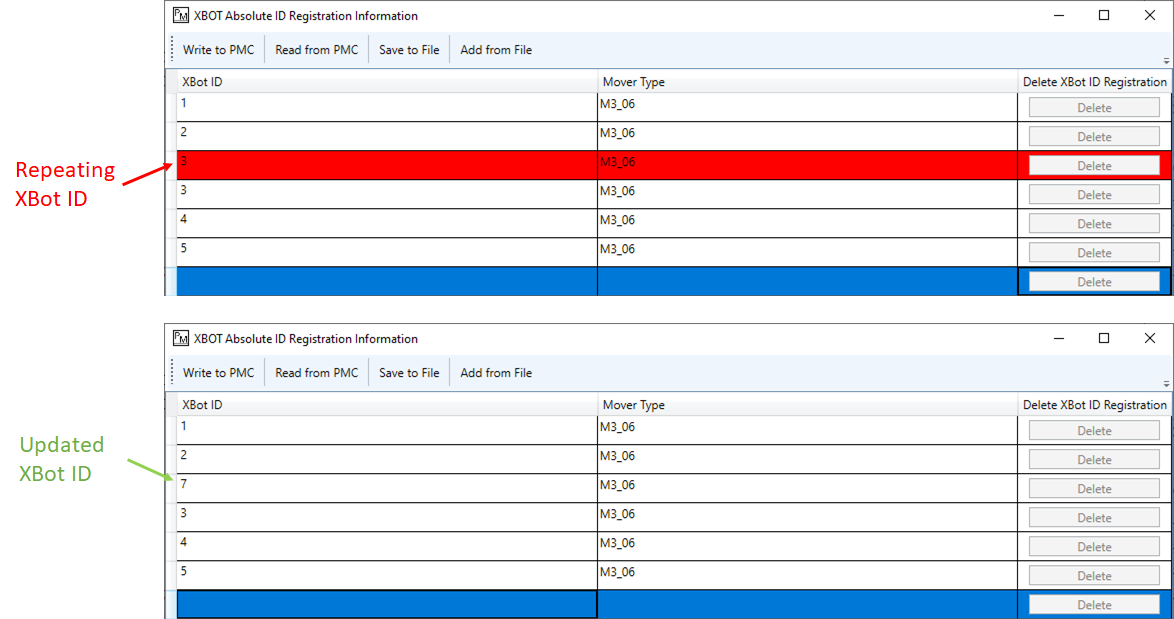
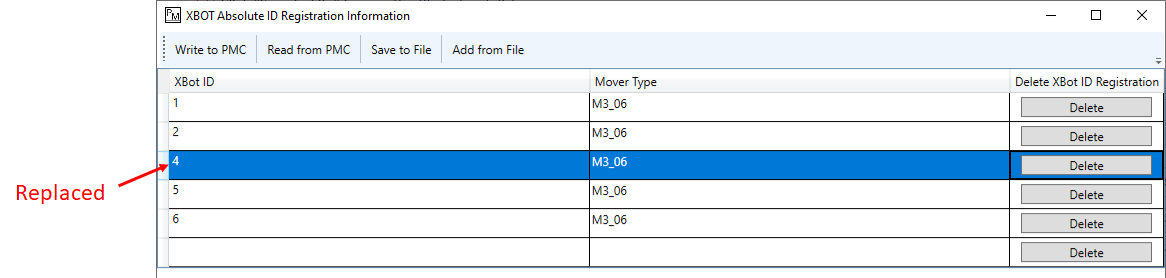
When two files contain the same physical XBot, the incoming file's XBot ID will replace the current one. For example, the current system has "1,2,3", and the incoming system has "4,5,6"; however, "3" and "4" represents the same physical XBot, so "4" replaced "3" automatically during merge; shown below:
-
If the same XBot ID is used for two different physical XBots, PMT will highlight the XBot ID in the current system in red, and it must be changed before the configuration can be written to PMC or saved to file. For example, the current system has "1,2,3", and the incoming system has "3,4,5"; both system has an instance of ID "3", but they are NOT the same physical XBot; PMT will highlight the XBot "3" from the "1,2,3" group so you could change it to a non-repeating