Library Setup
Installing Apps
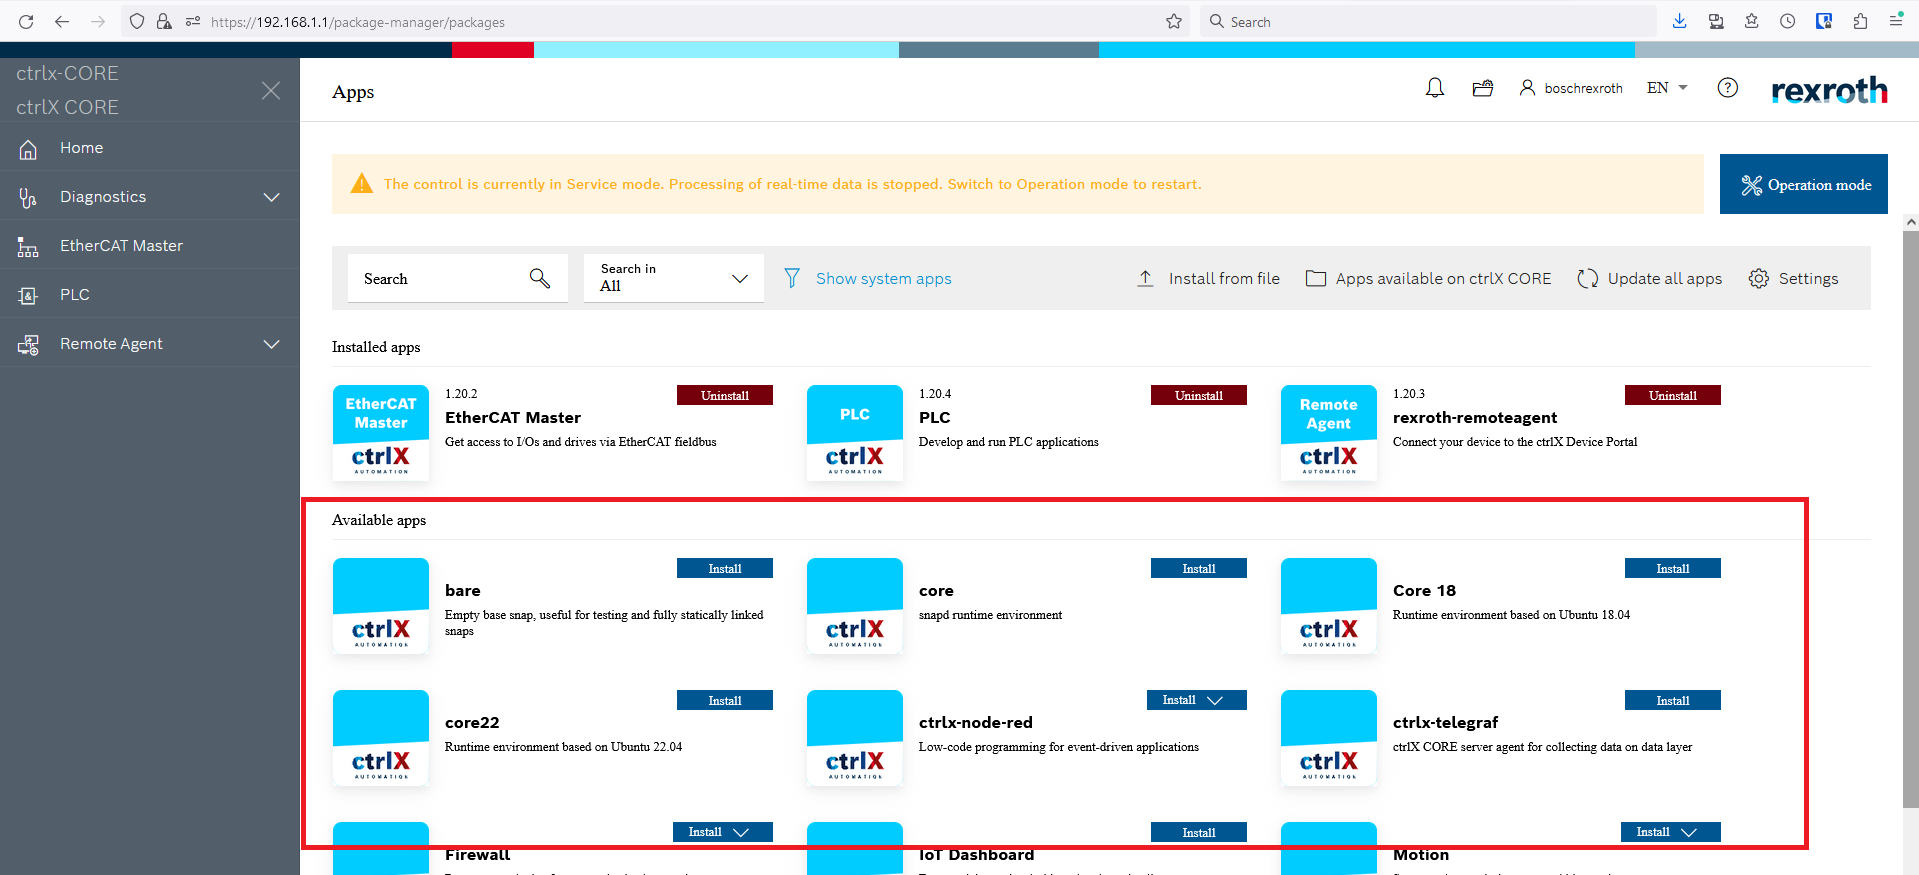
Step 1: First you need to install the PLC and EtherCAT apps onto the ctrlX Core. In a web browser connect to the controller (default IP 192.168.1.1). Any apps you already have installed will be listed on the home page
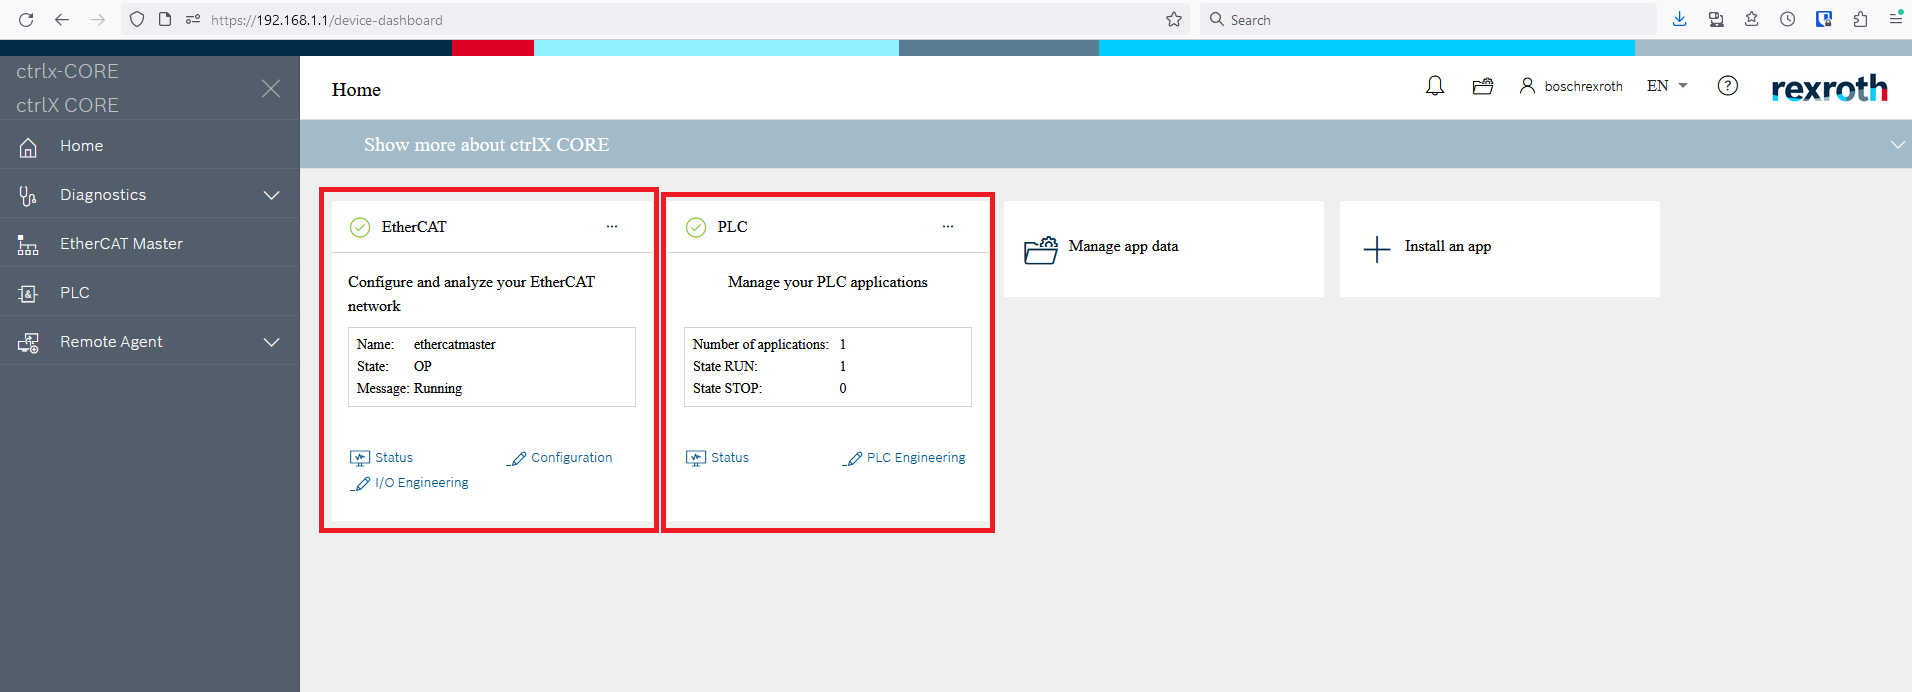
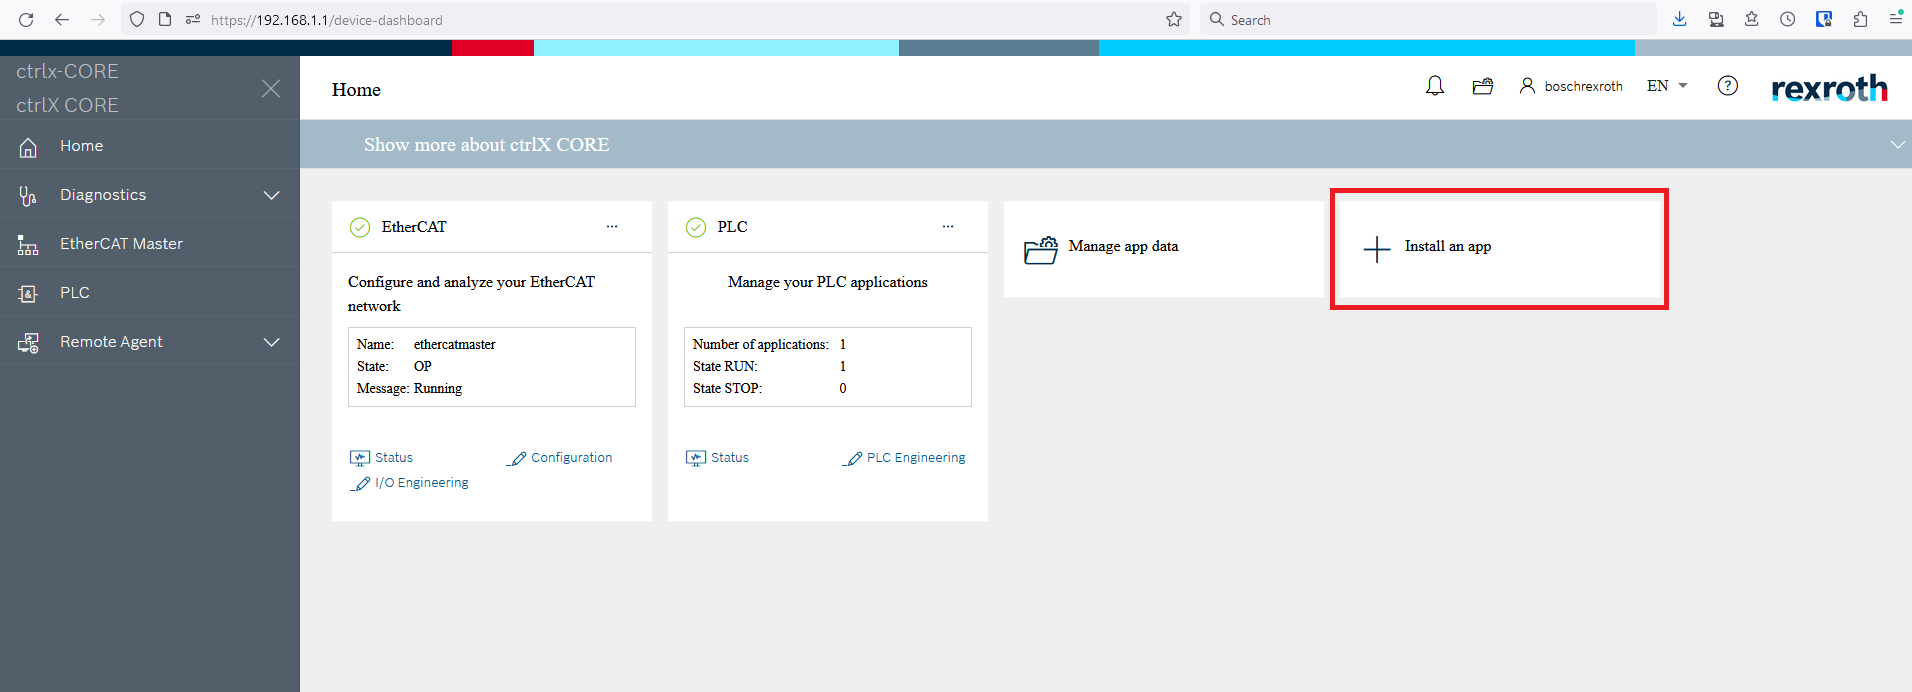
Step 2: If the EtherCAT and PLC apps haven’t been installed yet click the “Install an app” button
Step 3: In the Apps window click the Service mode button to allow new apps to be installed
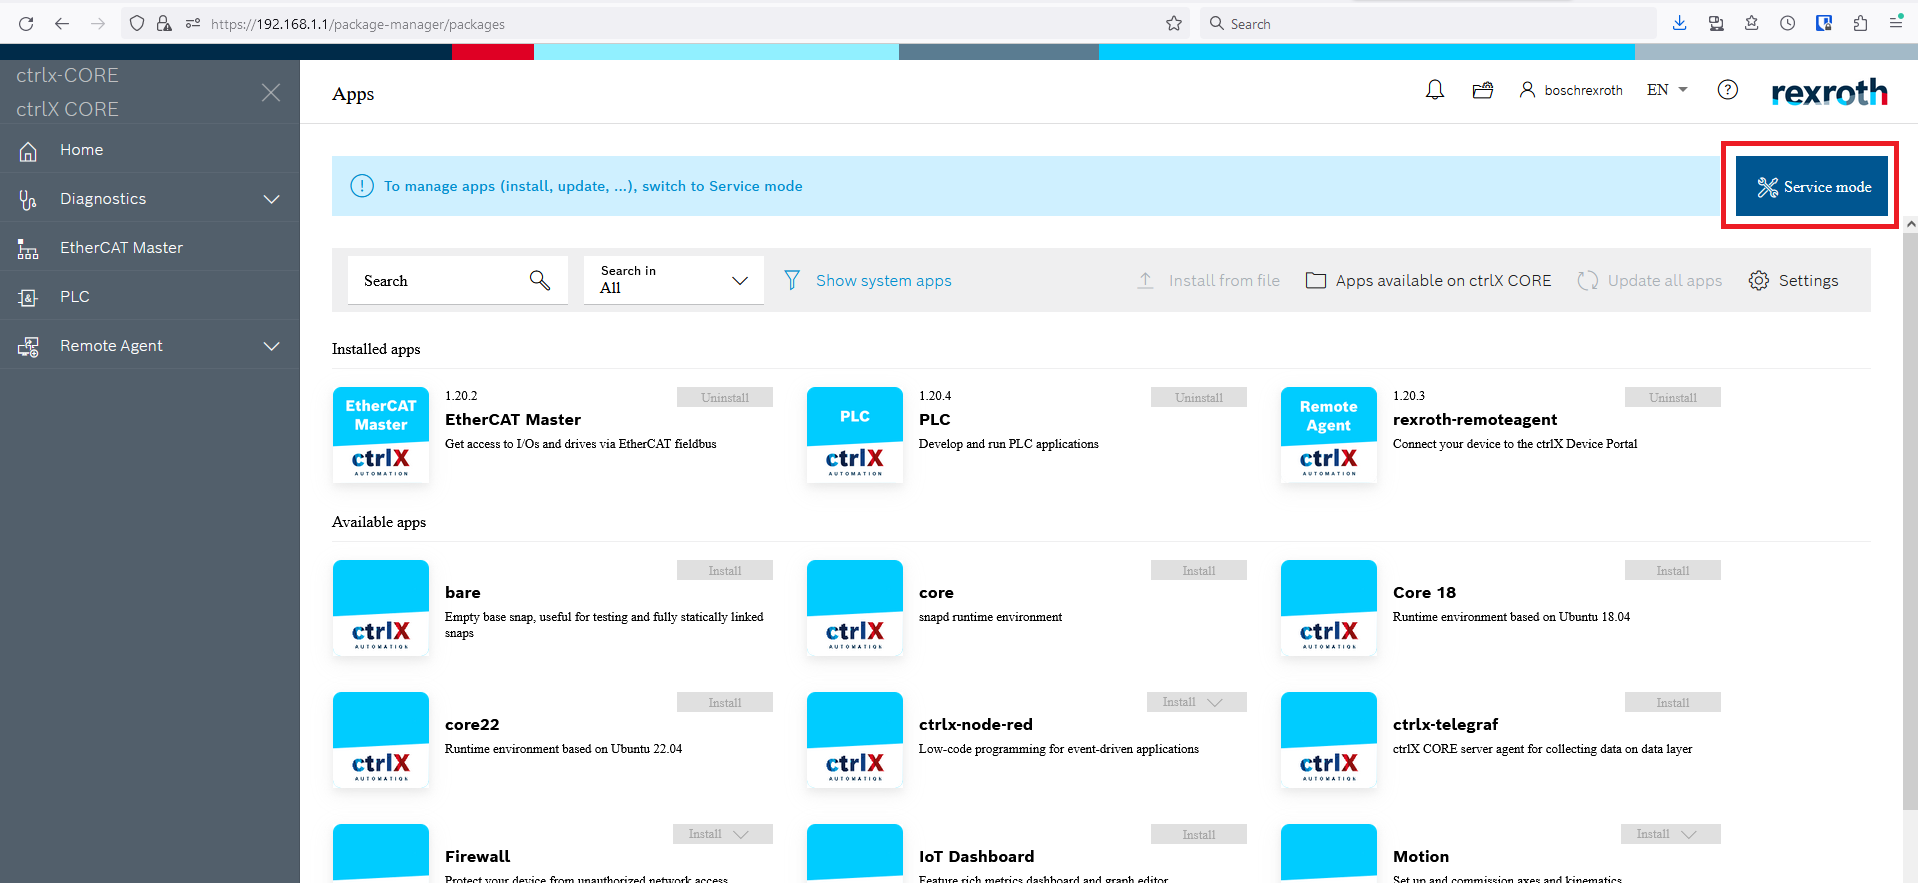
Step 4: If the CtrlX controller has an internet connection then the Available apps section will be populated with all the uninstalled apps available
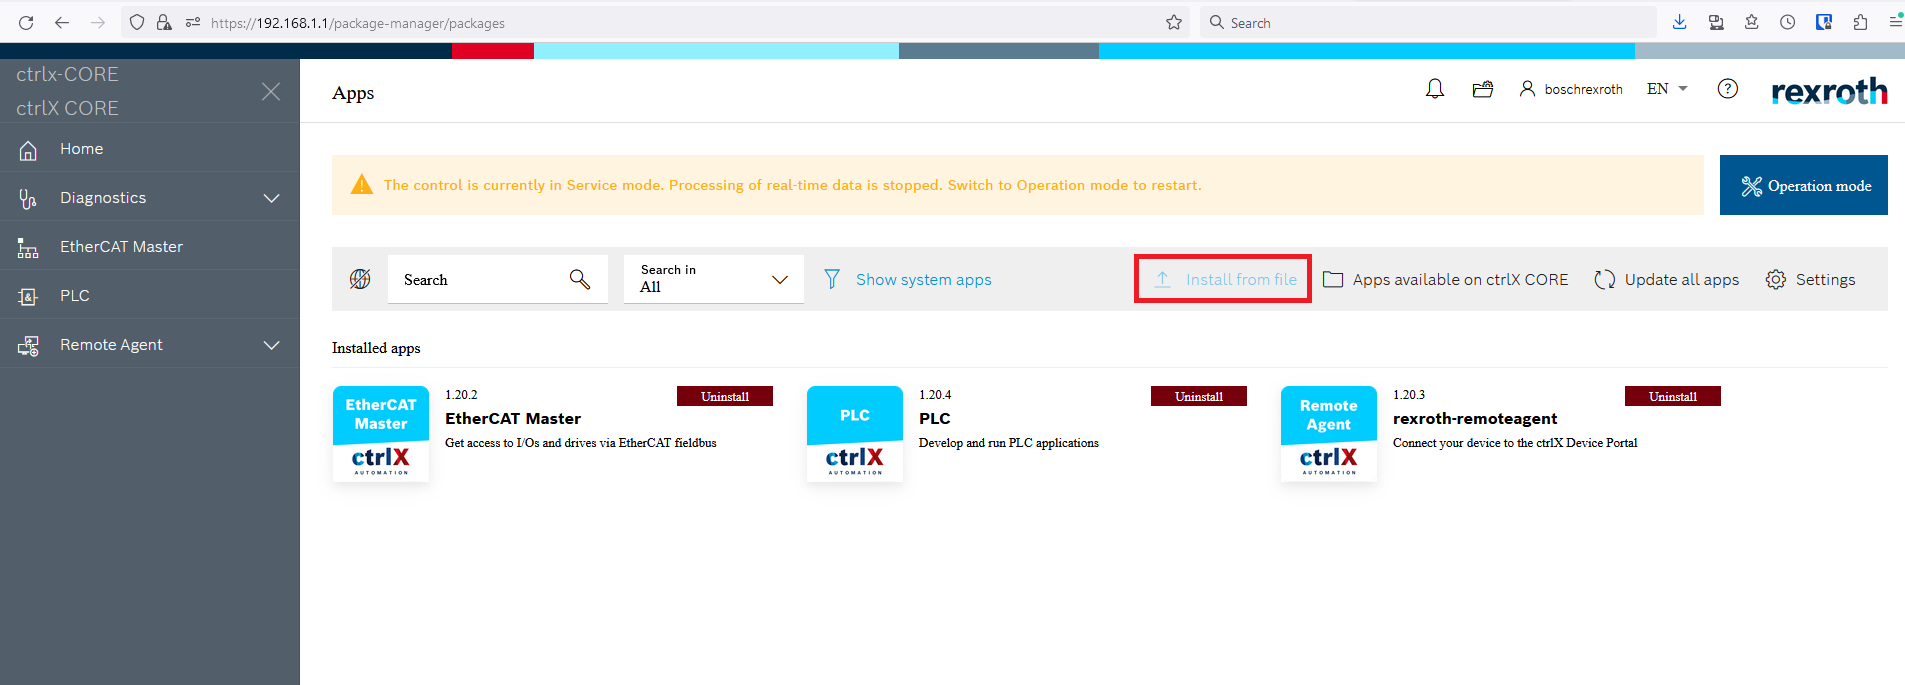
Step 5: If the controller doesn’t have an internet connection then you can click the Install from file button to install app files downloaded from the Bosch Rexroth website
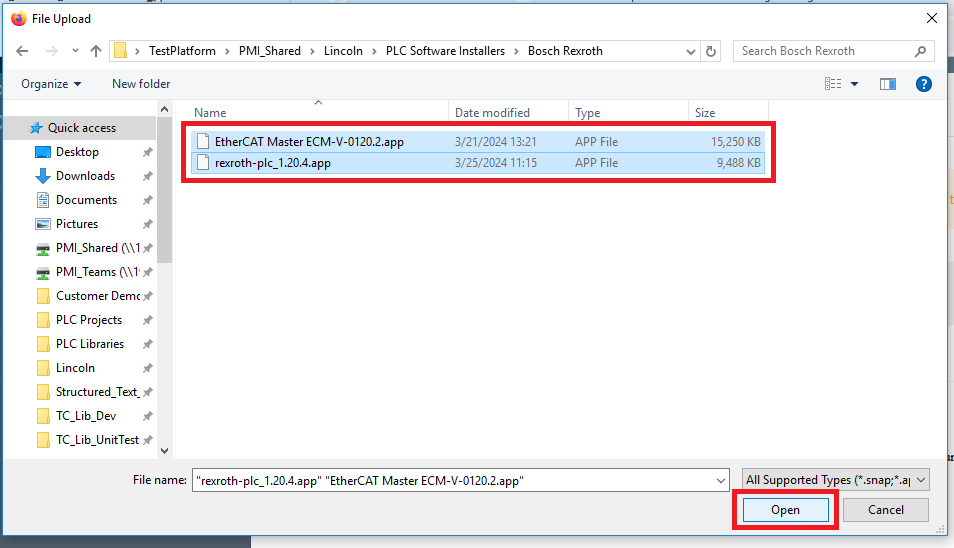
Step 6: In the File Upload window navigate to the .app files, select them, and click Open
Creating a new project
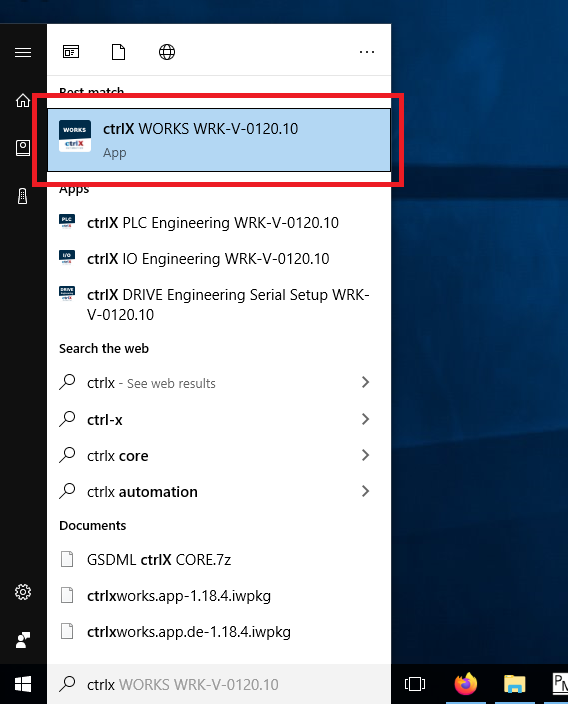
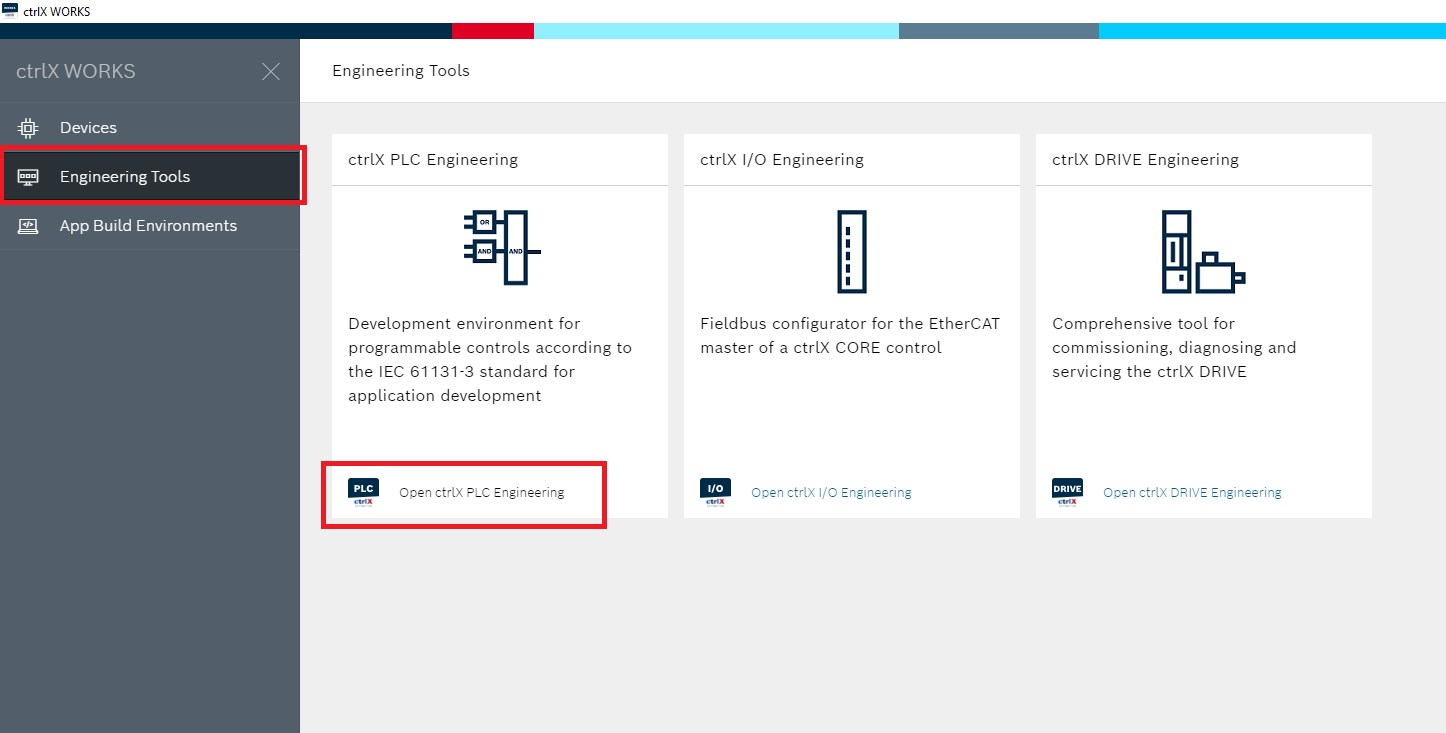
Step 1: To use an EtherCAT device with a CtrlX controller you need to create a PLC project and an IO configuration project. To start open the ctrlX Works program
Step 2: In the Engineering Tools tabs click the Open ctrlX PLC Engineering button. This program is for editing the PLC program itself
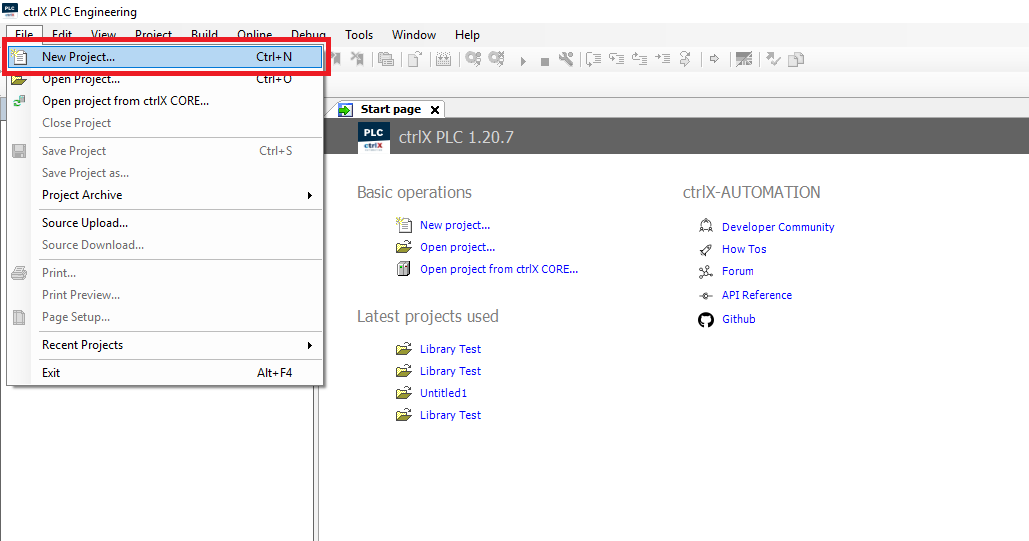
Step 3: In ctrlX PLC Engineering click File->New Project
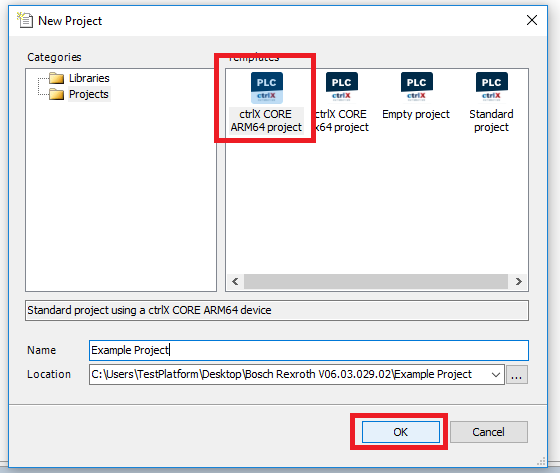
Step 4: In the New Project window select the type of ctrlX controller you are using; for this example an ARM64. Give the project an unique name and choose its location. Then click OK
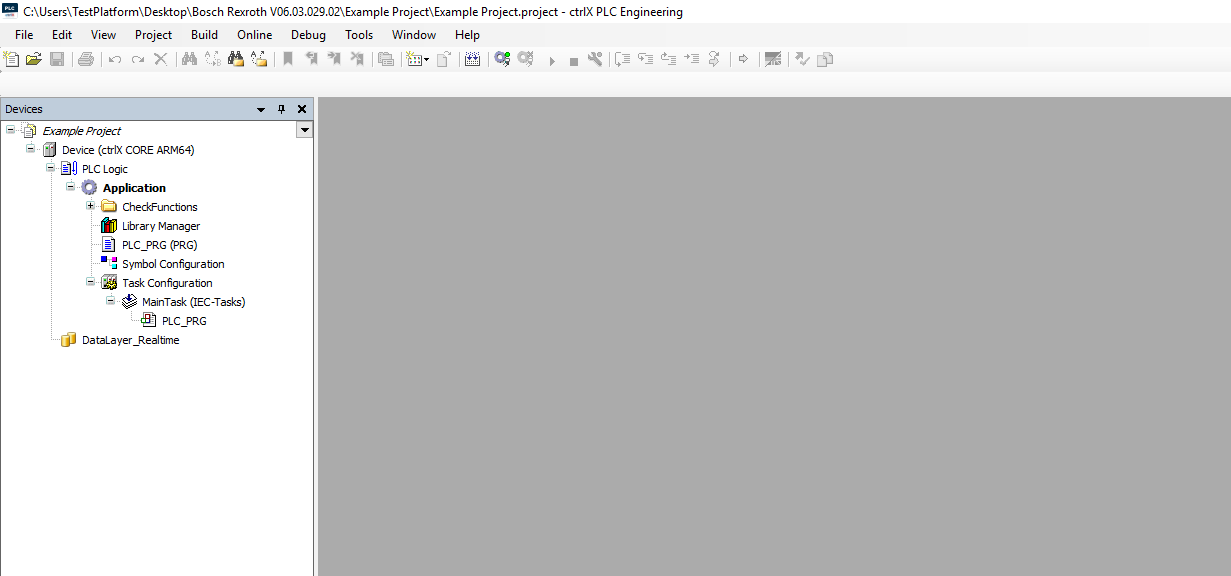
Step 5: This will create the PLC project
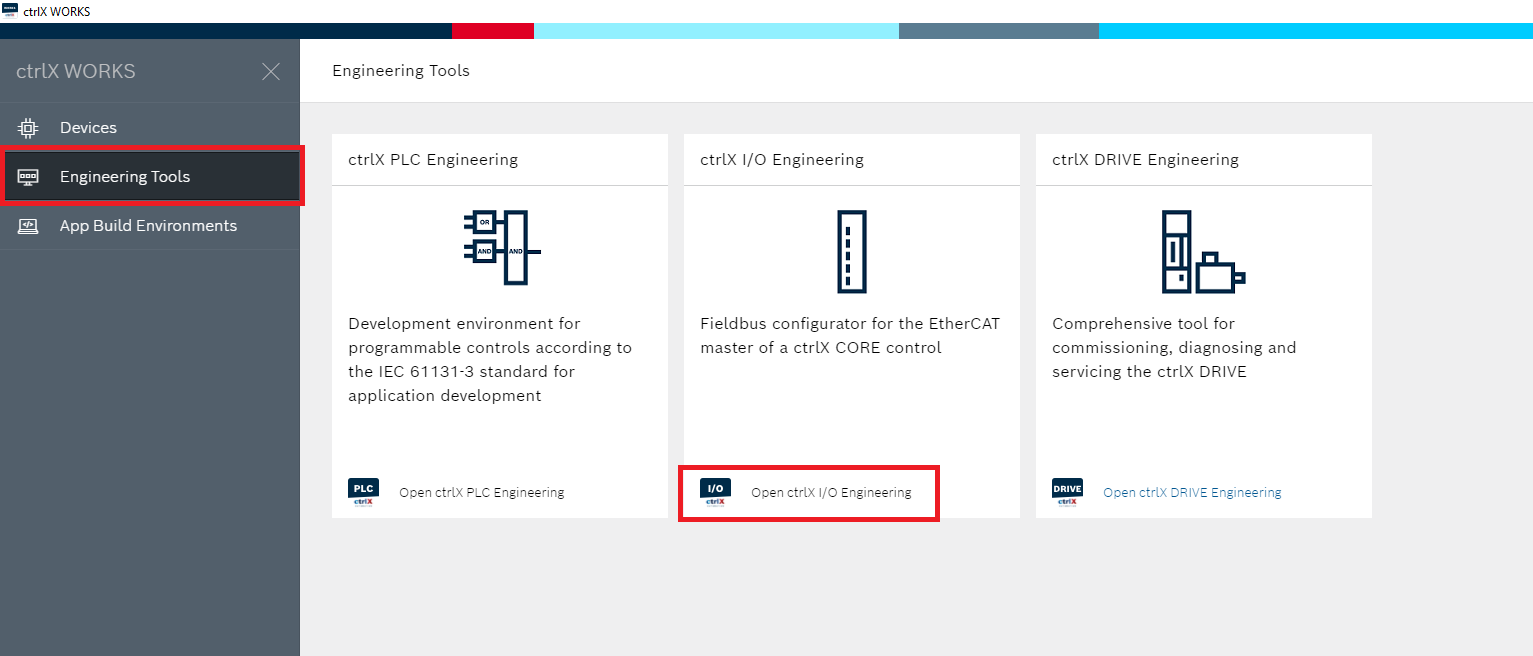
Step 6: Back in ctrlX WORKS click the Open ctrlX I/O Engineering button. This program is for editing the controller’s EtherCAT fieldbus configuration
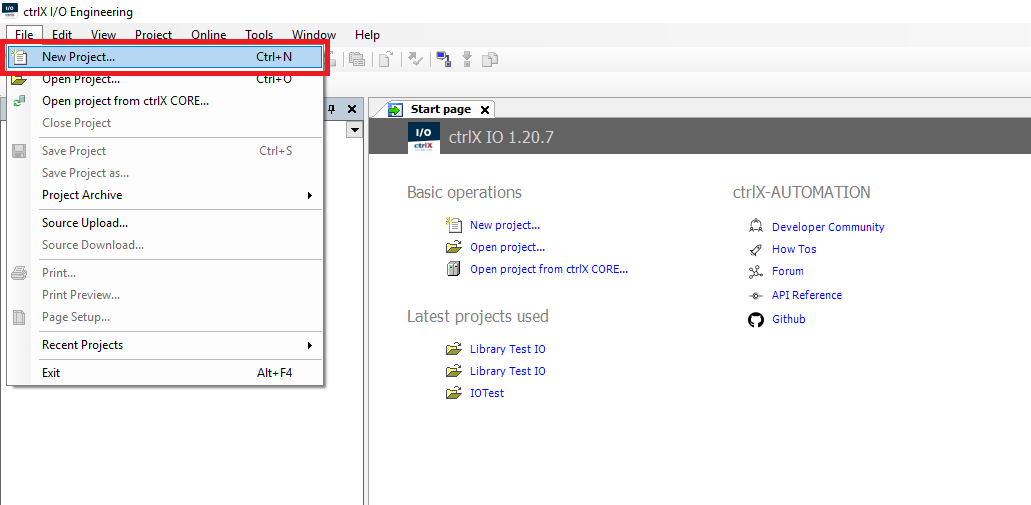
Step 7: In ctrlX I/O Engineering click File->New Project
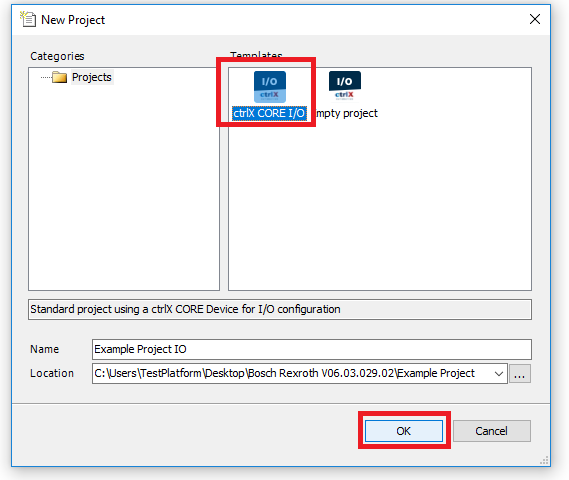
Step 8: In the New Project window choose ctrlX CORE I/O as the template. Give the project an unique name and location. Then click OK
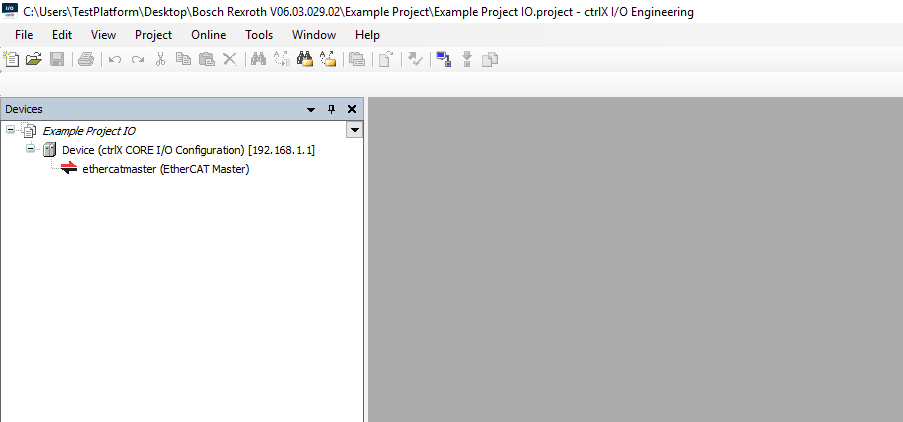
Step 9: This will create the IO configuration project
Setup Fieldbus
Steps 1-4 are only needed if the PMC hasn’t been used on this CtrlX install before.
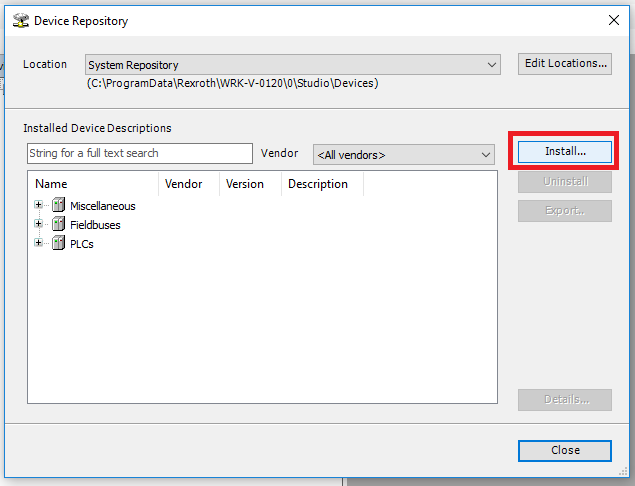
Step 1: In the I/O configuration project click Tools->Device Repository

Step 2: In the Device Repository window click the Install button
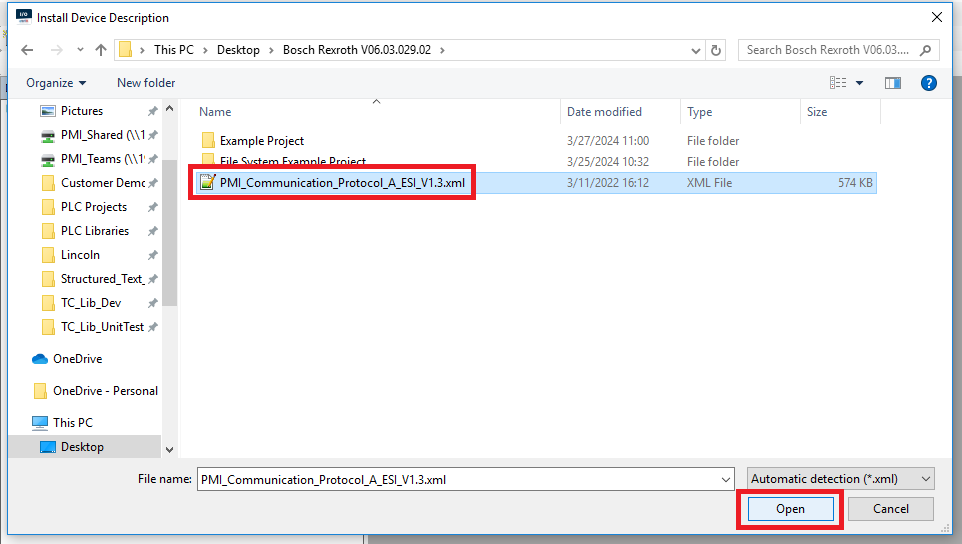
Step 3: In the Install Device Description window navigate to the location of the PMC ESI xml file, select it and click Open
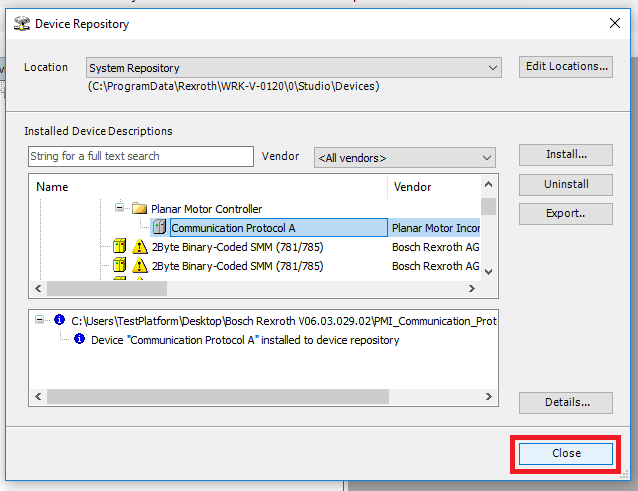
Step 4: Once the PMC device is installed click Close
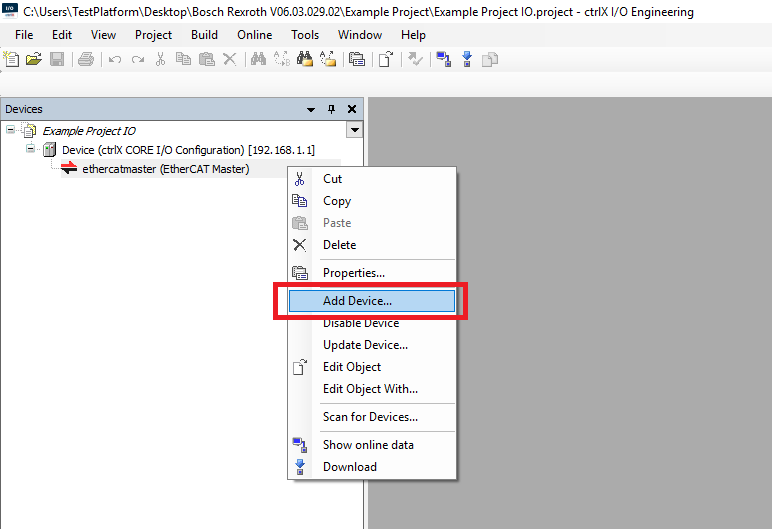
Step 5: In the Devices tree right click on the EtherCAT Master and click Add Device
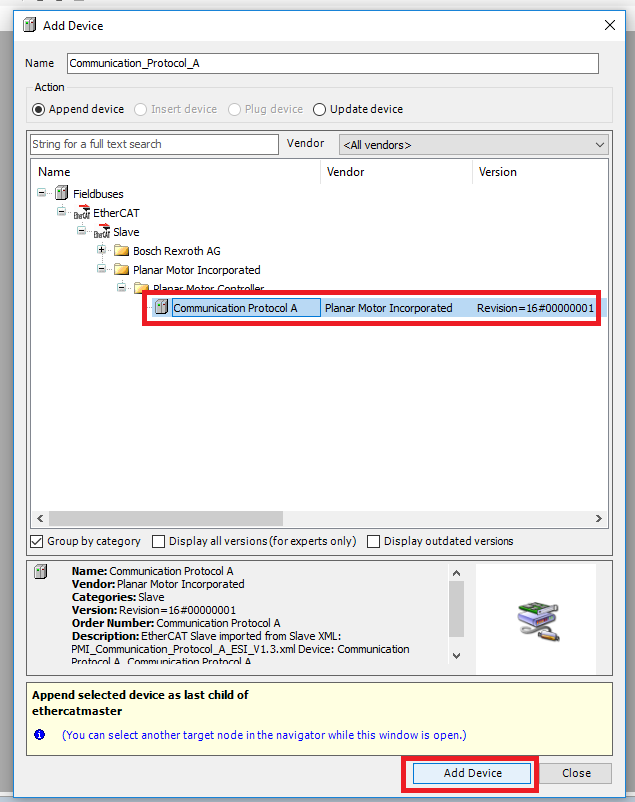
Step 6: In the Add Device window select the Planar Motor Controller->Communication Protocol A and click Add Device
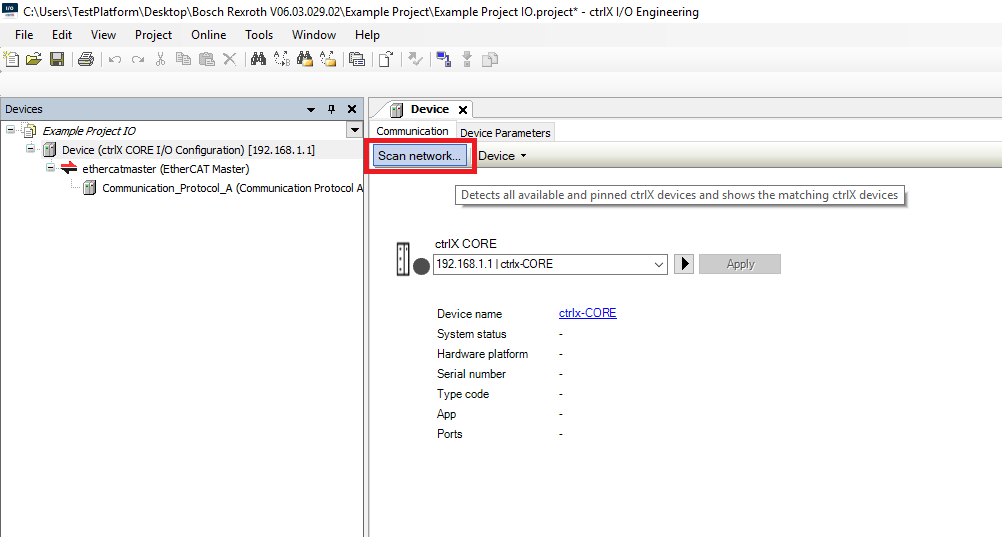
Step 7: To load the EtherCAT configuration to the controller right click the controller in the Devices tree and click Communication settings

Step 8: In the Communication tab click the Scan network button
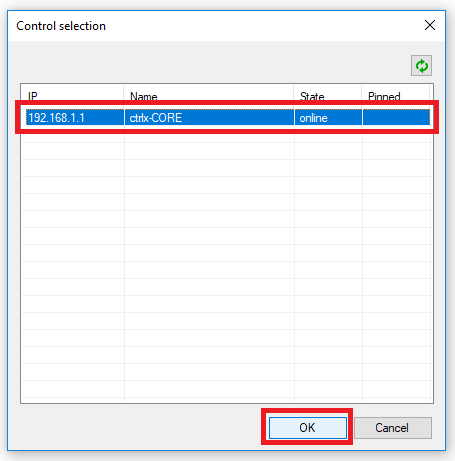
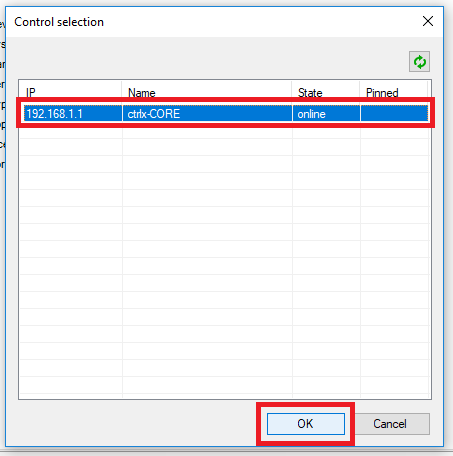
Step 9: In the Control selection window select the ctrlX controller and click OK
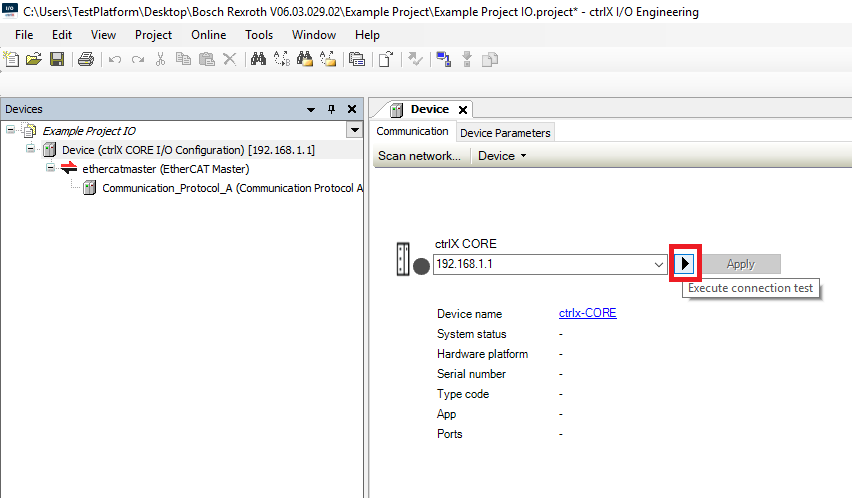
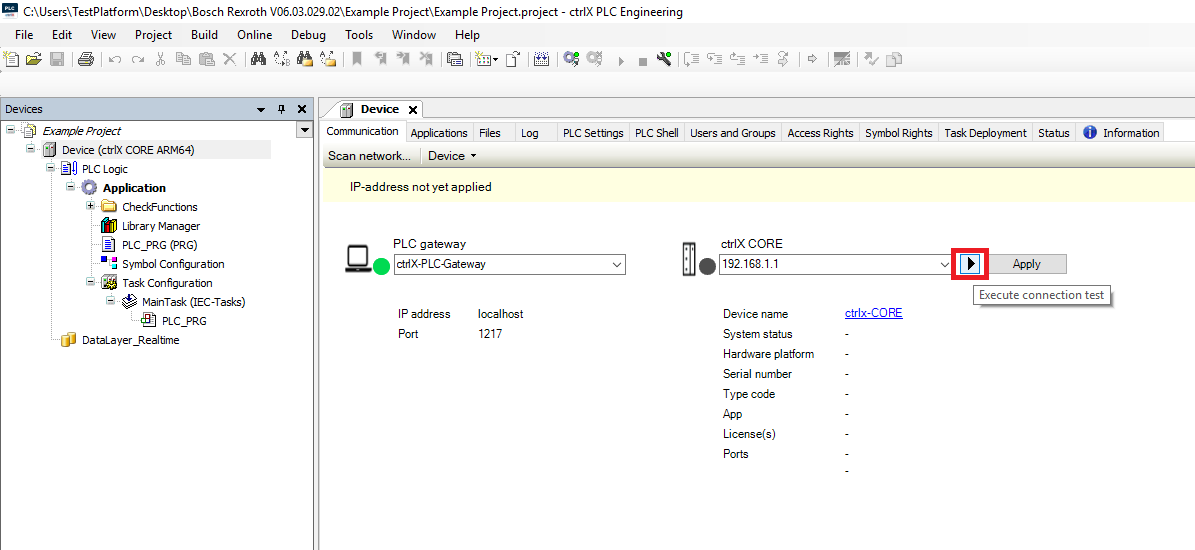
Step 10: Click the > “Execute connection test” button
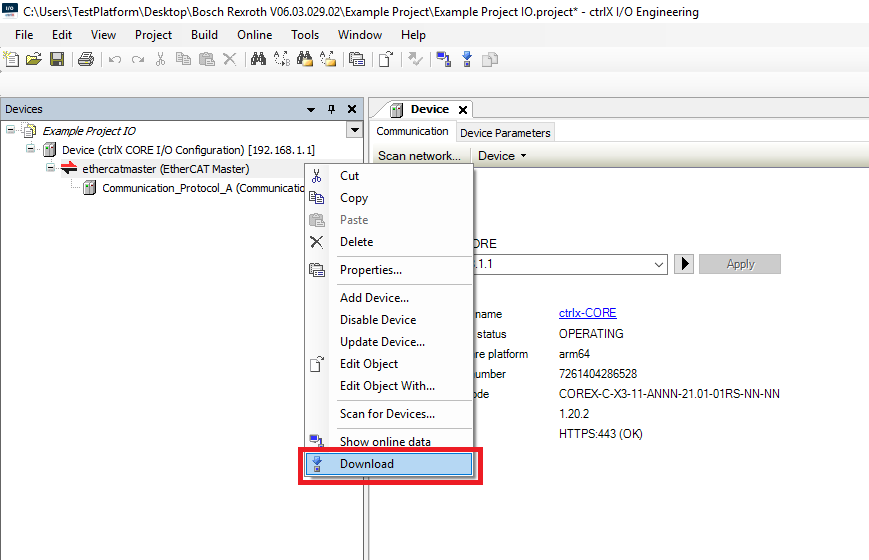
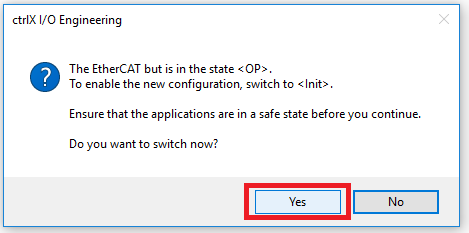
Step 11: In the Devices tree right click the EtherCAT Master and click Download. If the EtherCAT is already running click Yes in the window asking to enter Init state
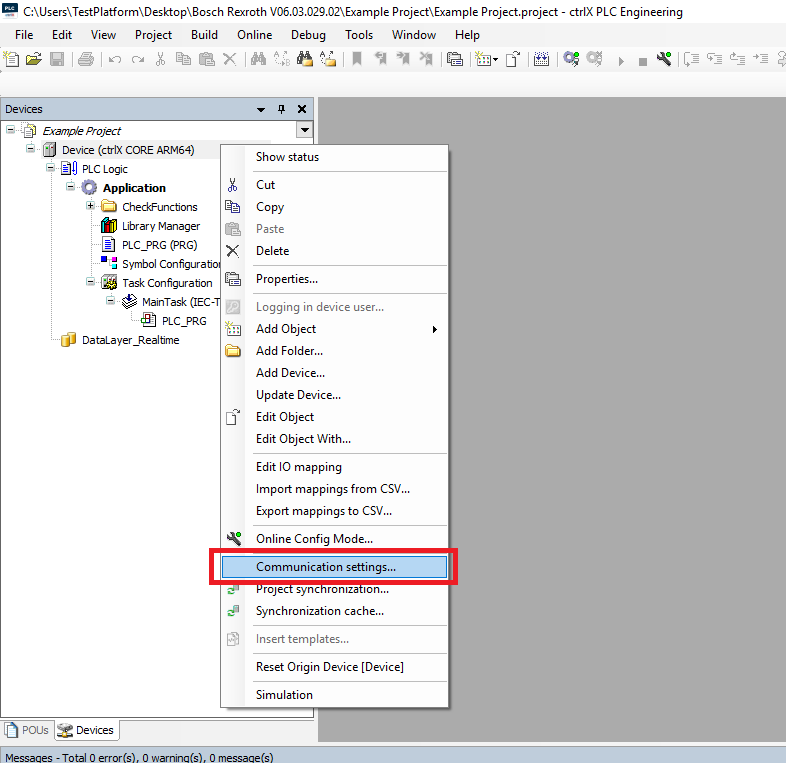
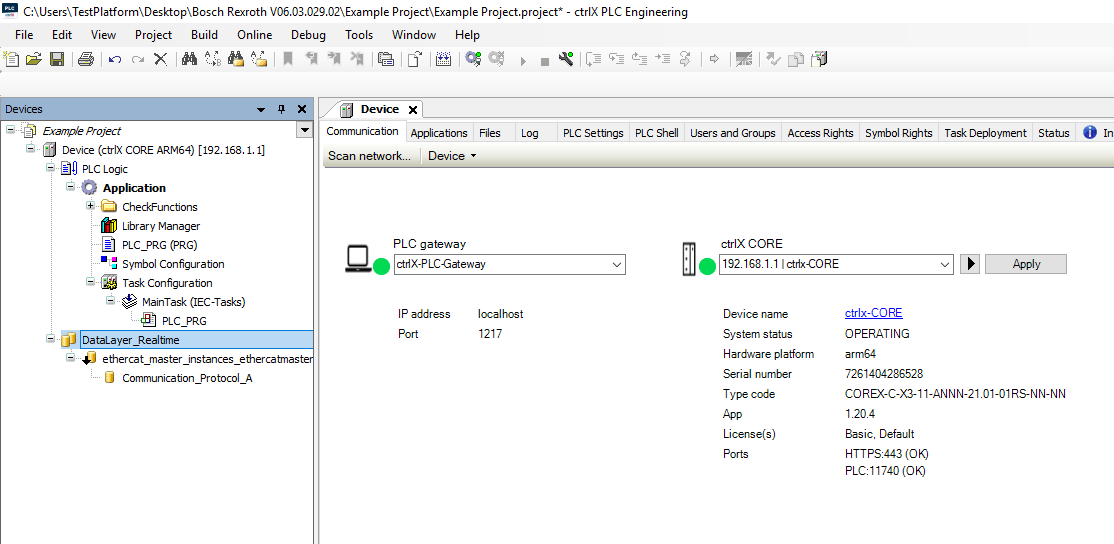
Step 12: Then in the PLC project right click the ctrlX CORE and click Communication settings
Step 13: In the Device Communication tab click the Scan network button
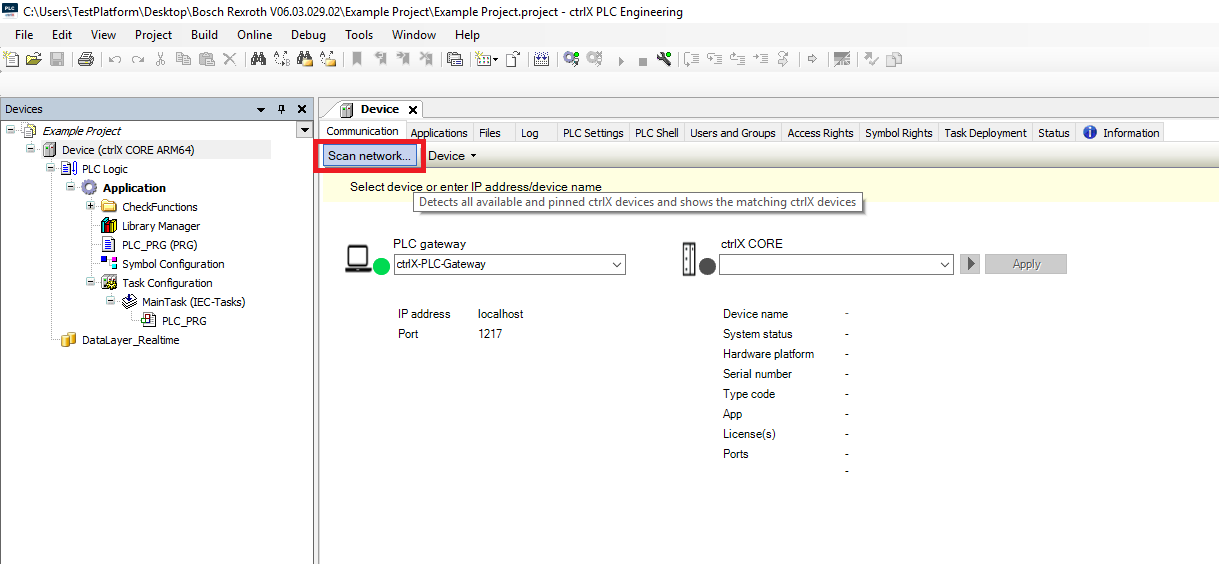
Step 14: In the Control selection window select the ctrlX controller and click OK
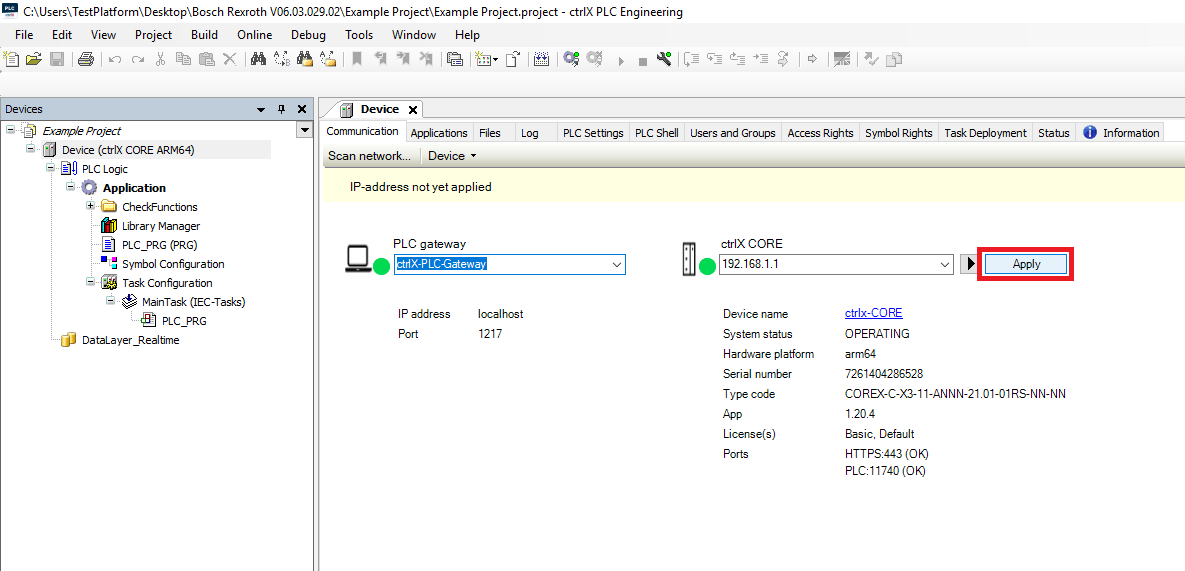
Step 15: In the Device Communication tab click the > “Execute connection test” button then click Apply
Step 16: In the Devices tree right click the DataLayer_Realtime and click Select realtime data->All data from ctrlX CORE
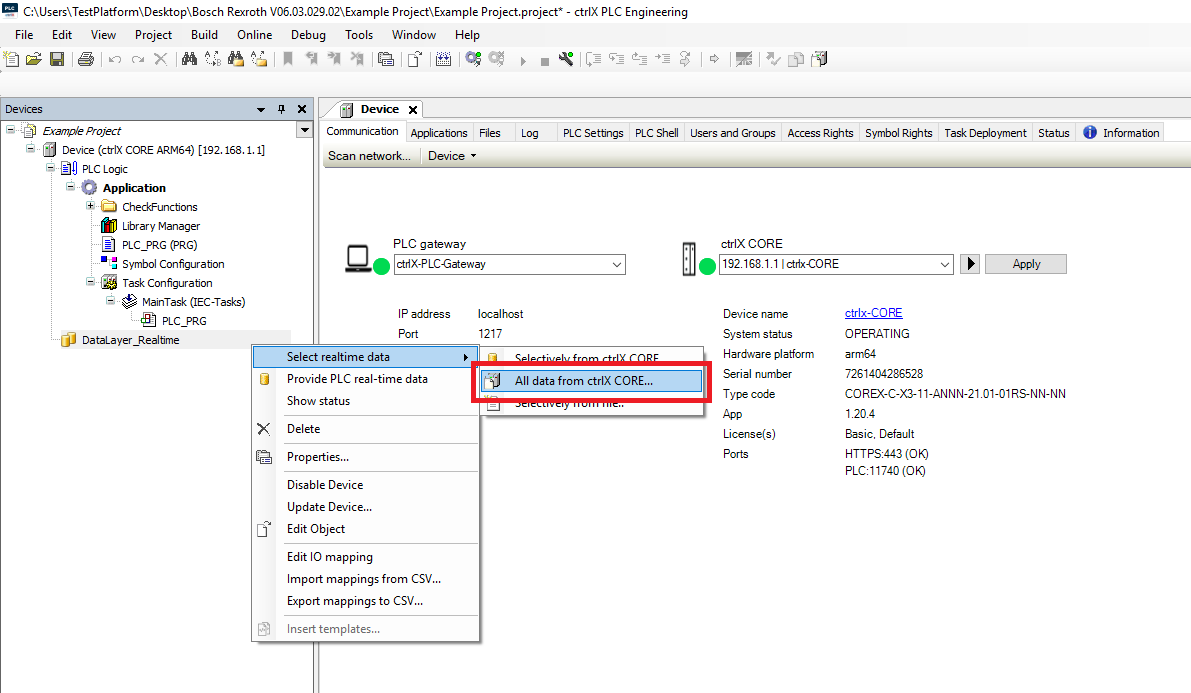
Step 17: This will load the EtherCAT configuration into the PLC project so that the PLC program can access the EtherCAT variables
Import and use library
Steps 1-4 are only needed if this is first time the PMC library has been used on this ctrlX install.
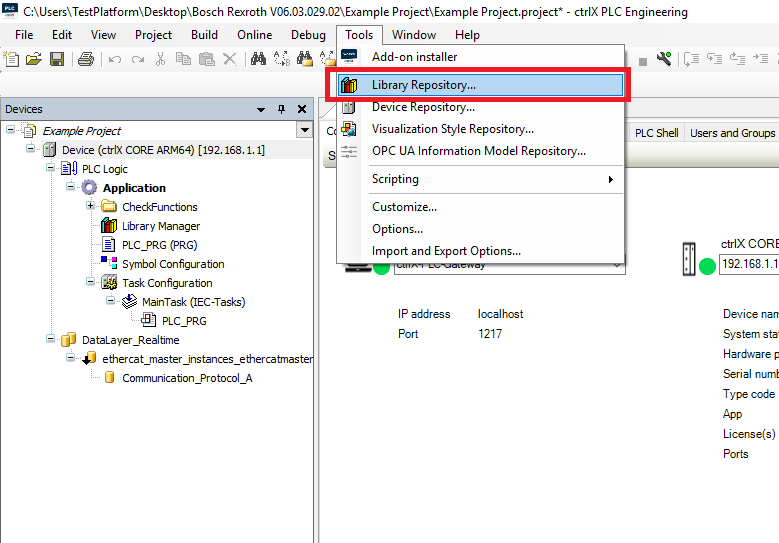
Step 1: Click Tools->Library Repository
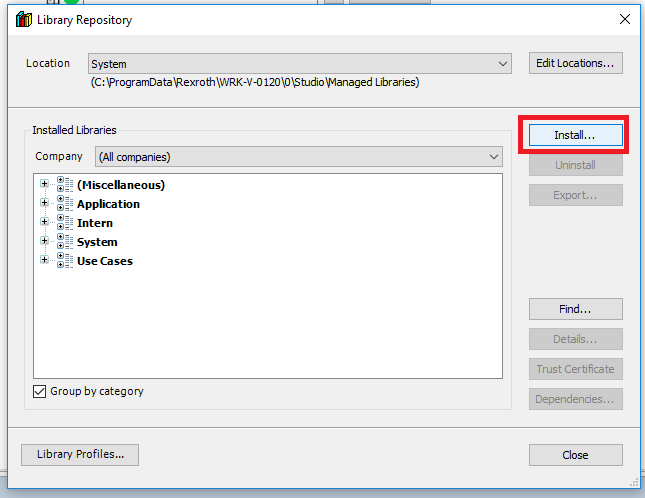
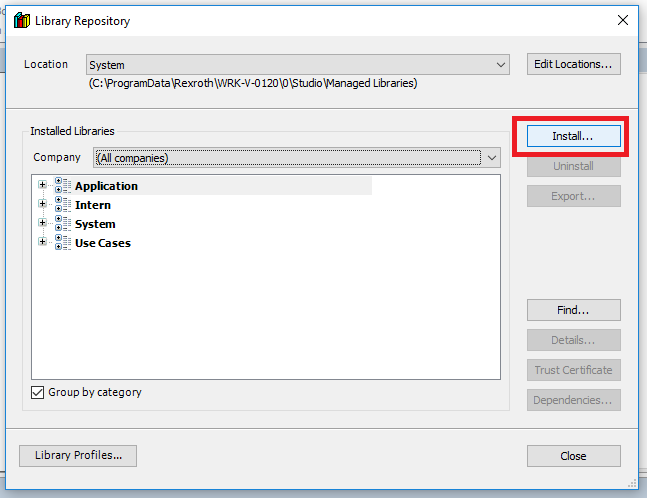
Step 2: In the Library Repository window click "Install..."
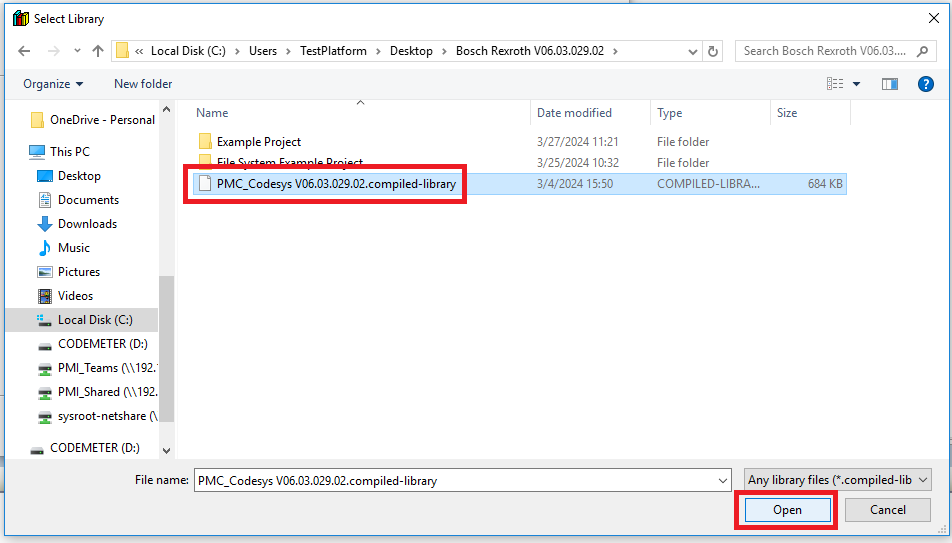
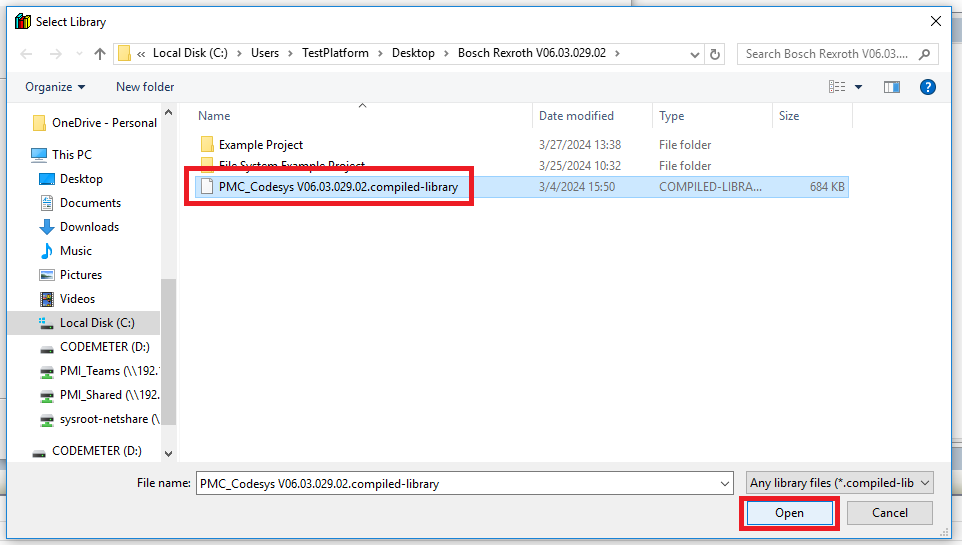
Step 3: In the Select Library window browse to and select the PMC .compiled-library file. Then click "Open"
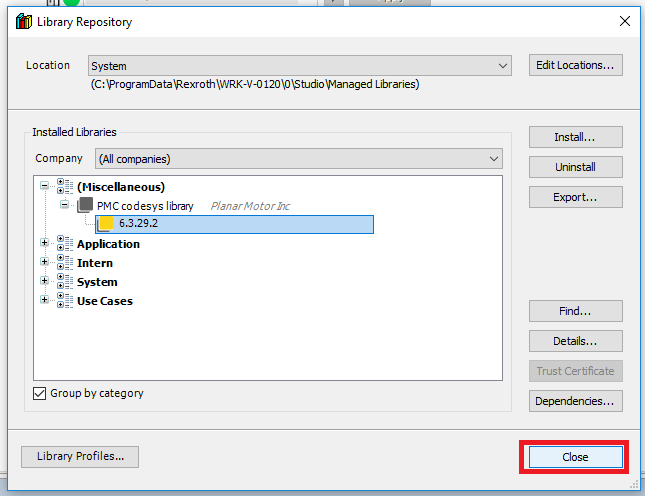
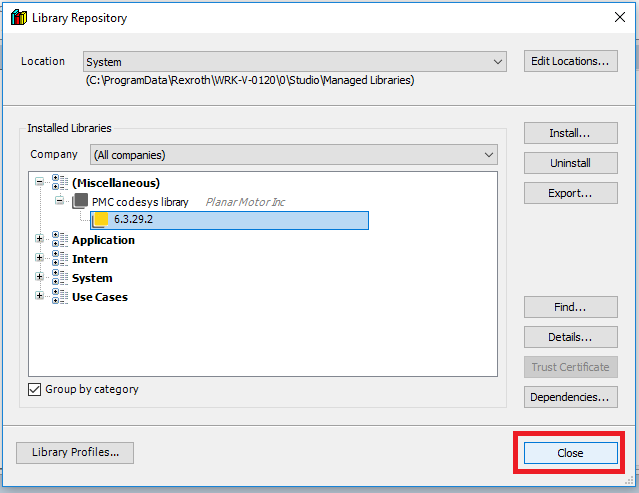
Step 4: Once the PMC library is installed click Close
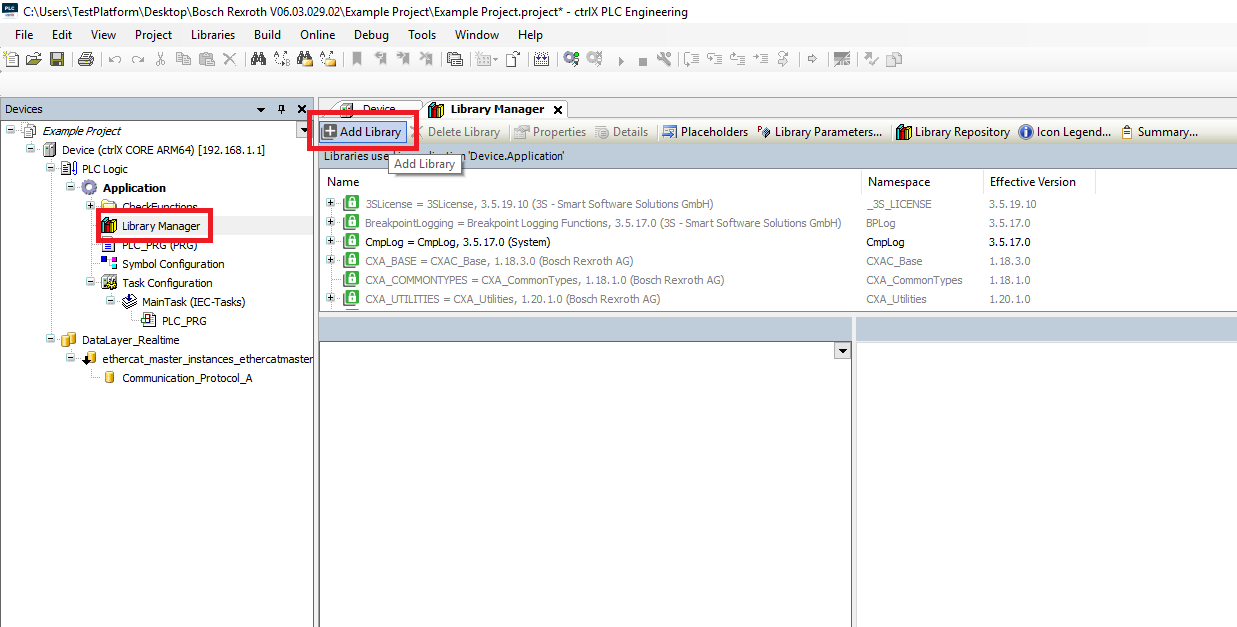
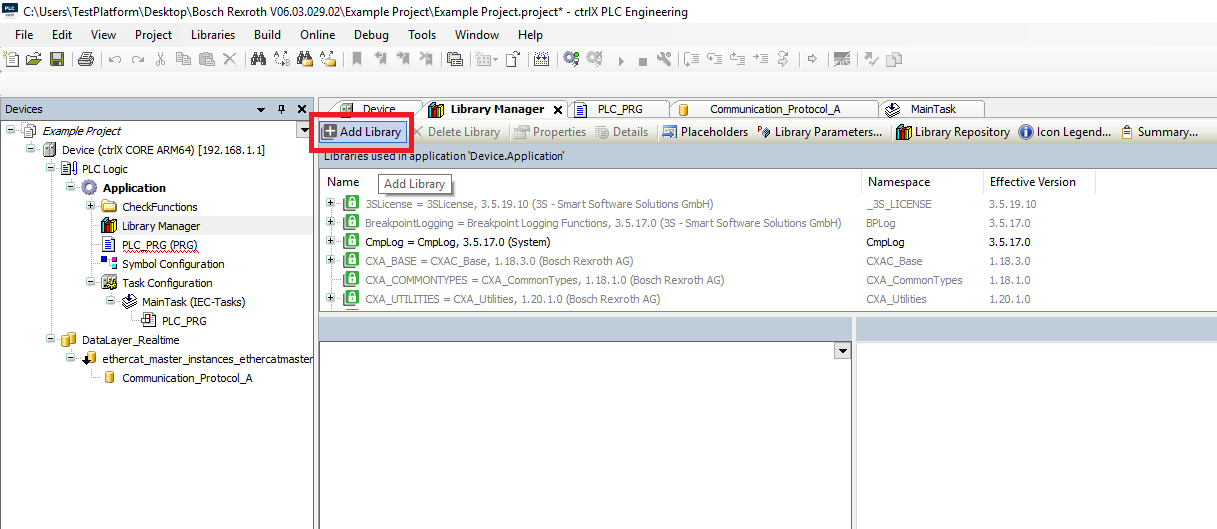
Step 5: In the Devices tree open the Library Manager. In the library manager window click the Add Library button
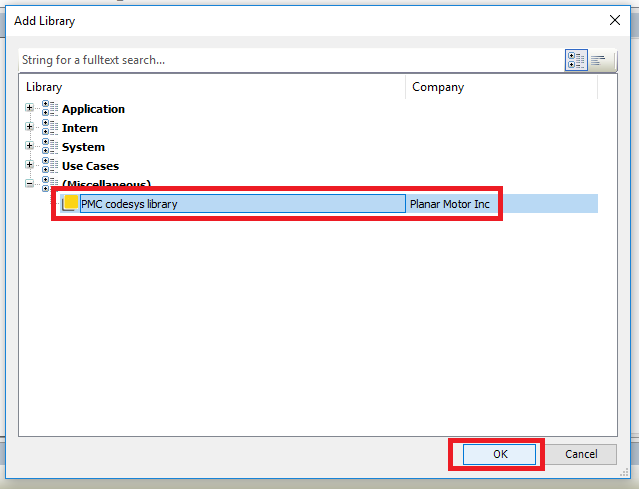
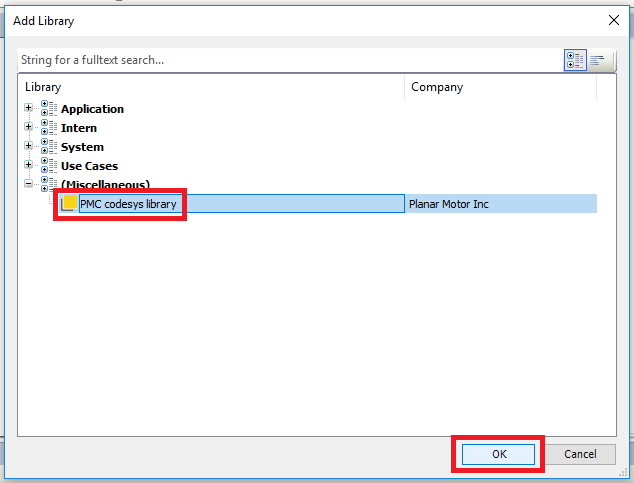
Step 6: In the Add Library window select the PMC codesys library and click OK
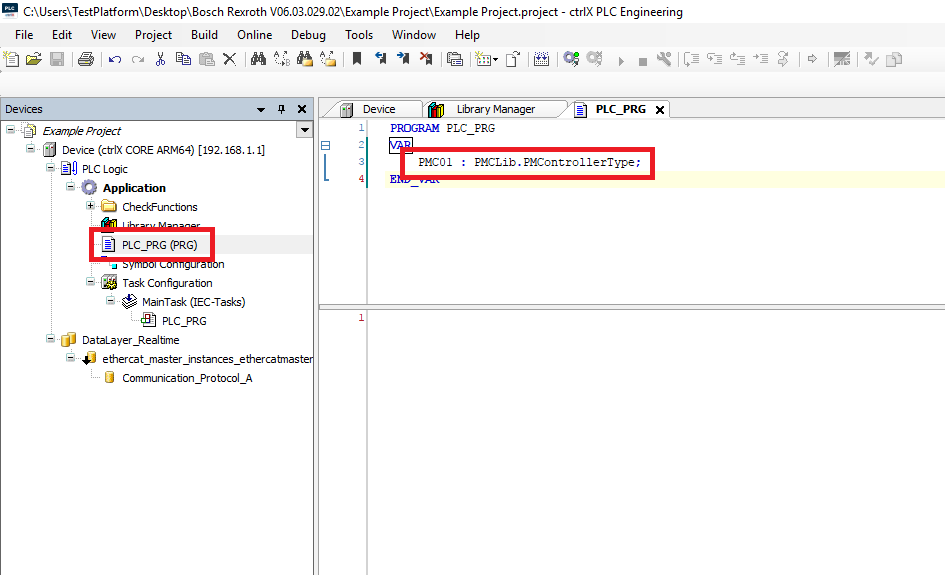
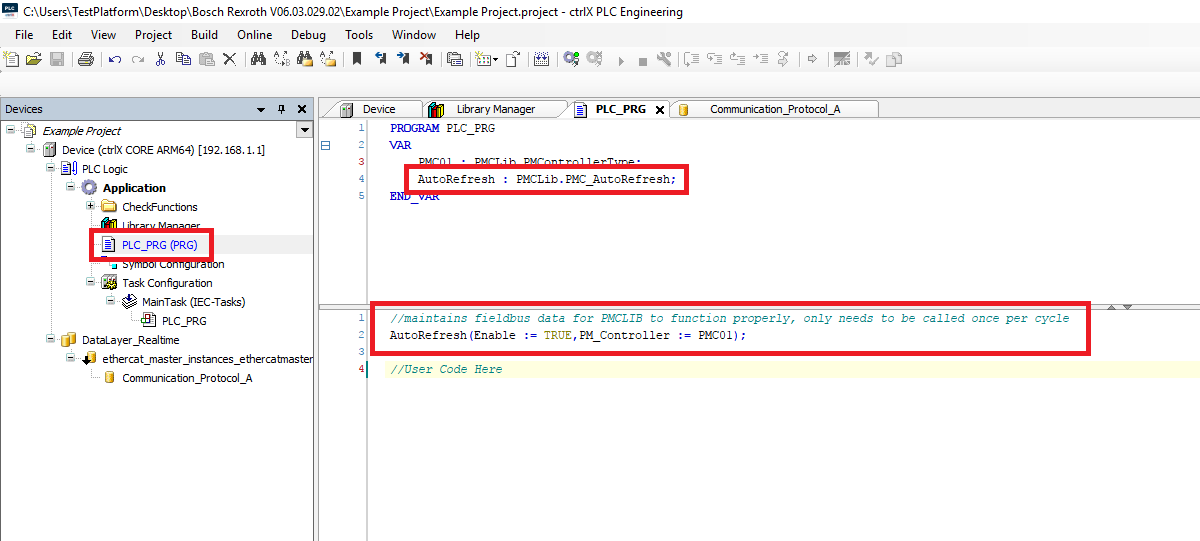
Step 7: In the Devices tree open the PLC_PRG. In the variables of the PLC_PRG declare a PMControllerType variable
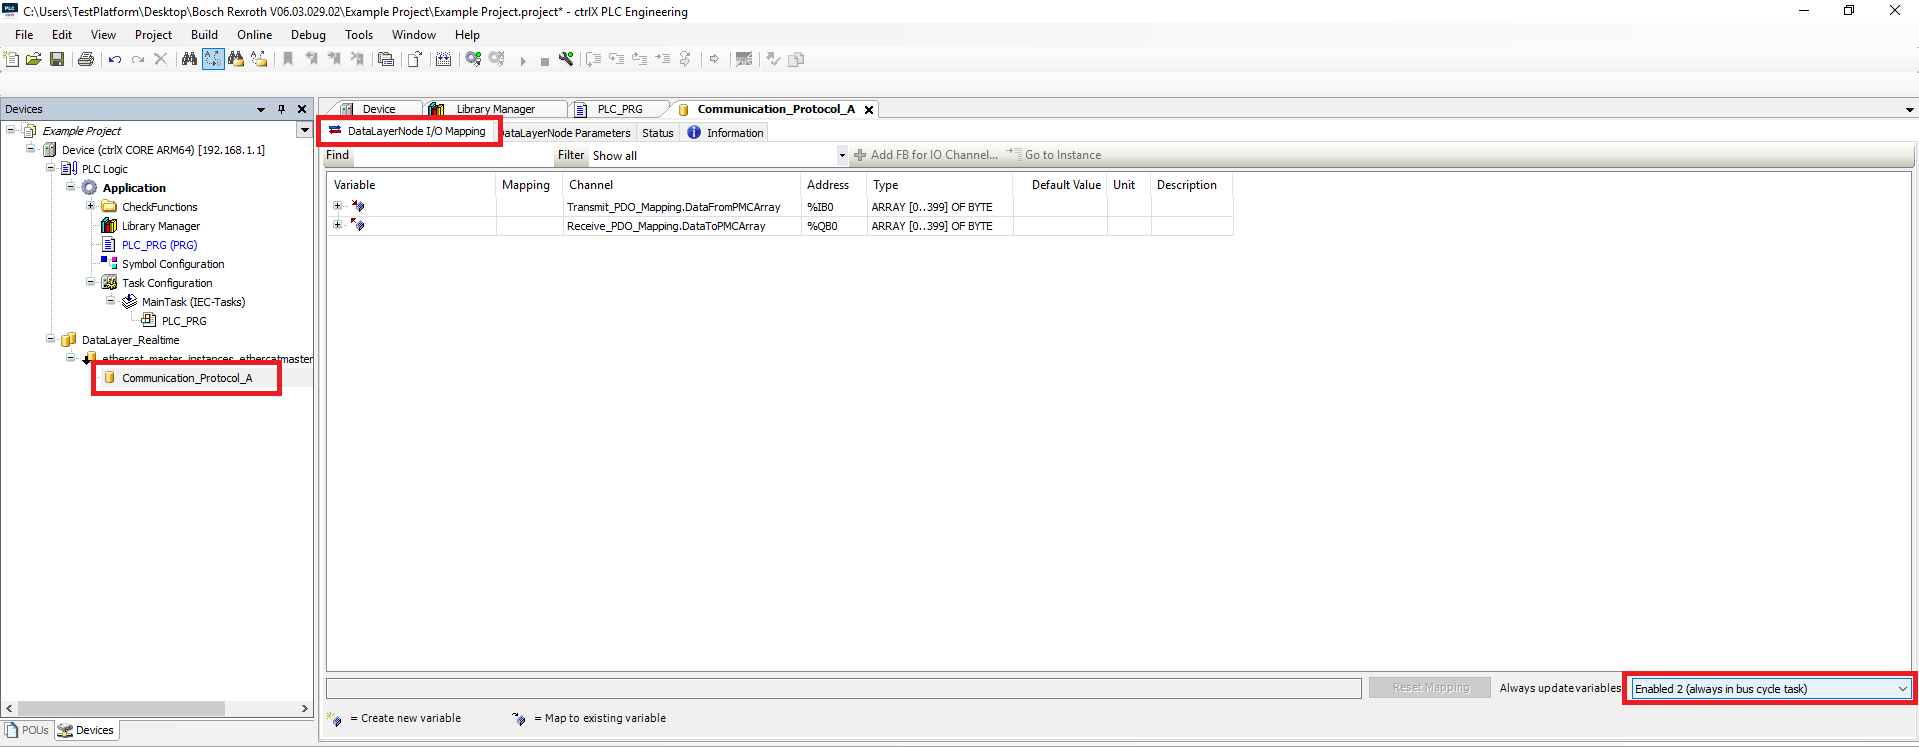
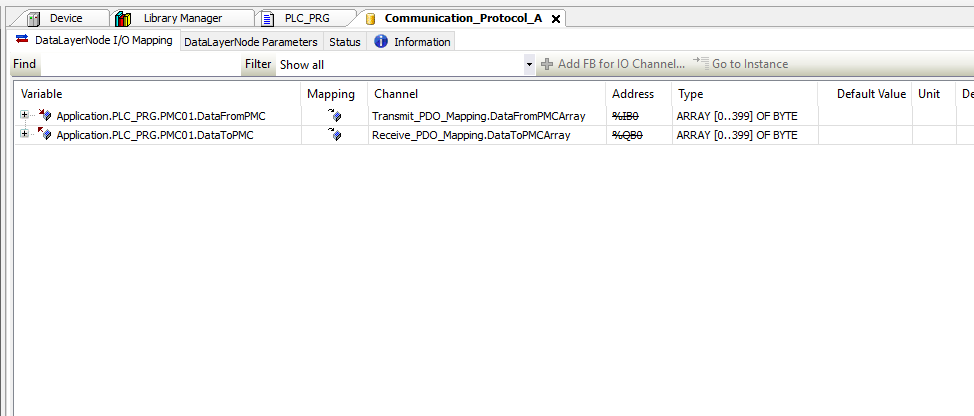
Step 8: In the Devices tree open the PMC device Communication_Protocol_A. In the Communication_Protocol_A window select the DataLayerNode I/O Mapping tab. Change the Always update variables setting to Enable 2 (always in bus cycle task)
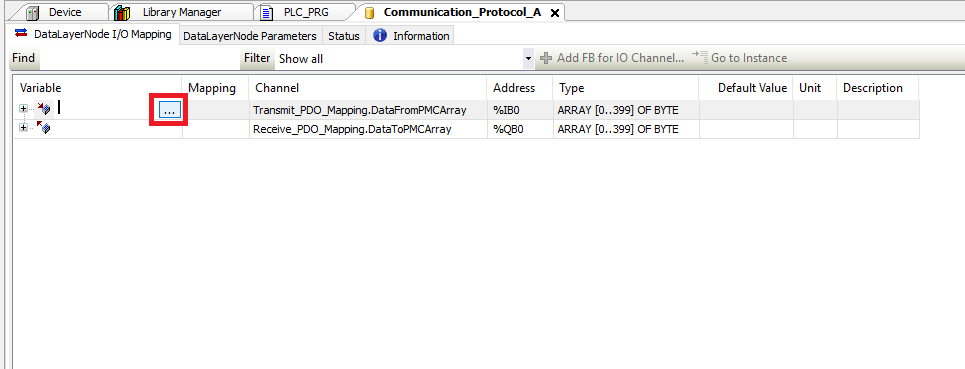
Step 9: Click on the Variable cell next to the DataFromPMCArray channel. Then click on the “…” button that appears.
Step 10: In the Input Assistant window find the PMControllerType variable that you declared in the PLC_PRG. Select the DataFromPMC member of the PMControllerType and click OK

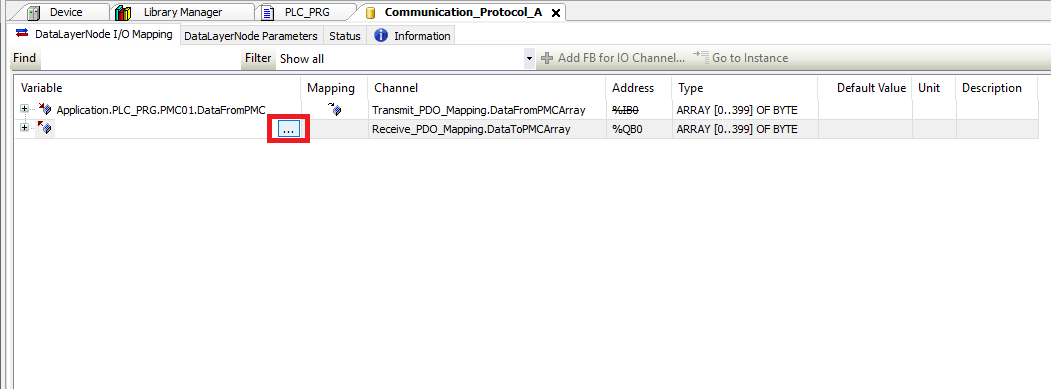
Step 11: Click the Variable cell next to the DataToPMCArray channel. Then click on the “…” button that appears
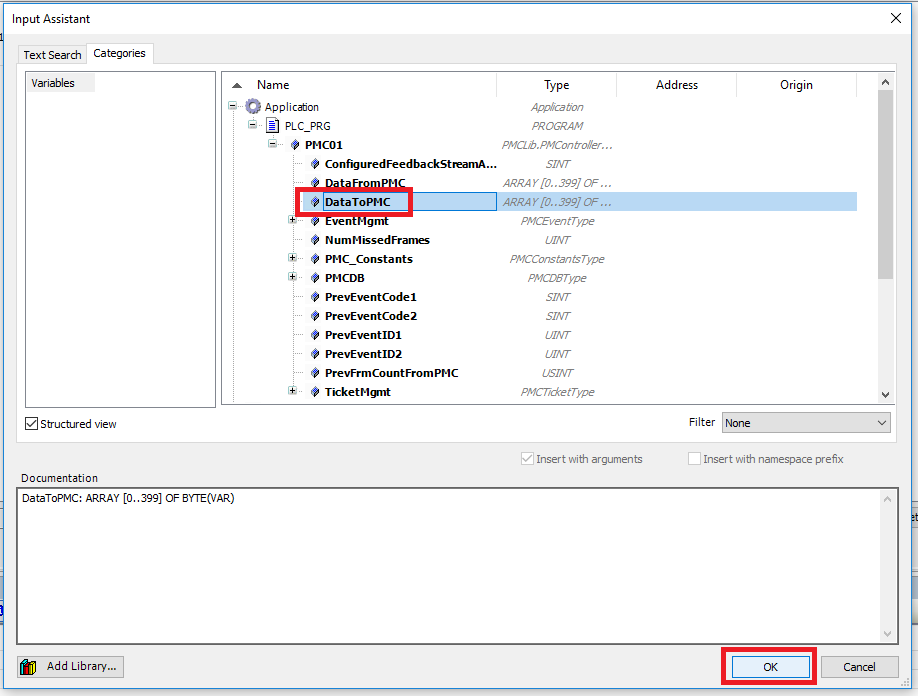
Step 12: In the Input Assistant window find the PMControllerType variable that you declared in the PLC_PRG. Select the DataToPMC member of the PMControllerType and click OK
Step 13: The I/O mapping should look like this when you are done
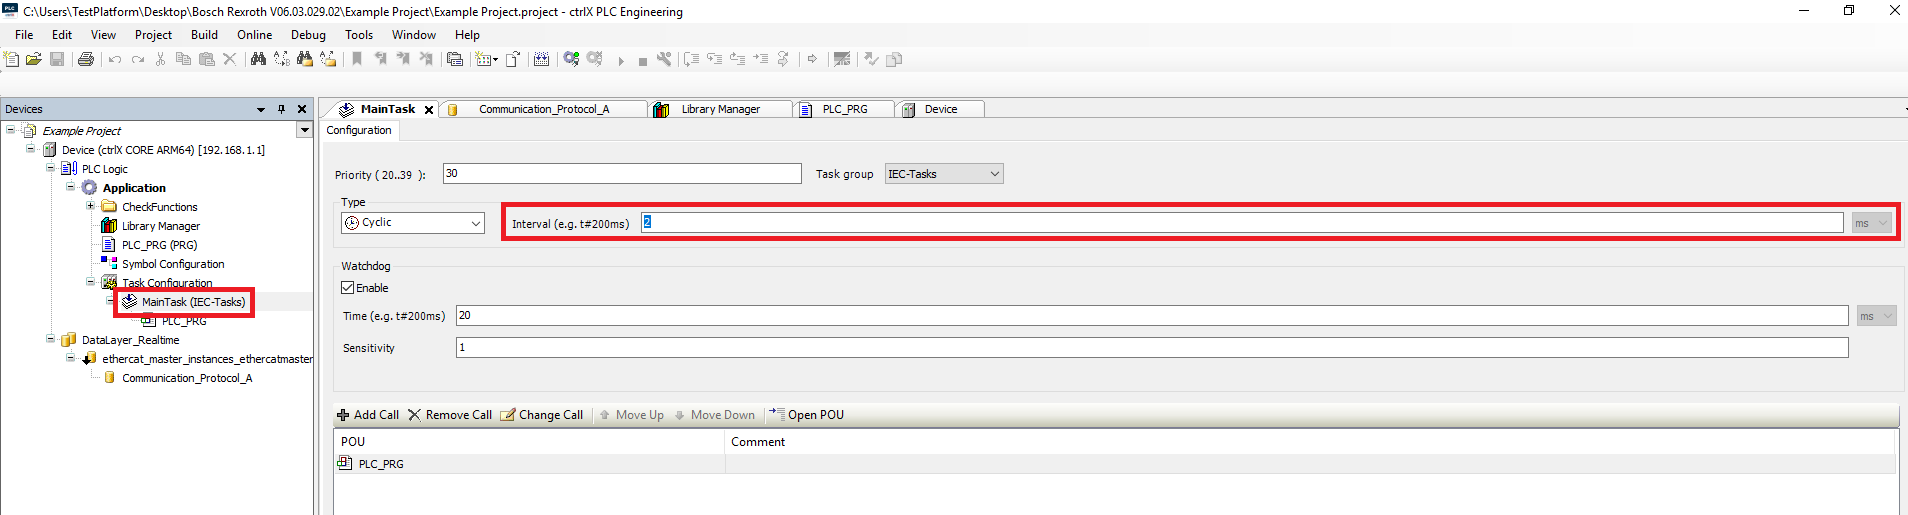
Step 14: In the PLC_PRG make sure to declare a PMC_AutoRefresh function block. The AutoRefresh needs to be called once per cycle
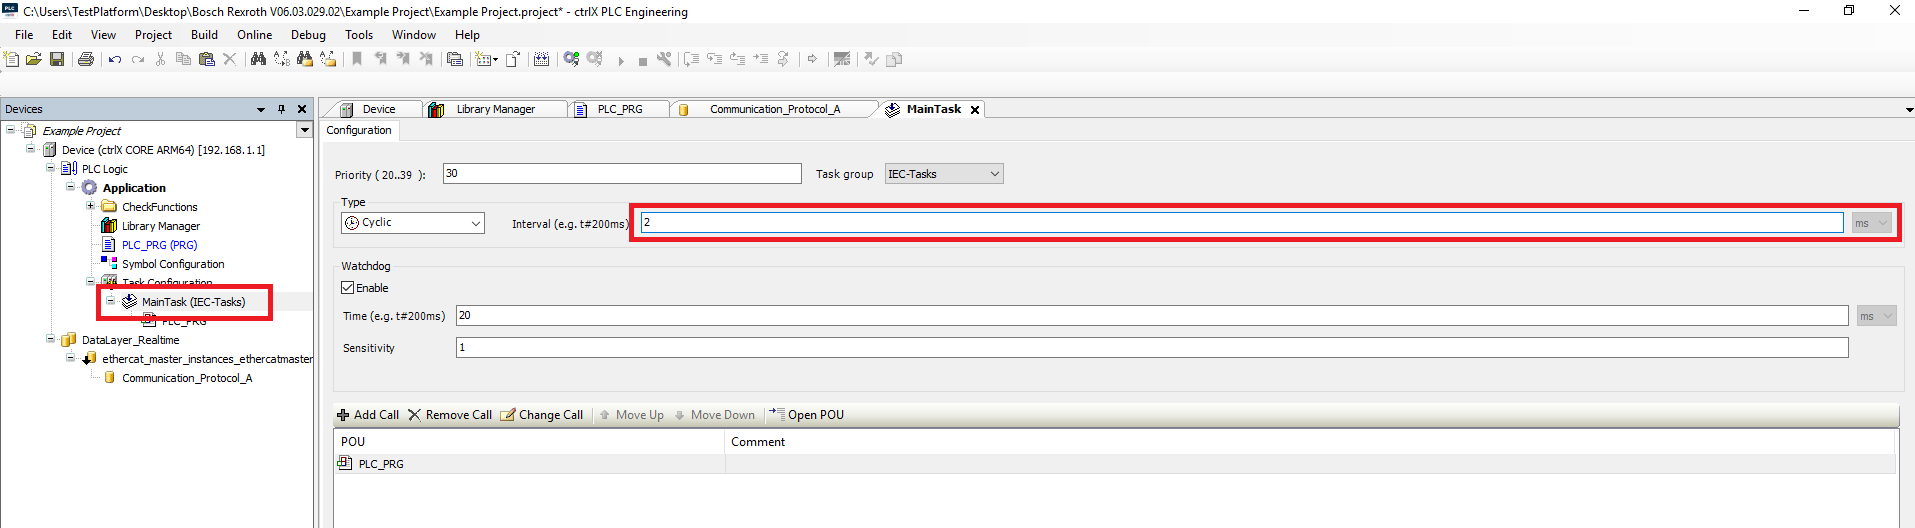
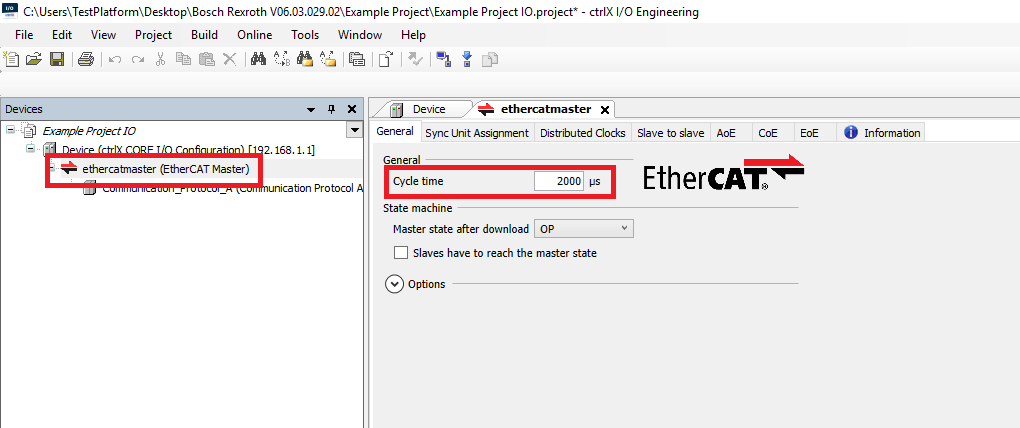
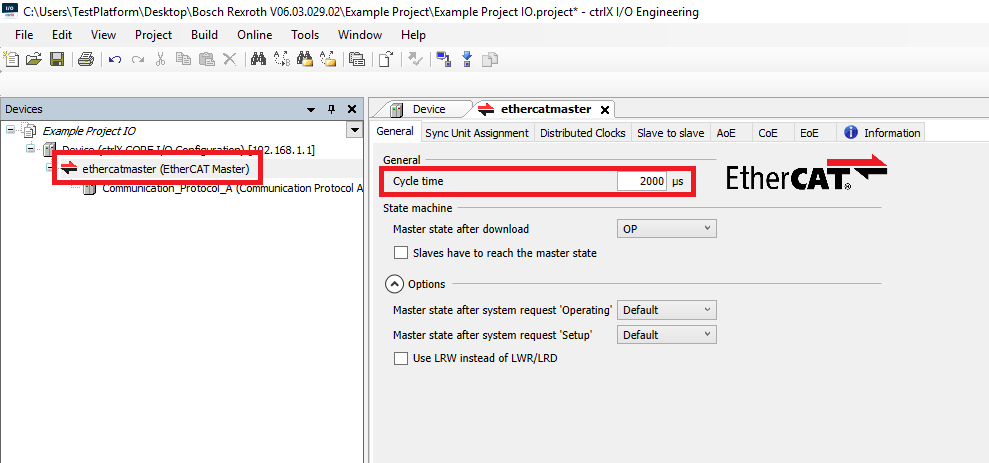
Step 15: Make sure that the task that runs the PRG is a Cyclic type task and that the Interval matches the Cycle time set for the EtherCAT master in the I/O configuration
Upgrade Library
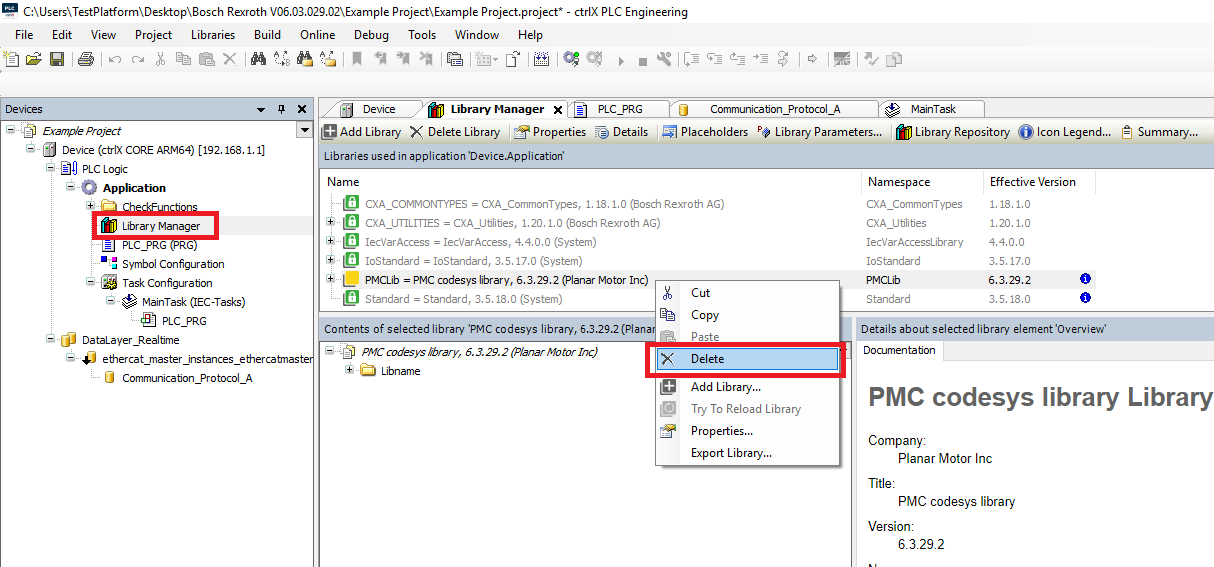
Step 1: Start by going into the Devices tree and opening the Library Manager. Then delete the previous old version of the PMC library
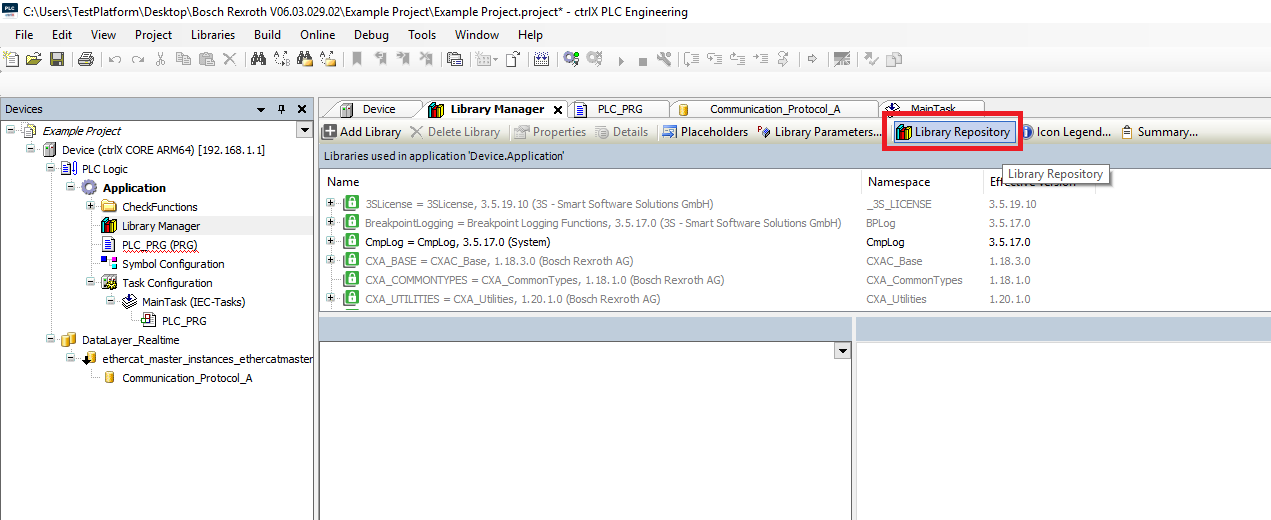
Step 2: Click Library Repository
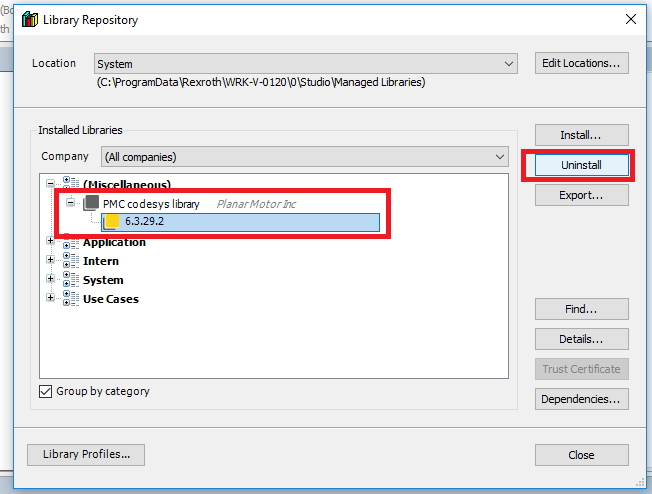
Step 3: In the Library Repository window find the old version of the PMC library and click "Uninstall"
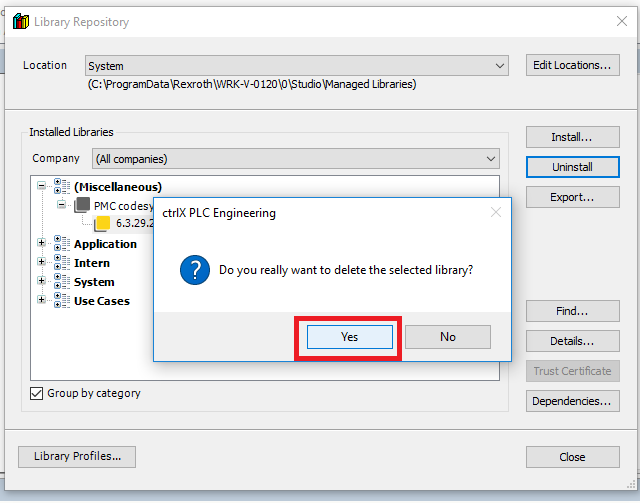
Step 4: Click "Yes" in the confirmation box
Step 5: When you are back in the Library Repository and click "Install..."
Step 6: Browse to the new version of the PMC library and click "Open"
Step 7: Click Close when the new version of the PMC library is installed
Step 8: Then in the Library Manager click "Add library"
Step 9: Then in the Add Library window find and select the new PMC library and click "OK"
Setup Streaming (Optional) - only for synchronization with external axis
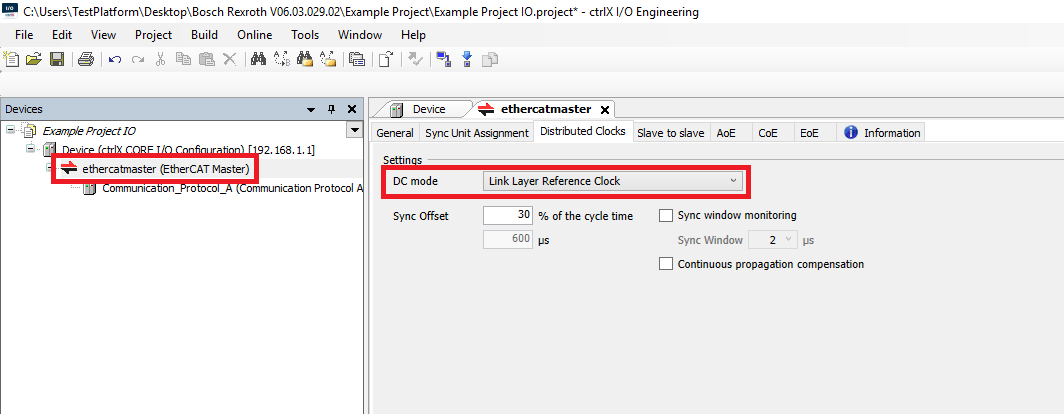
Step 1: In the I/O configuration Devices tree click the EtherCAT Master. In the Distributed Clocks tab set the DC mode setting to Link Layer Reference Clock. Remember to download the changed I/O config to the controller
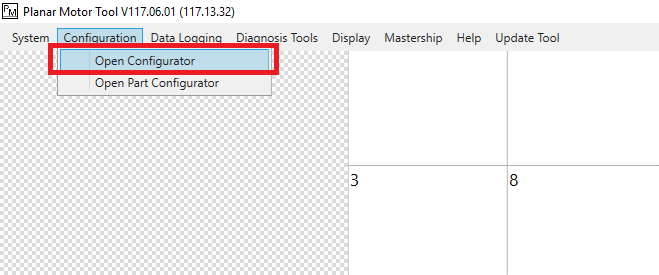
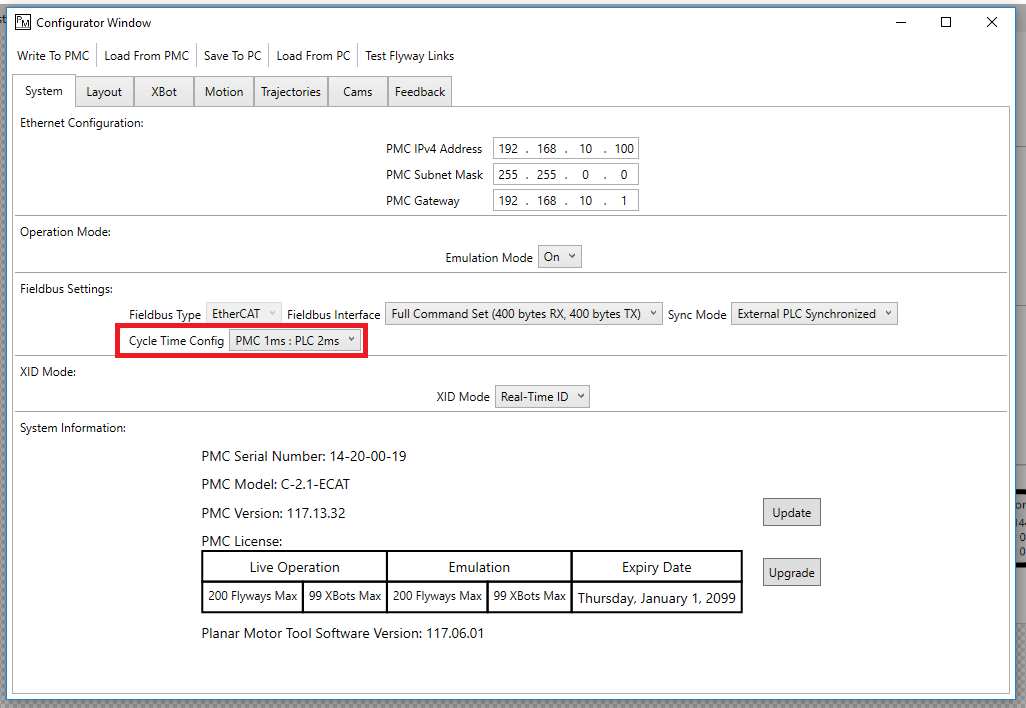
Step 2: In the Planar Motor Tool click Configuration->Open Configurator
Step 3: In the Configurator Window set the Sync Mode to External PLC Sychronized. Remember to Write To PMC
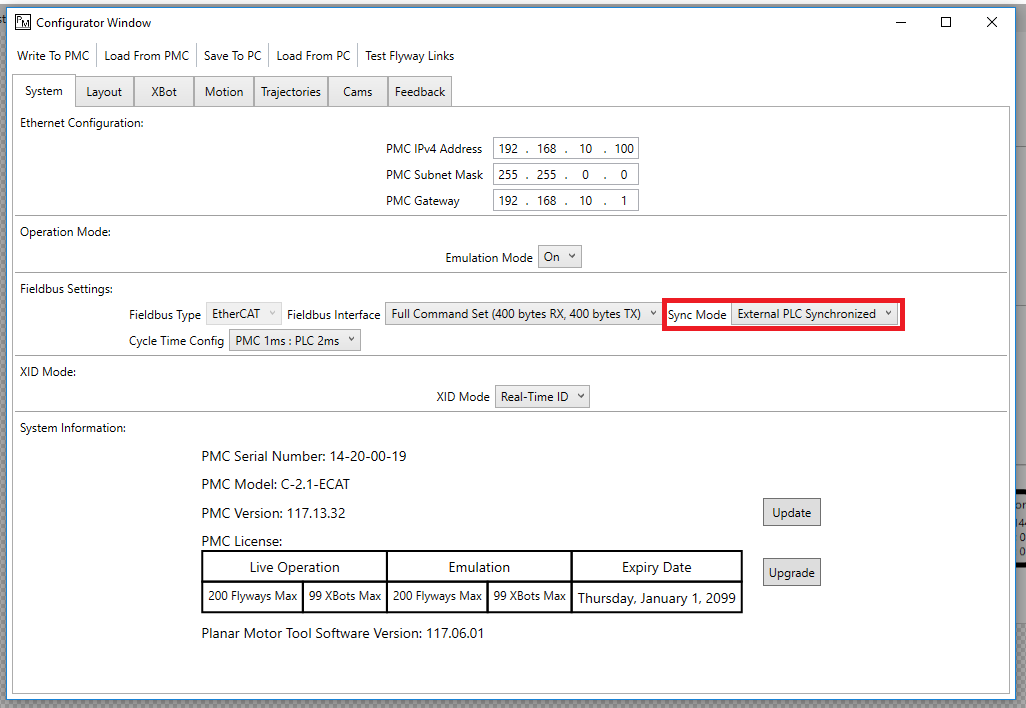
Step 4: Make sure that the PMC Cycle Time Config, the PLC task interval, and the EtherCAT Master cycle time are all the same
File I/O on the PLC (Optional)
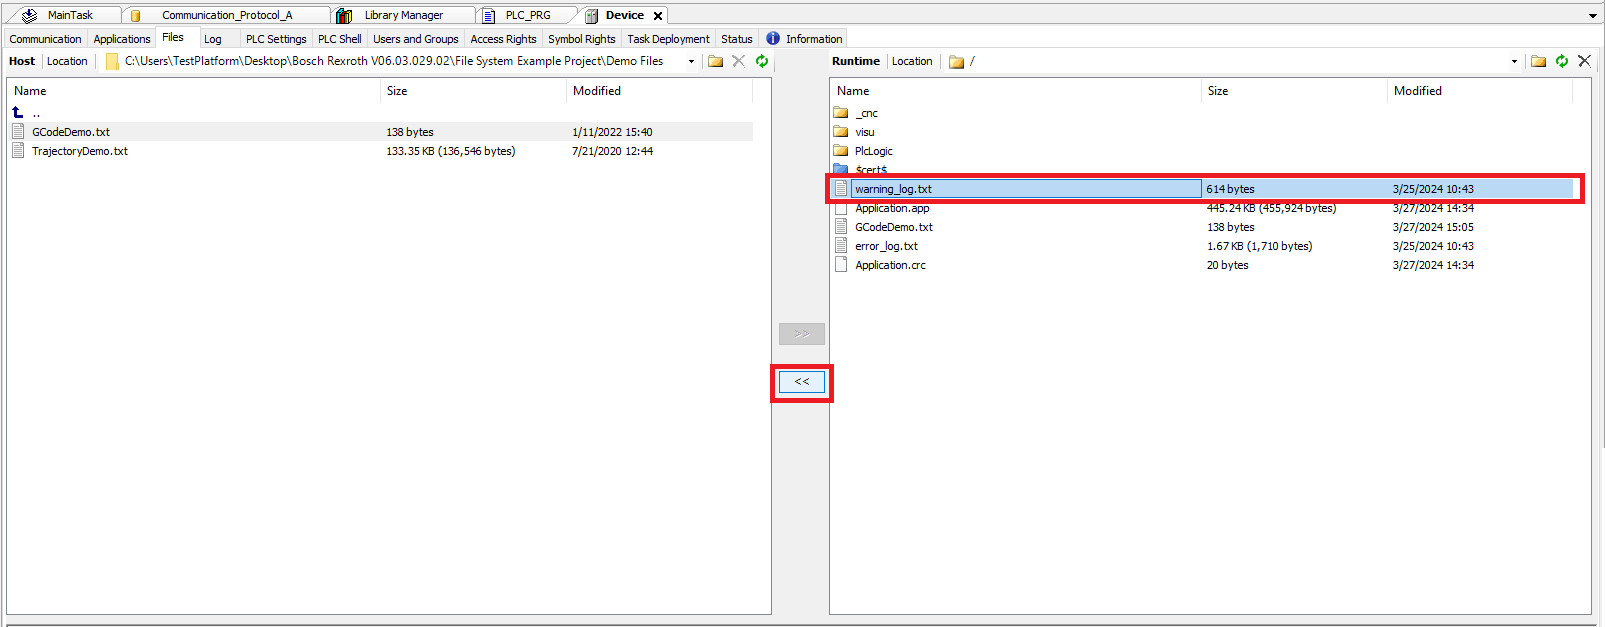
Step 1: Click the ctrlX controller in the Devices tree. Select the Files tab. Click the Refresh button on the right (controller) side to see the file structure on the controller
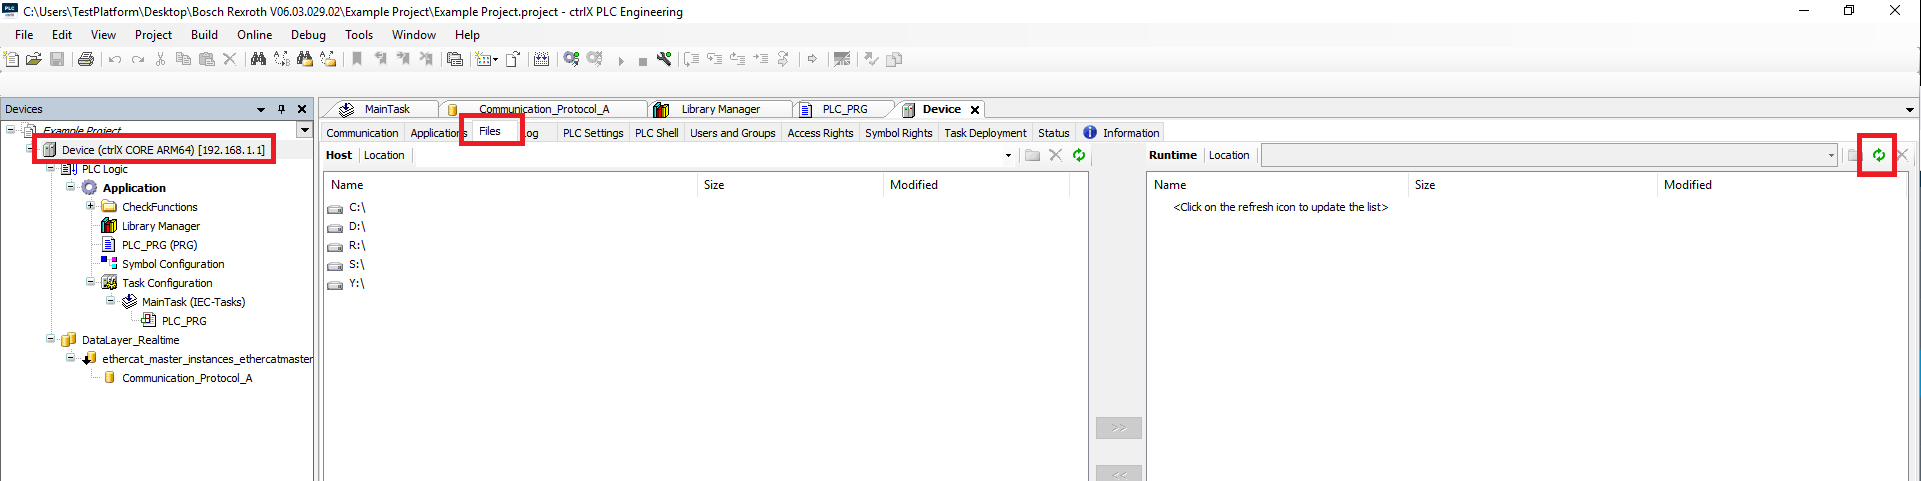
Step 2: To upload file(s) onto the controller select the file(s) on the left (PC) side and then click the >> button
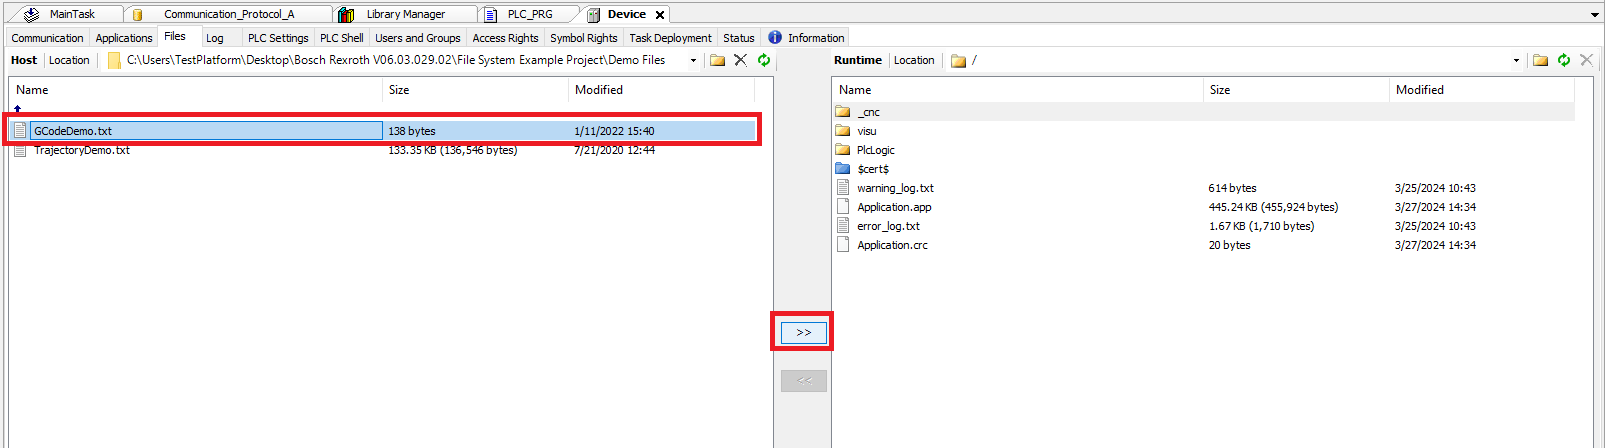
Step 3: To download file(s) from the controller select the file(s) on the right (controller) side and then click the << button