Library Setup
Creating a new project
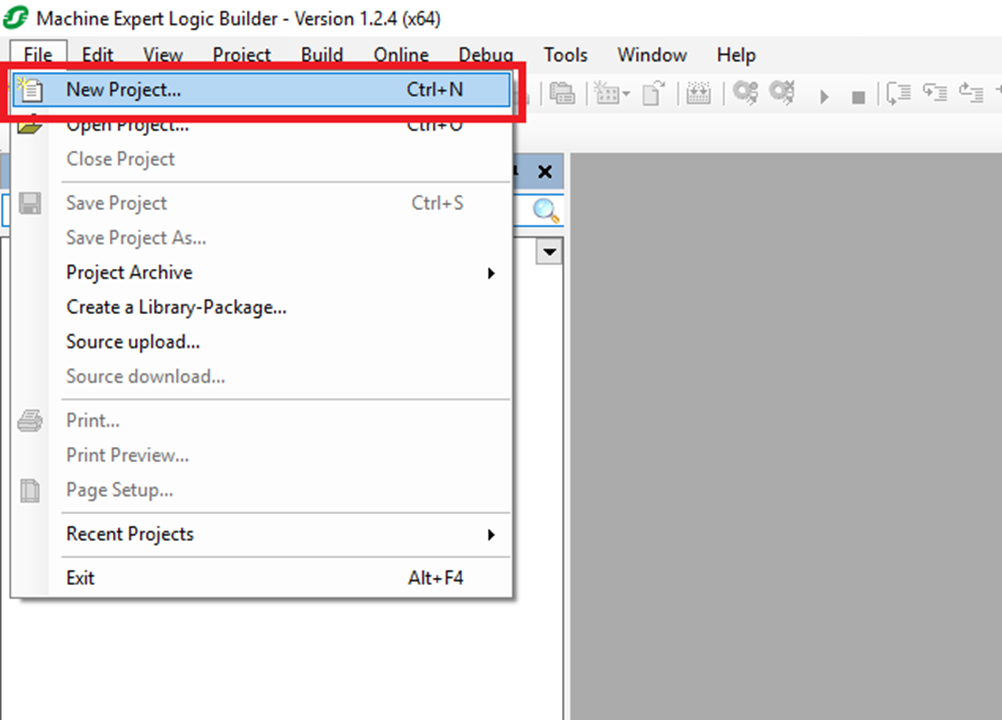
Step 1: Start by clicking File->New Project
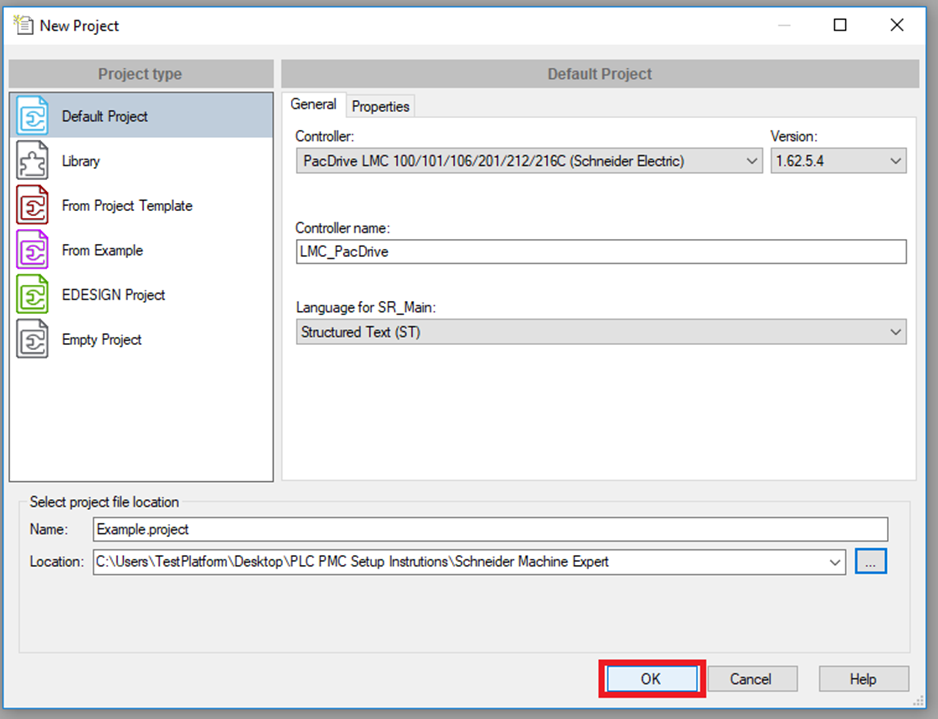
Step 2: In the New Project window select Default Project for the Project type. Then select the Controller to be used and select the Language for SR_Main. The library works for Structured Text and Ladder Logic, but this example uses Structured Text. Lastly choose and name and location for the project and then click "OK"
Setup Fieldbus
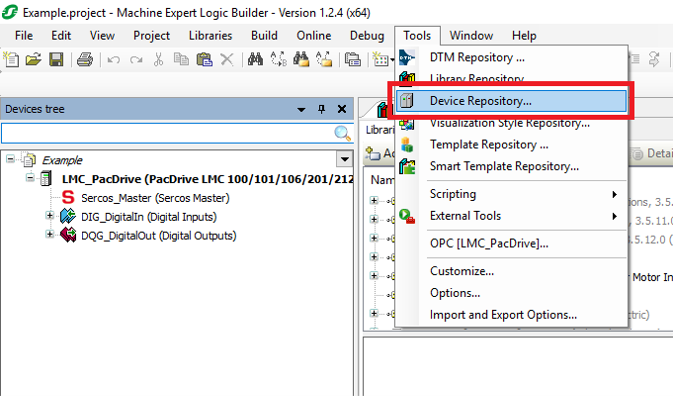
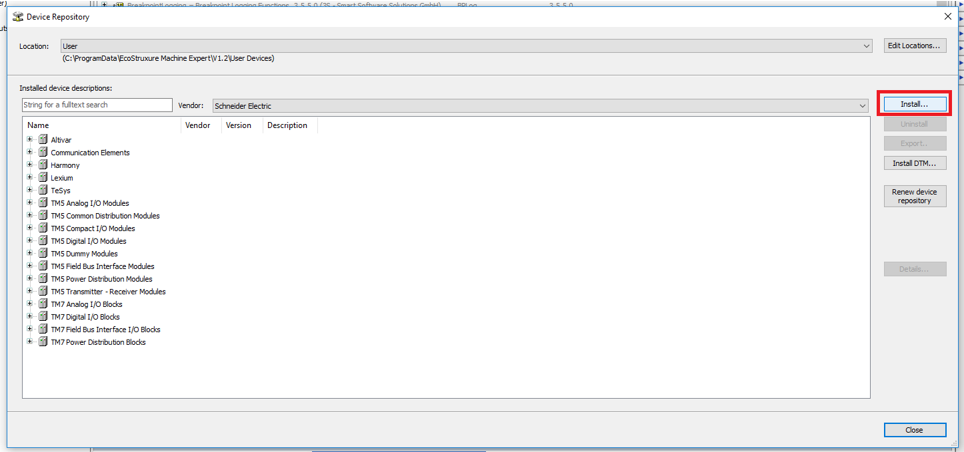
Step 1: Click Tools->Device Repository
Step 2: In the Device Repository window click "Install..."
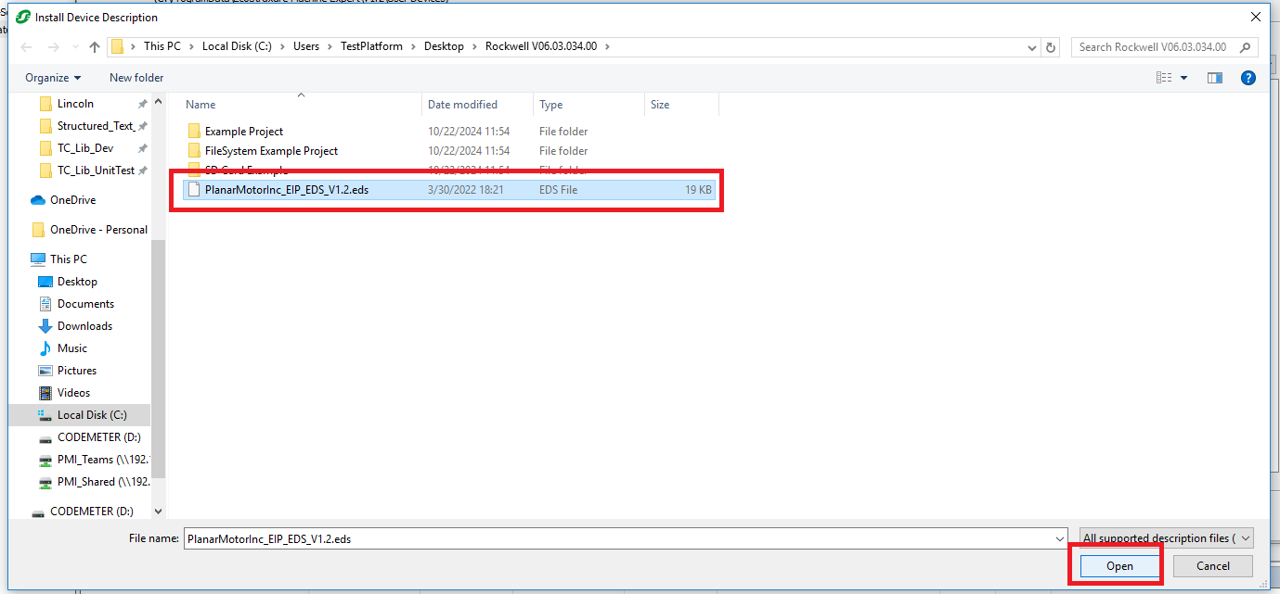
Step 3: In the Install Device Description window browse to the EDS file, select it, and then click "Open"
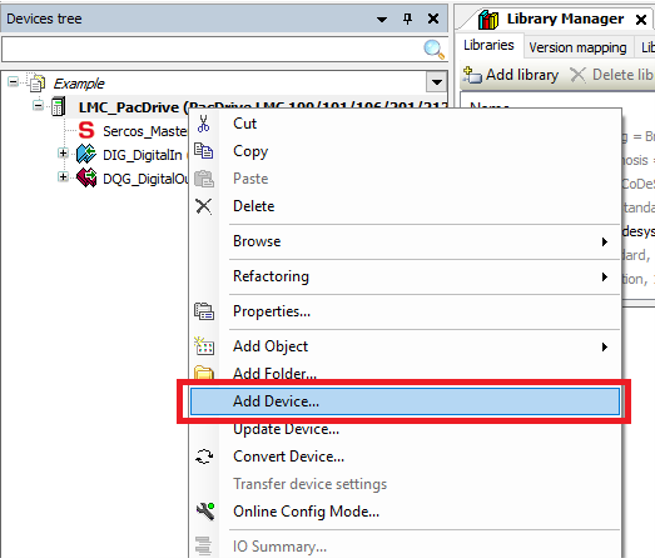
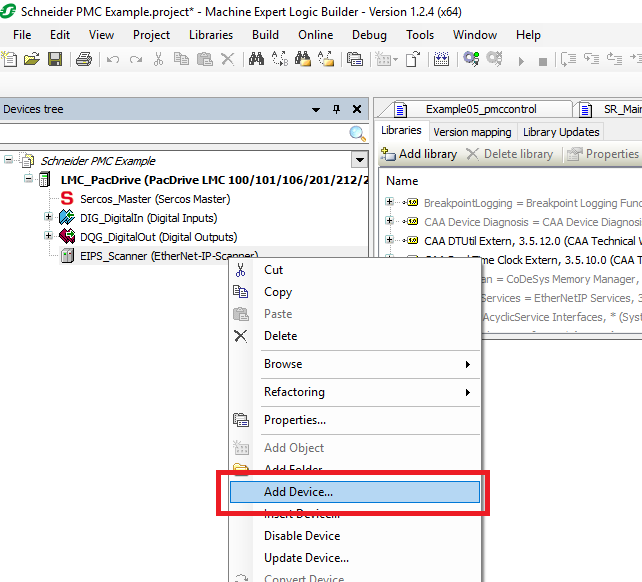
Step 4: In the Devices tree right click on the Controller and click "Add Device..."
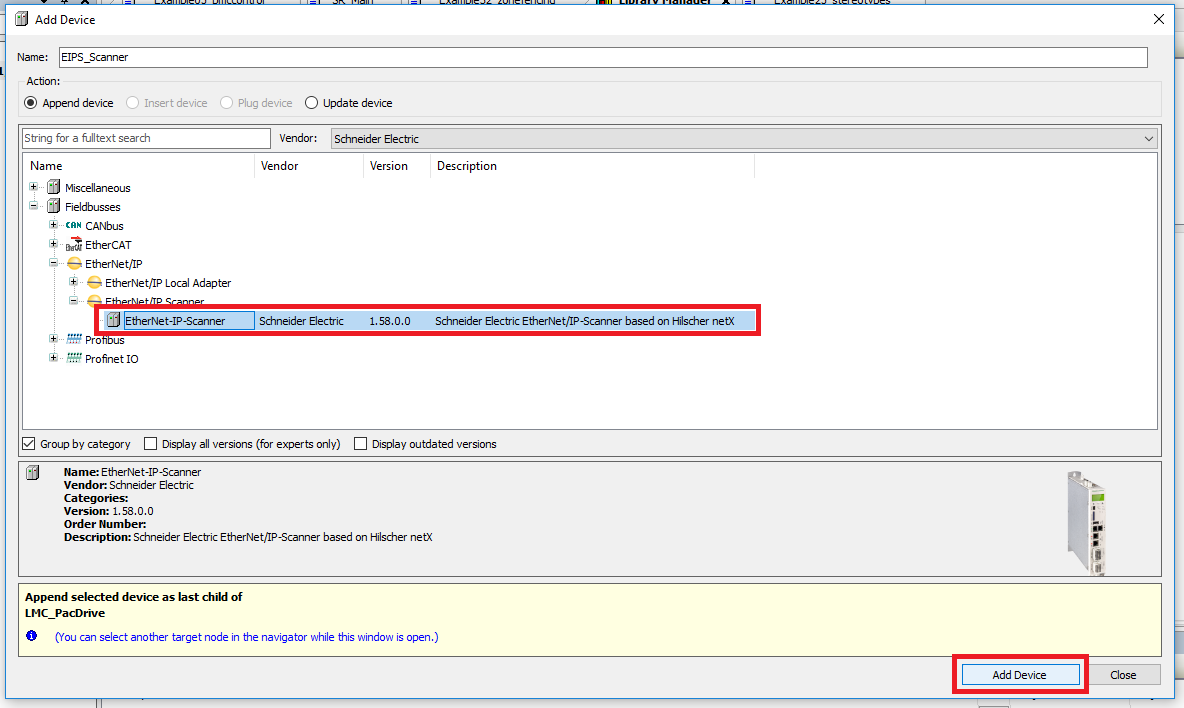
Step 5: In the Add Device window select the Schneider Electric EtherNet-IP-Scanner and click "Add Device"
Step 6: Right click on the new EIPS_Scanner and click "Add Device"
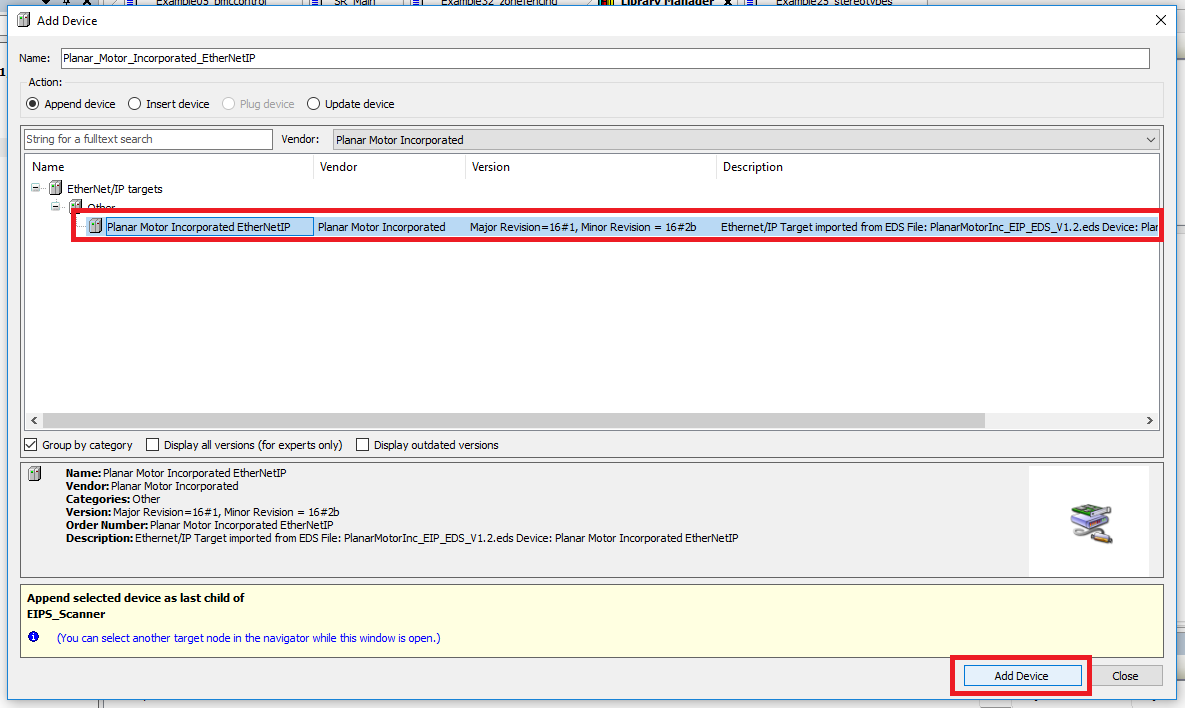
Step 7: In the Add Device window find and select the Planar Motor Controller device and click "Add Device"
Import and use library
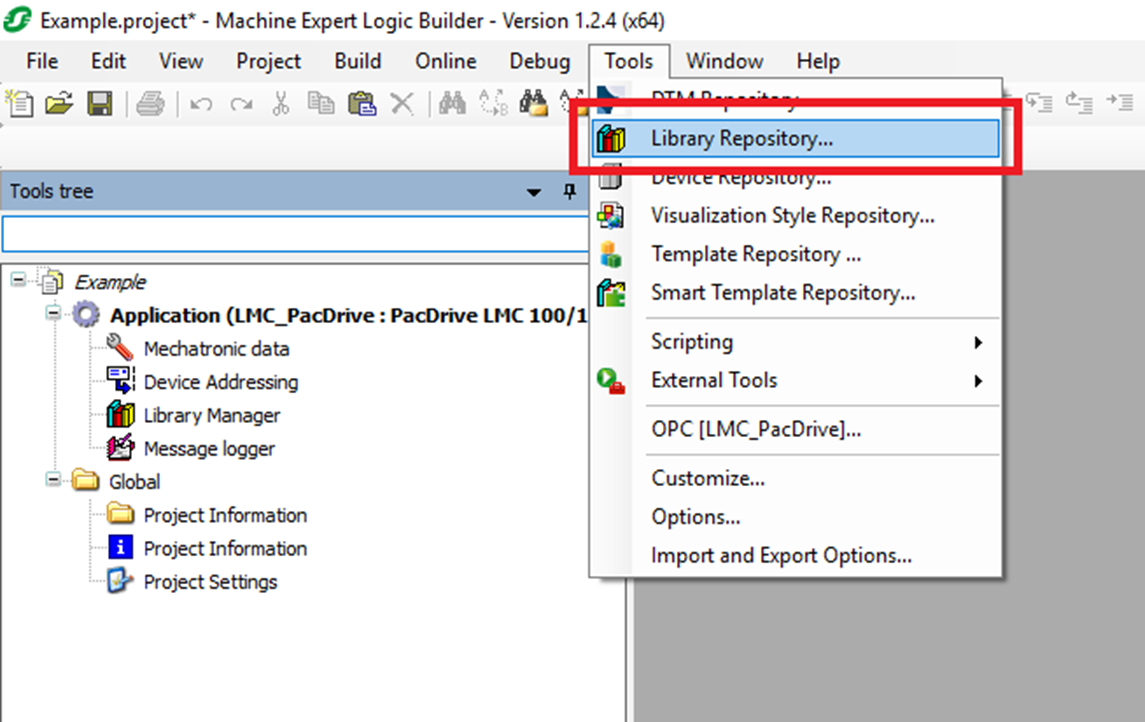
Step 1: Click Tools->Library Repository
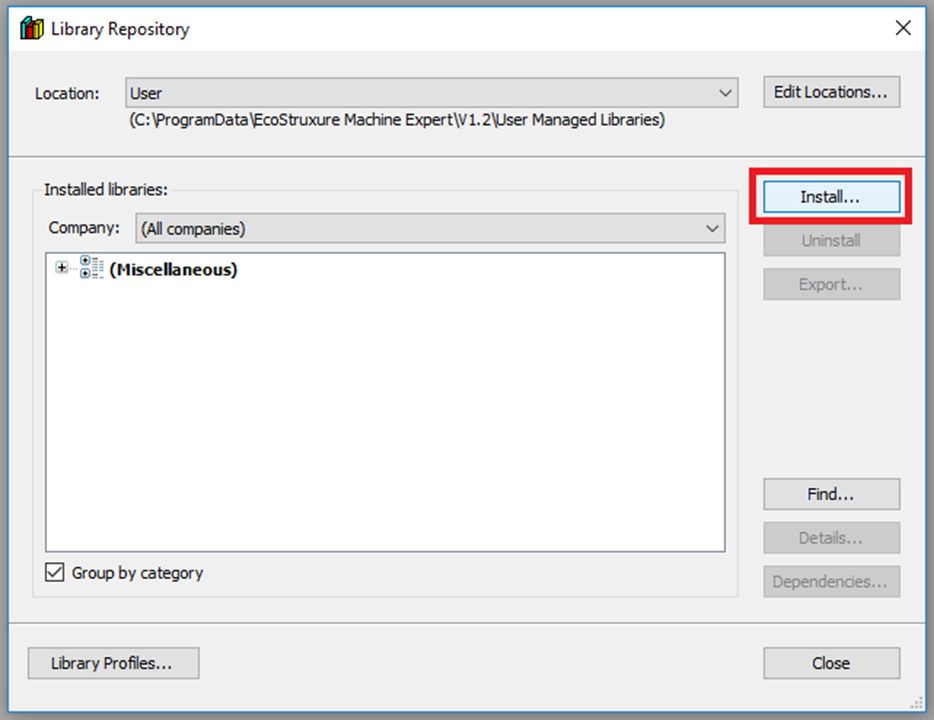
Step 2: In the Library Repository window click "Install..."
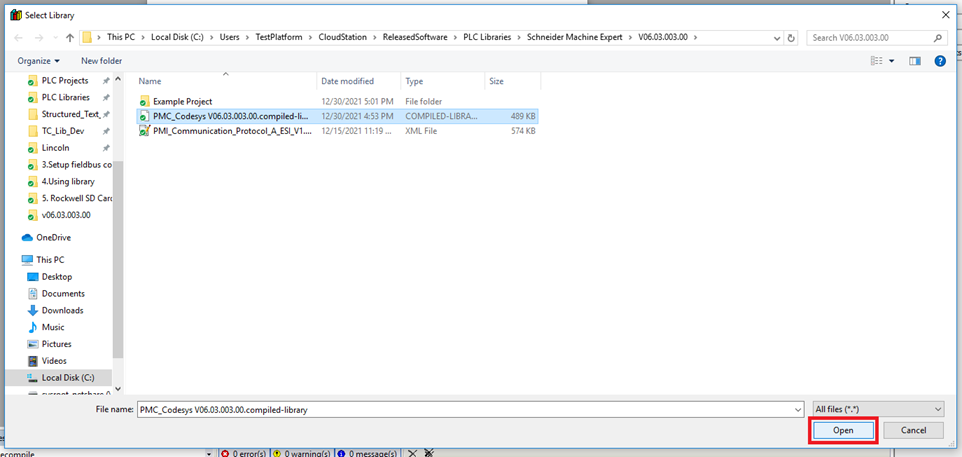
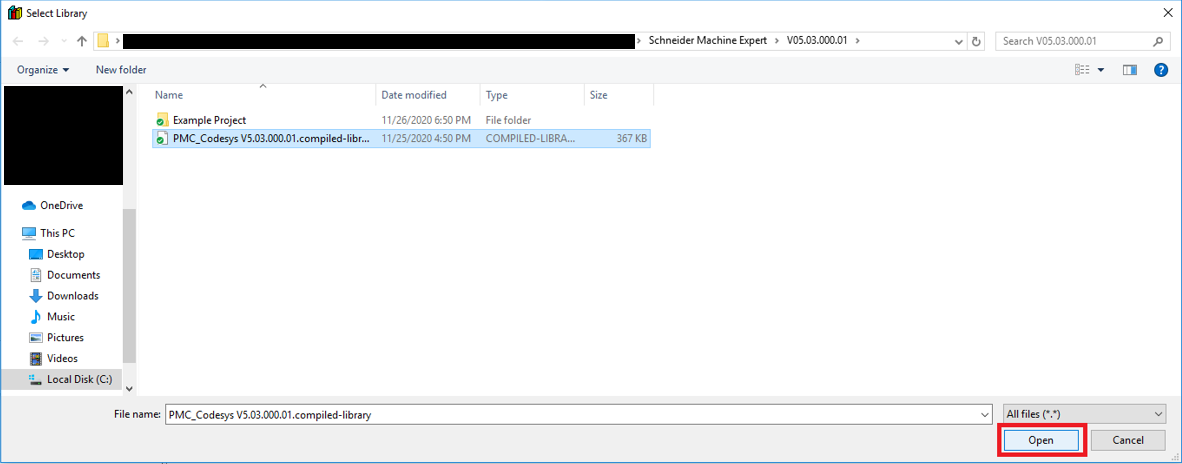
Step 3: In the Select Library window browse to and select the PMC .compiled-library file. Then click "Open"
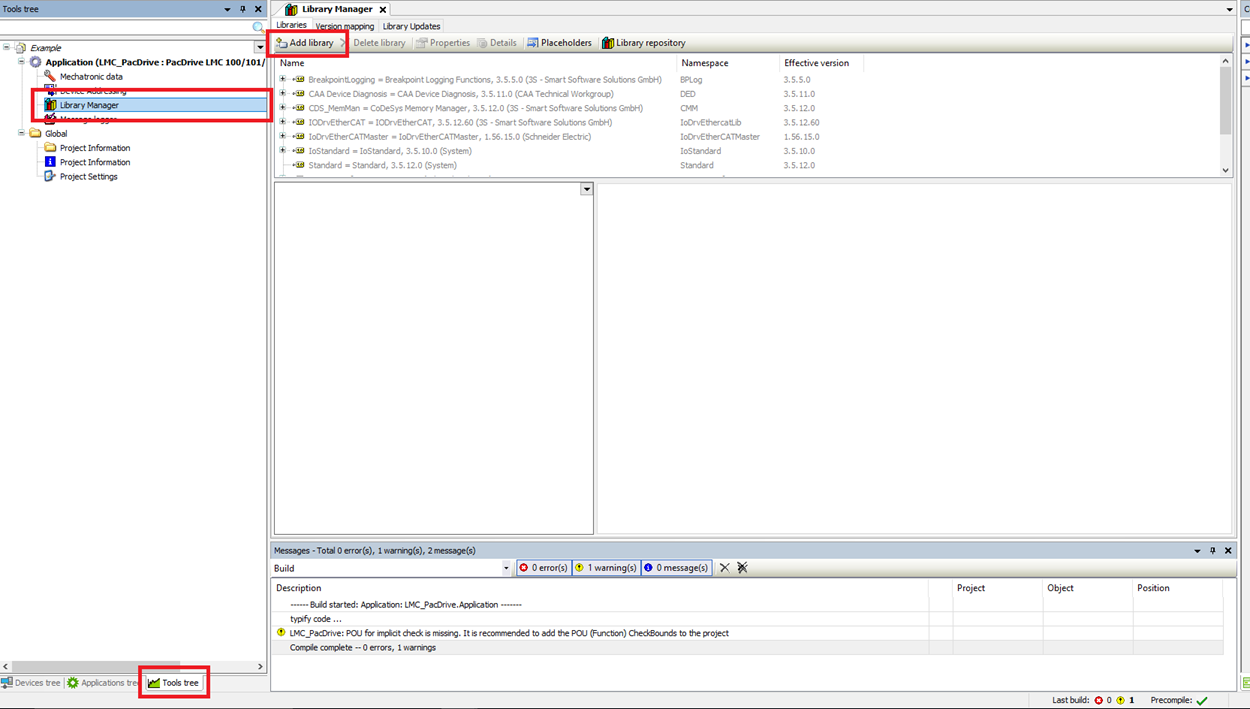
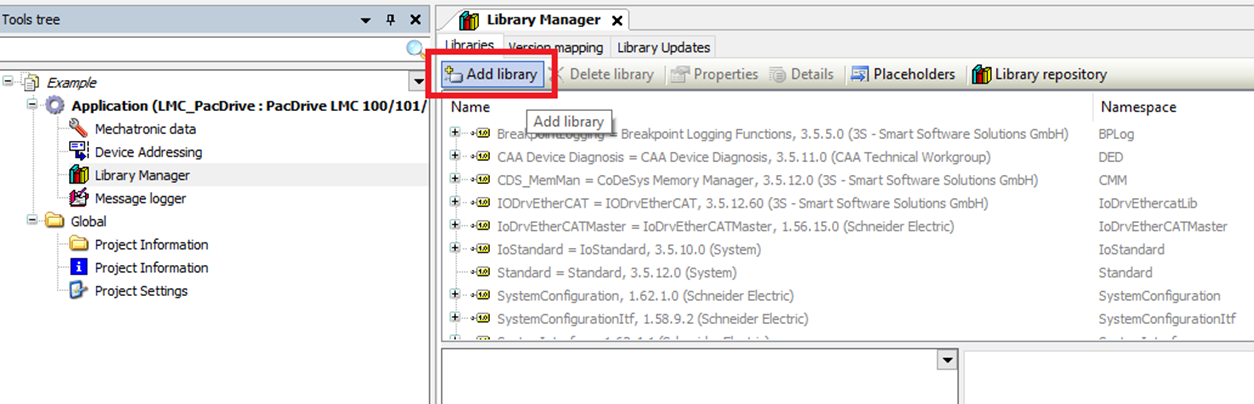
Step 4: Open the Library Manager from the Tools tree. Then click "Add library"
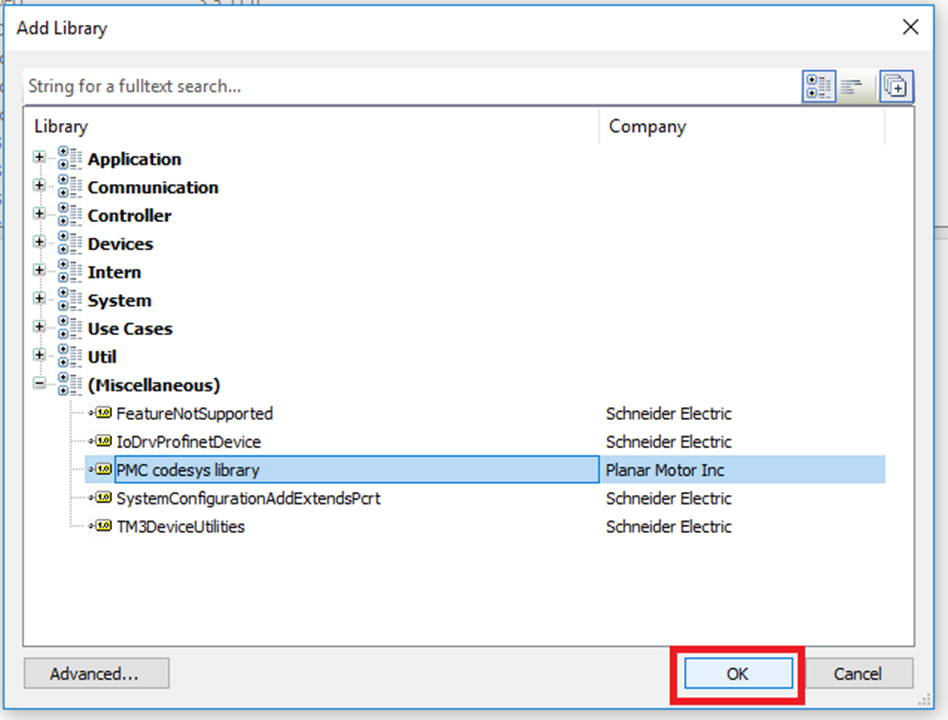
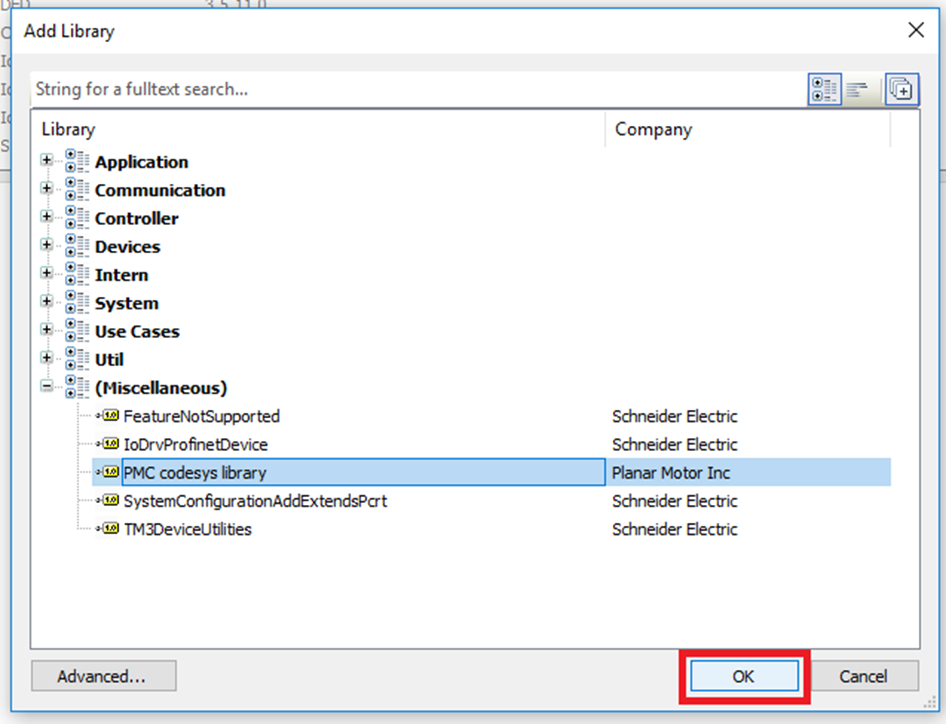
Step 5: Search for and find the PMC library and click "OK"
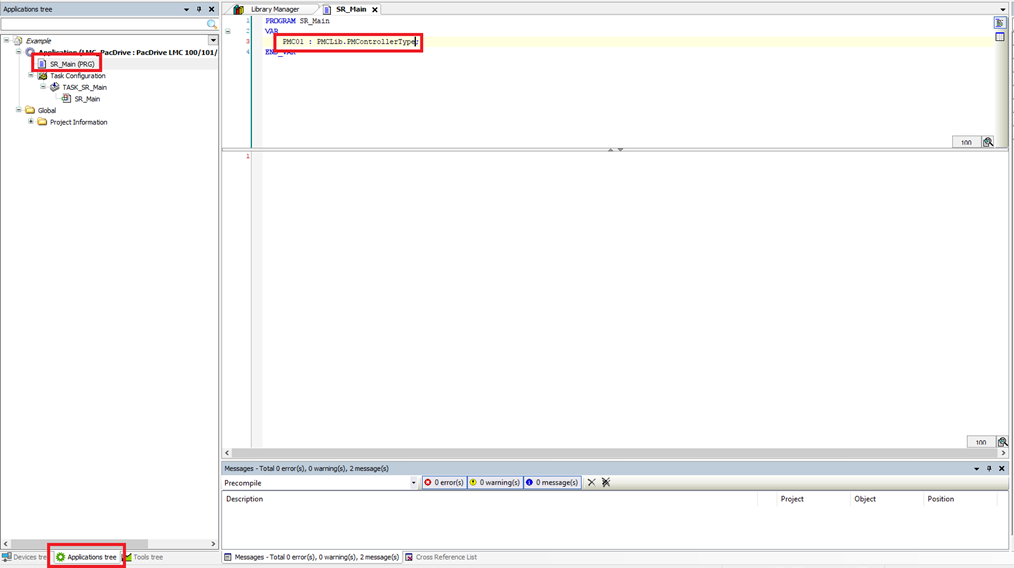
Step 6: In the Applications tree click on the Main program. Declare a PMCLib.PMControllerType variable in the Main program.
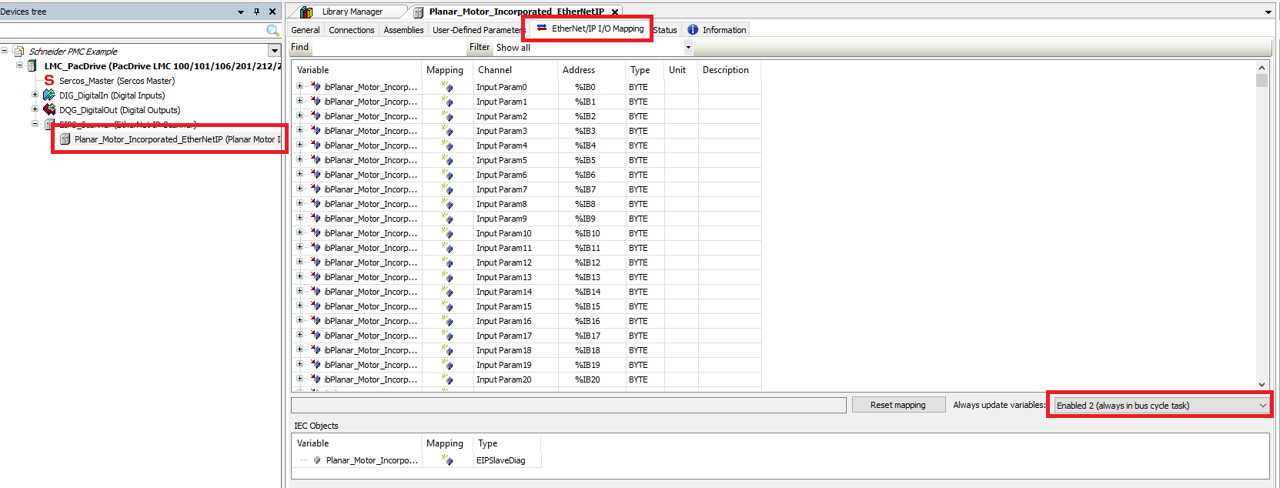
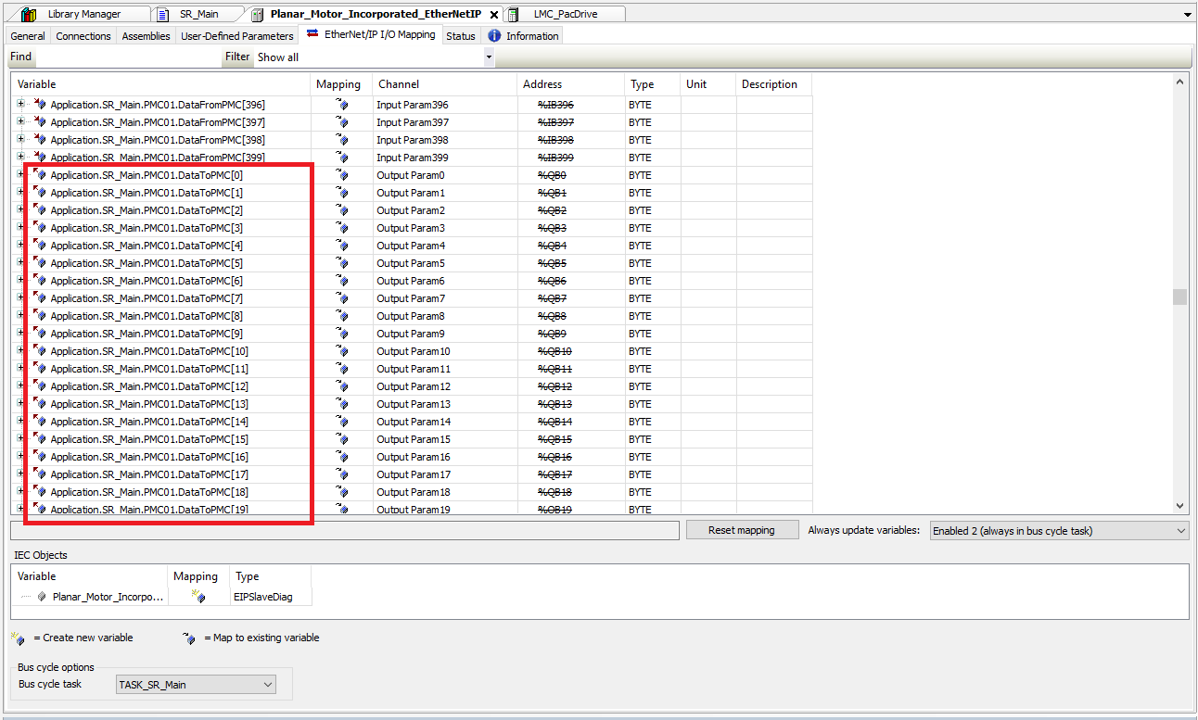
Step 7: Click the new Planar Motor Controller in the Devices tree and enter the EtherNet/IP I/O Mapping tab. Change the Always update variables setting to Enabled 2 (always in bus cycle task).
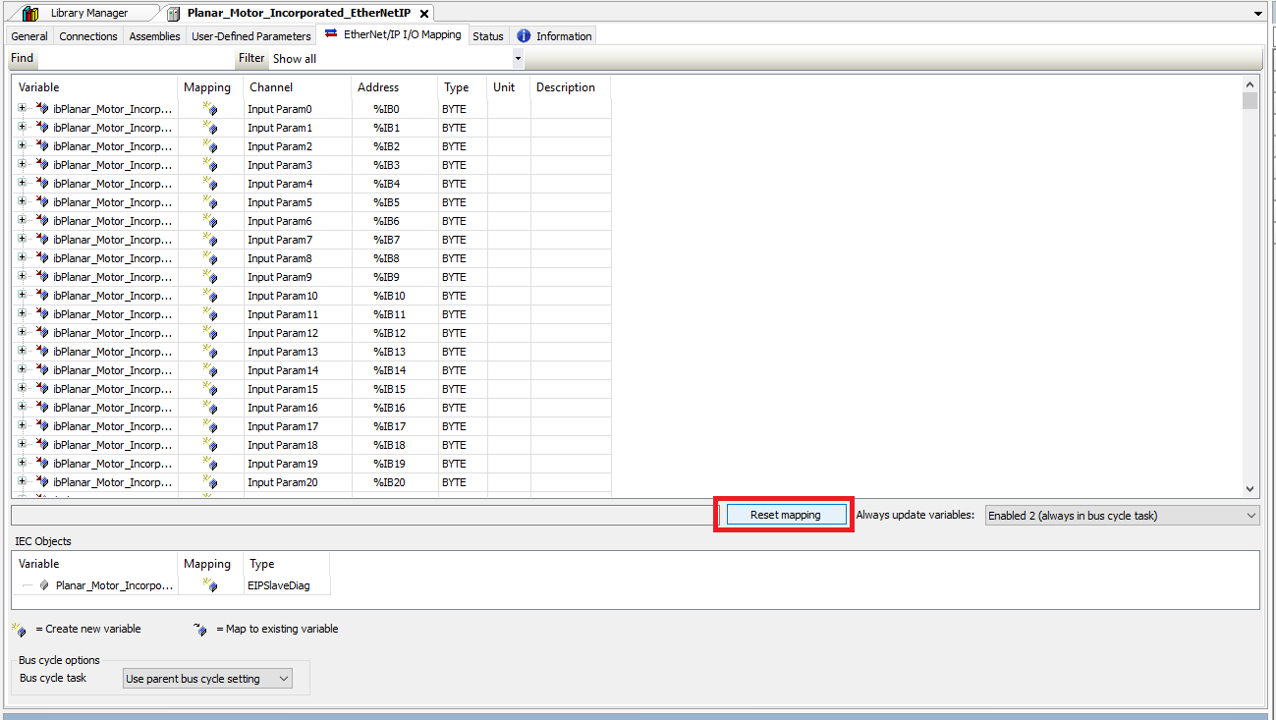
Step 8: Before mapping the two arrays click Reset mapping to delete the auto created mapped variables.
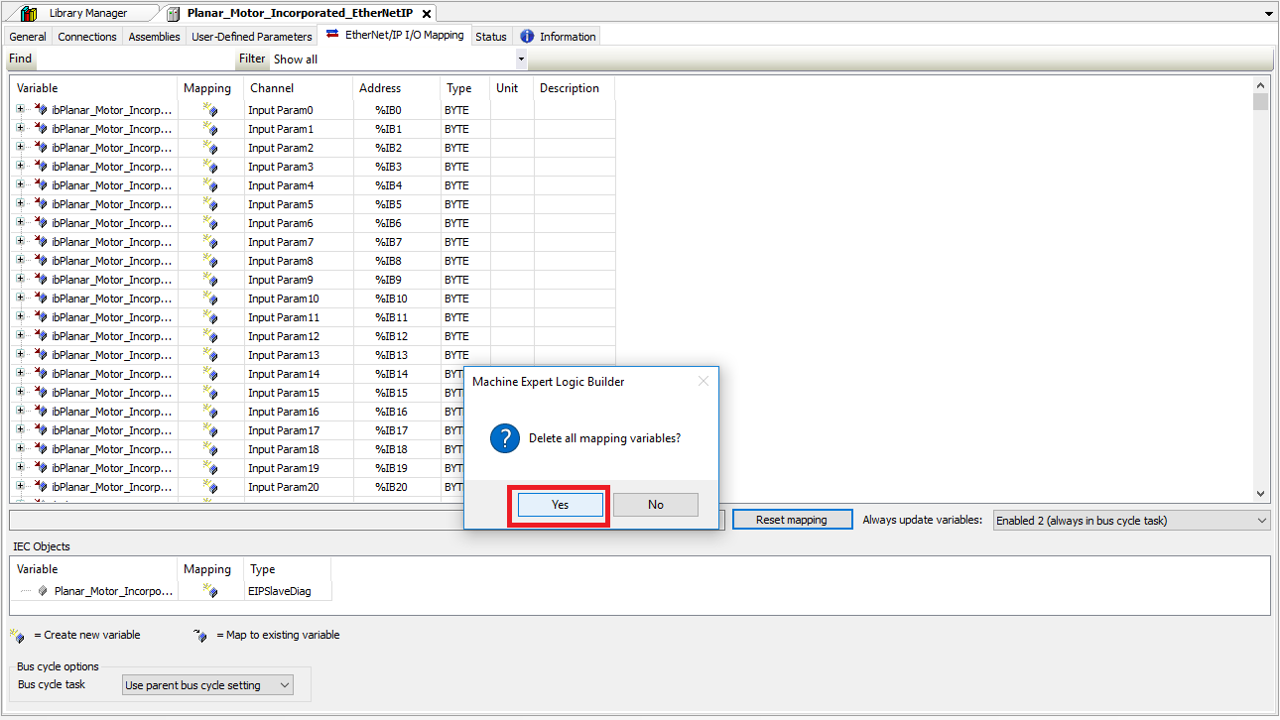
Step 9: Click Yes in the confirmation window.
Step 10: Then map the 400 Input Params to the DataFromPMC array member of the PMController variable declared earlier. Unfortunately you will need to do this element by element.
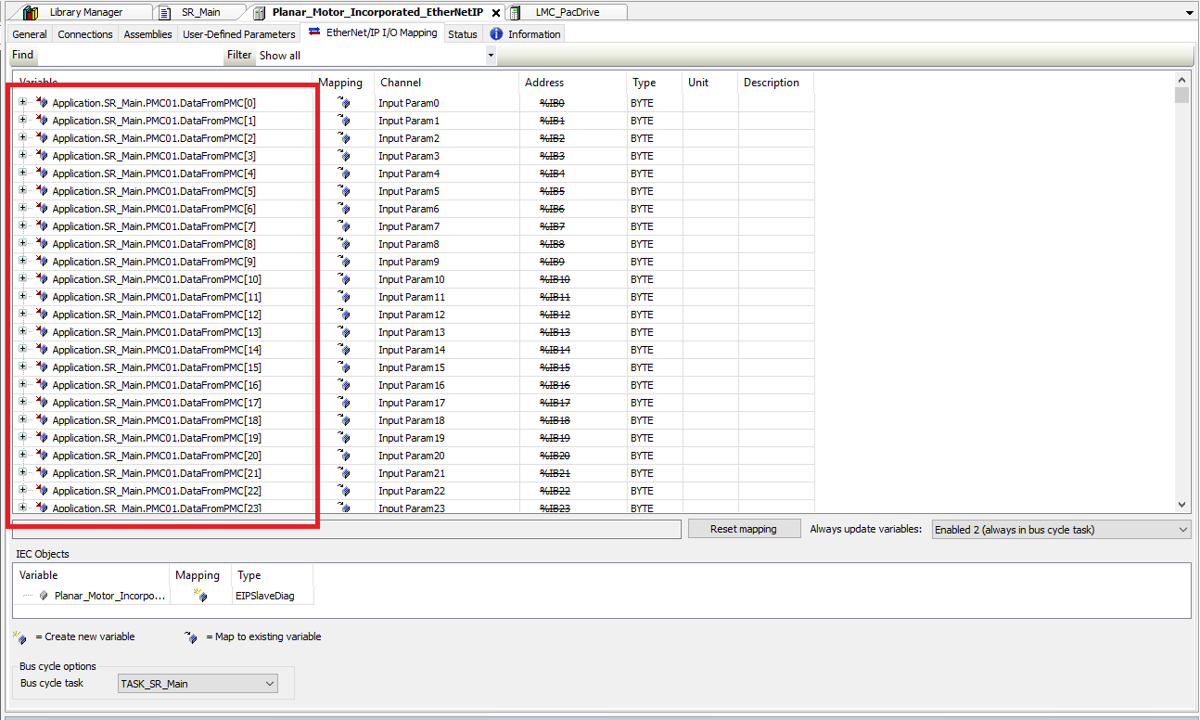
Step 11: Then map the 400 Output Params to the DataToPMC array member of the PMController variable declared earlier. Unfortunately you will need to do this element by element.
Step 12: Before using the PMC library, make sure that one and only one instance of the PMC_AutoRefresh function block is declared and that the PMC_AutoRefresh function block is called once and only once per PLC cycle.

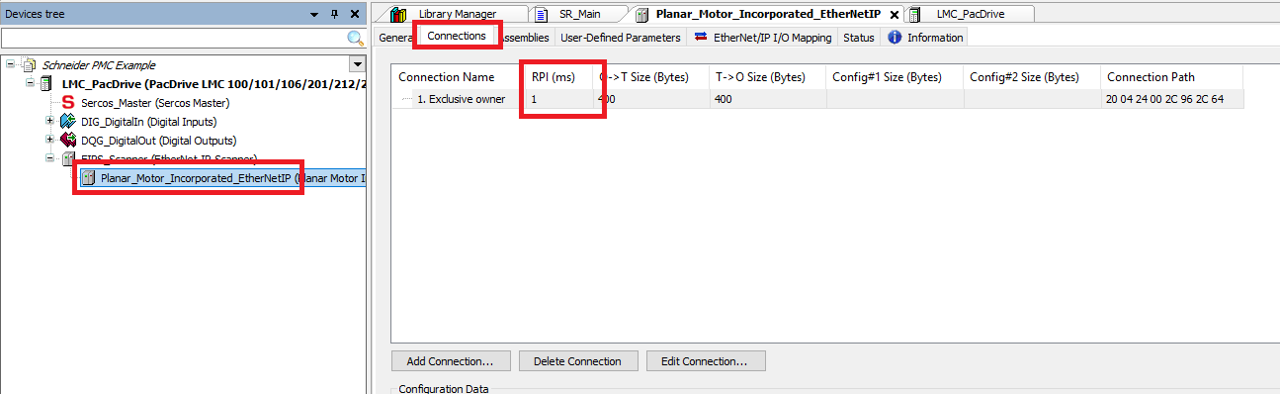
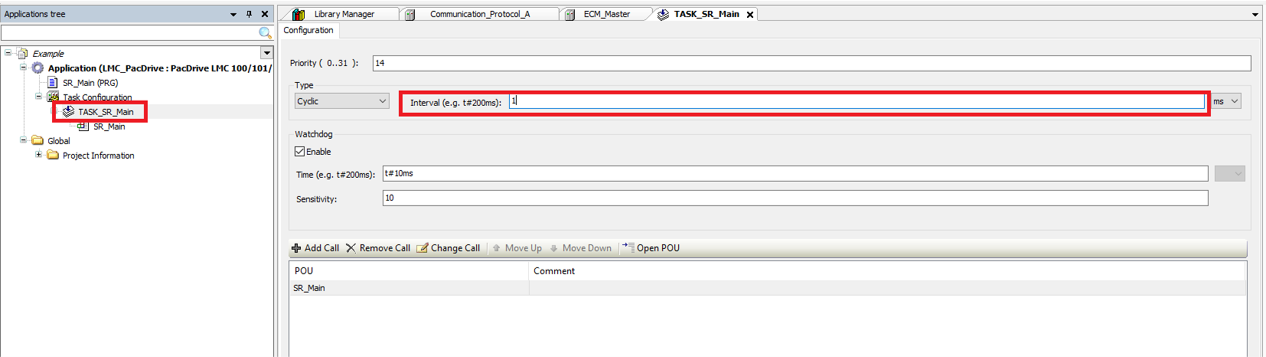
Step 13: Lastly make sure that the RPI of the PMC_EtherNetIP matches the Cycle Interval of the Main Task.
Upgrade library
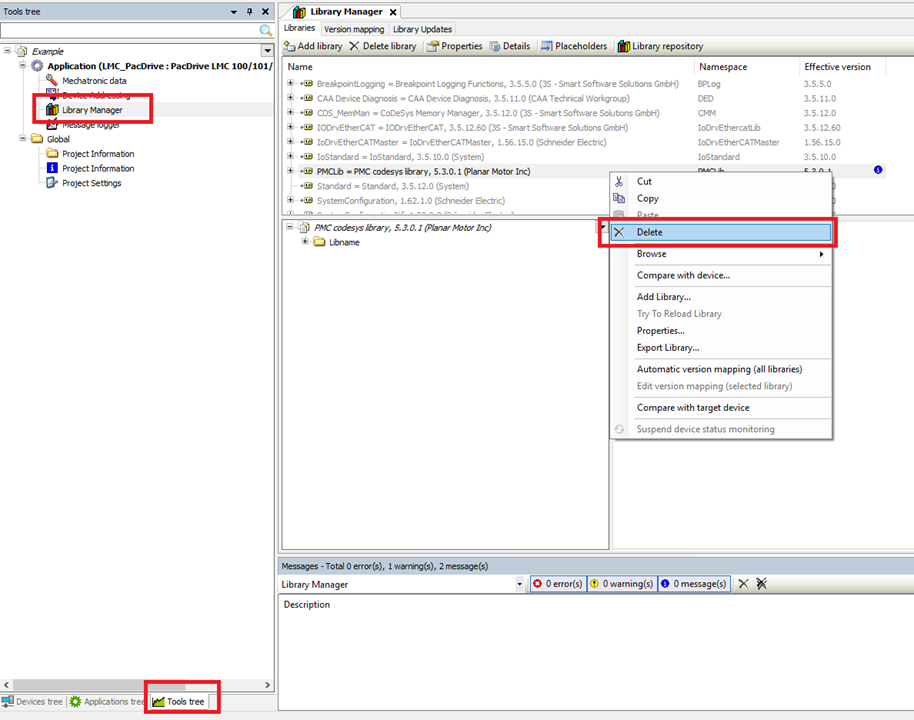
Step 1: Start by going into the Tools tree and opening the Library Manager. Then delete the previous old version of the PMC library
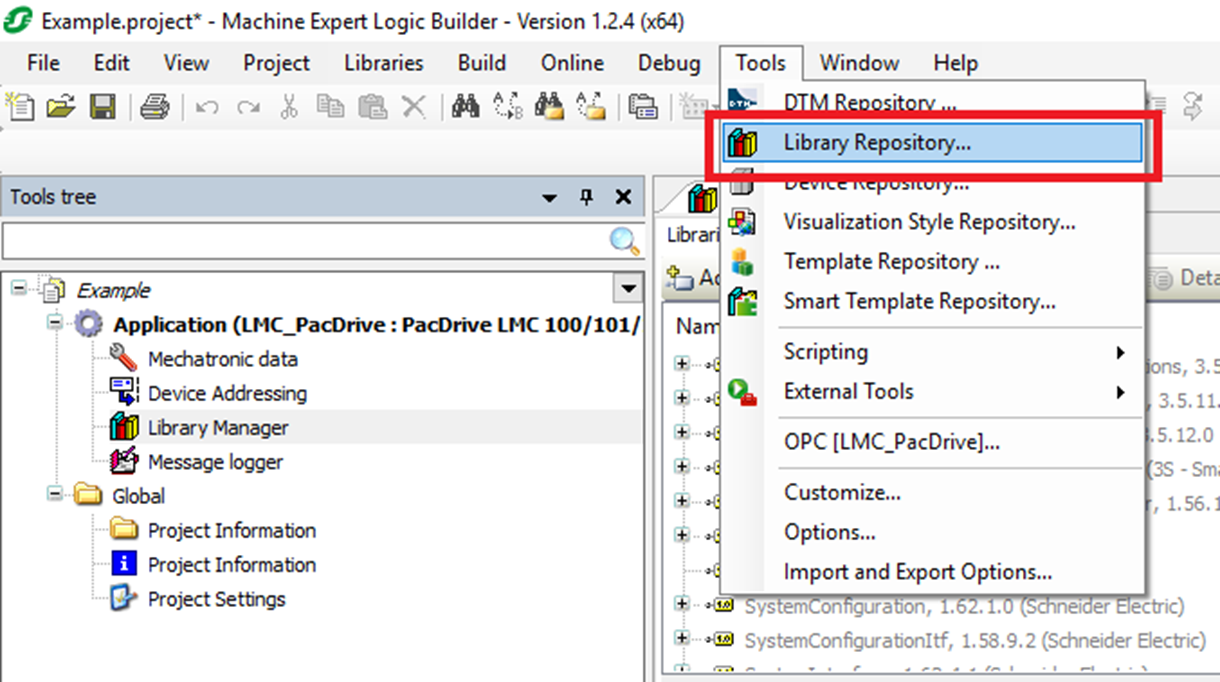
Step 2: Click Tools->Library Repository
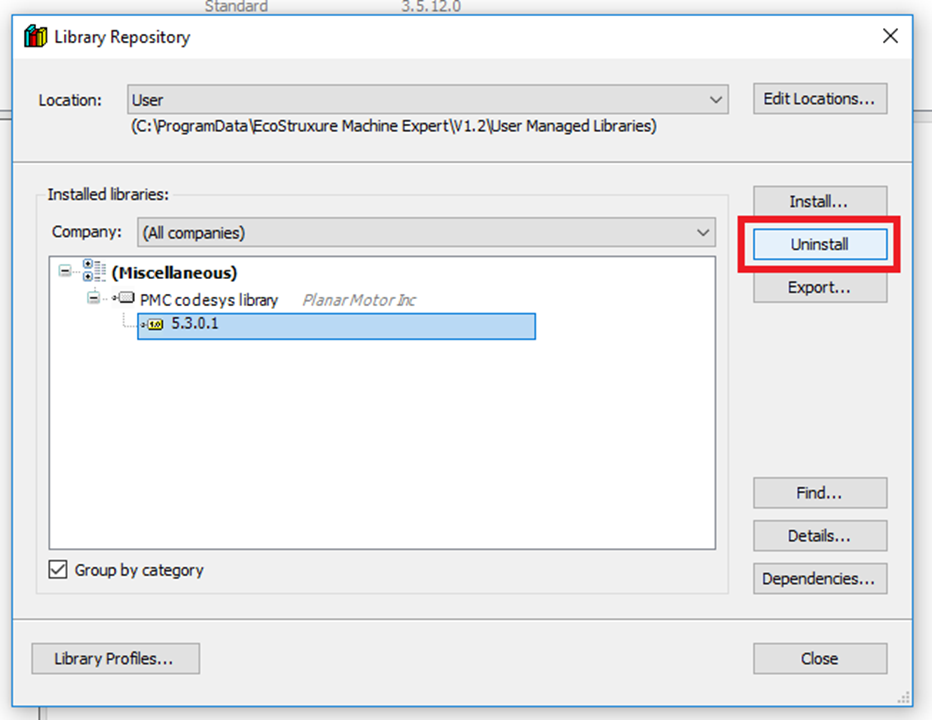
Step 3: In the Library Repository window find the old version of the PMC library and click "Uninstall"
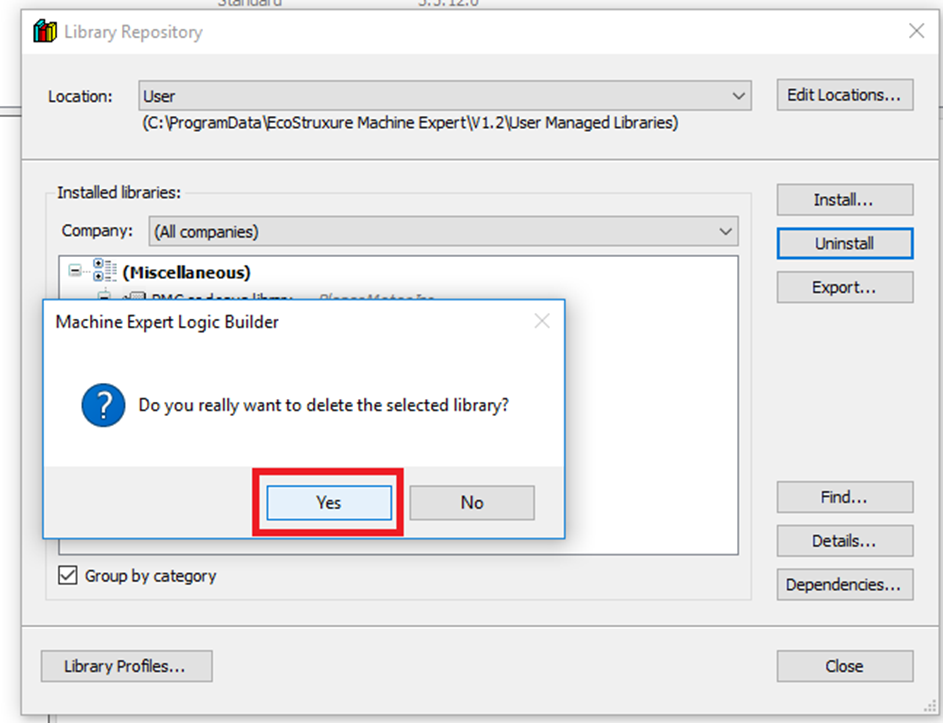
Step 4: Click "Yes" in the confirmation box
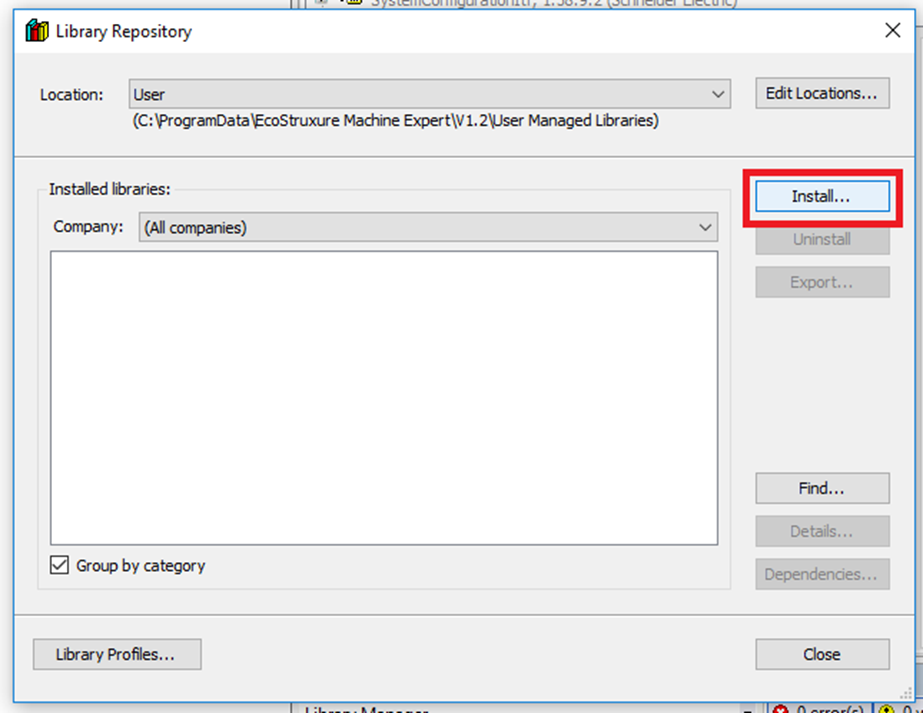
Step 5: When you are back in the Library Repository and click "Install..."
Step 6: Browse to the new version of the PMC library and click "Open"
Step 7: Then in the Library Manager click "Add library"
Step 8: Then in the Add Library window find and select the new PMC library and click "OK"