Library Setup
Creating a new project
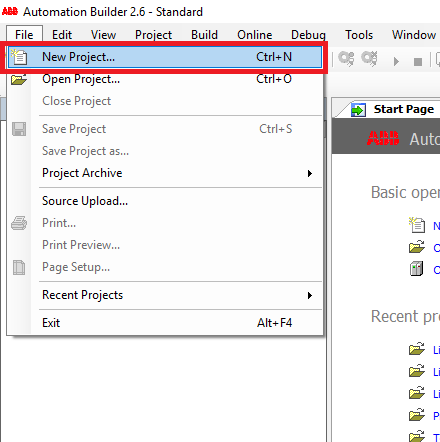
Step 1: Click File -> New Project
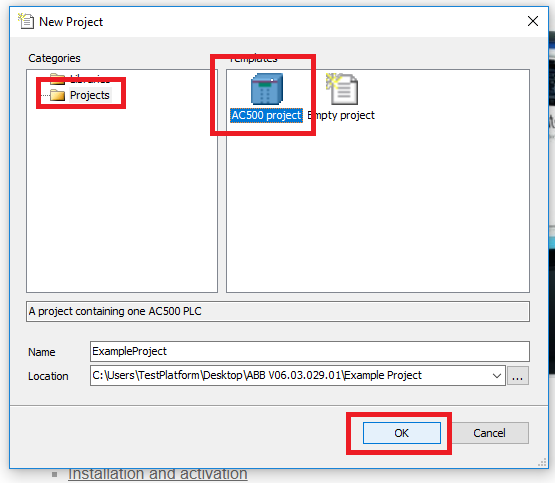
Step 2: In the New Project window, select AC500 project fro the project template. Give the project a descriptive name and click OK
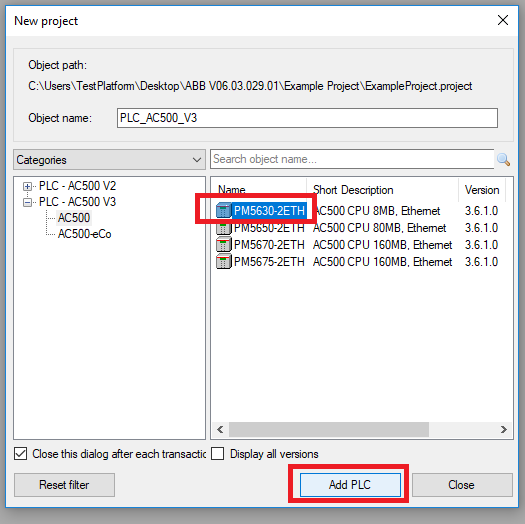
Step 3: Select the PLC you are using, in this case a PM5630-2ETH and click Add PLC
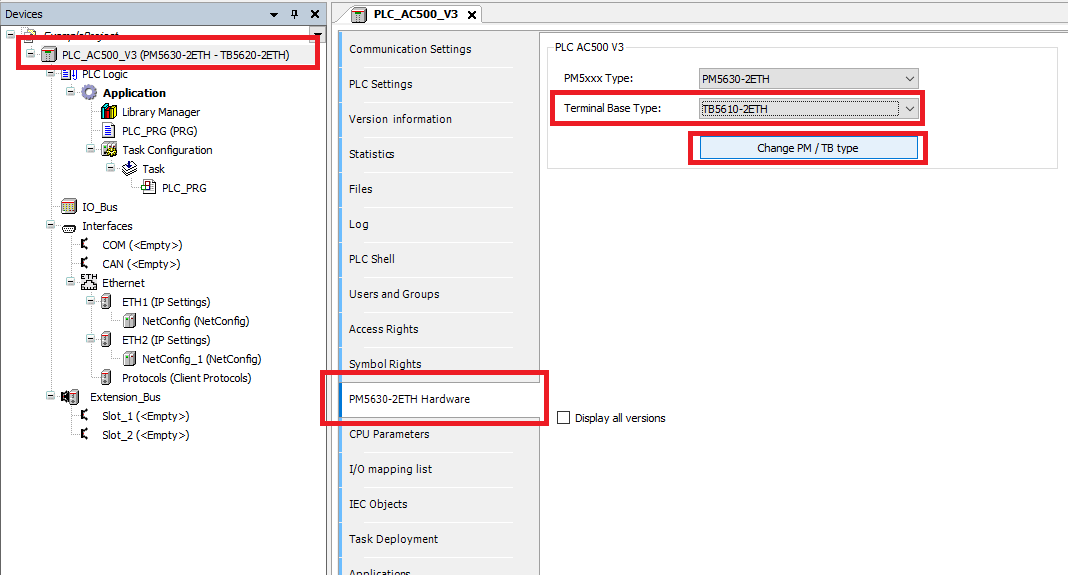
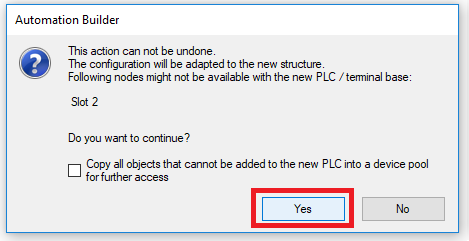
Step 4: Once in the project, double click the PLC in the Devices tree. Then navigate to the Hardware tab and change the Terminal Base Type to the one you are using. This project uses a TB5610-2ETH. Then click Yes in the pop-up window.
Setup Fieldbus
Steps 1-4 are only if you haven’t used the PMC on this Automation Builder install.
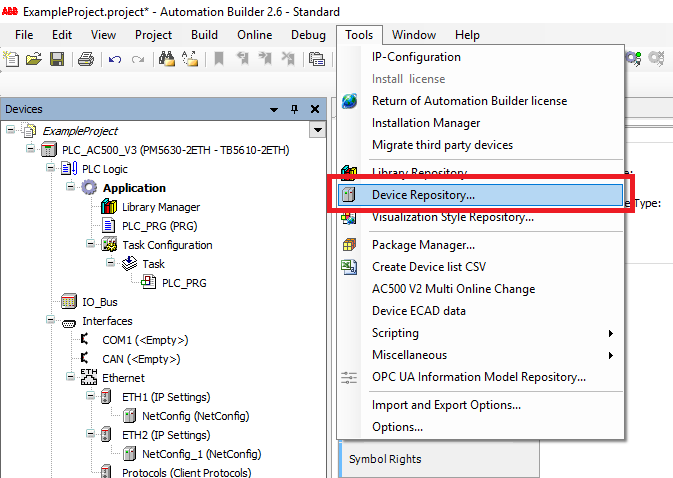
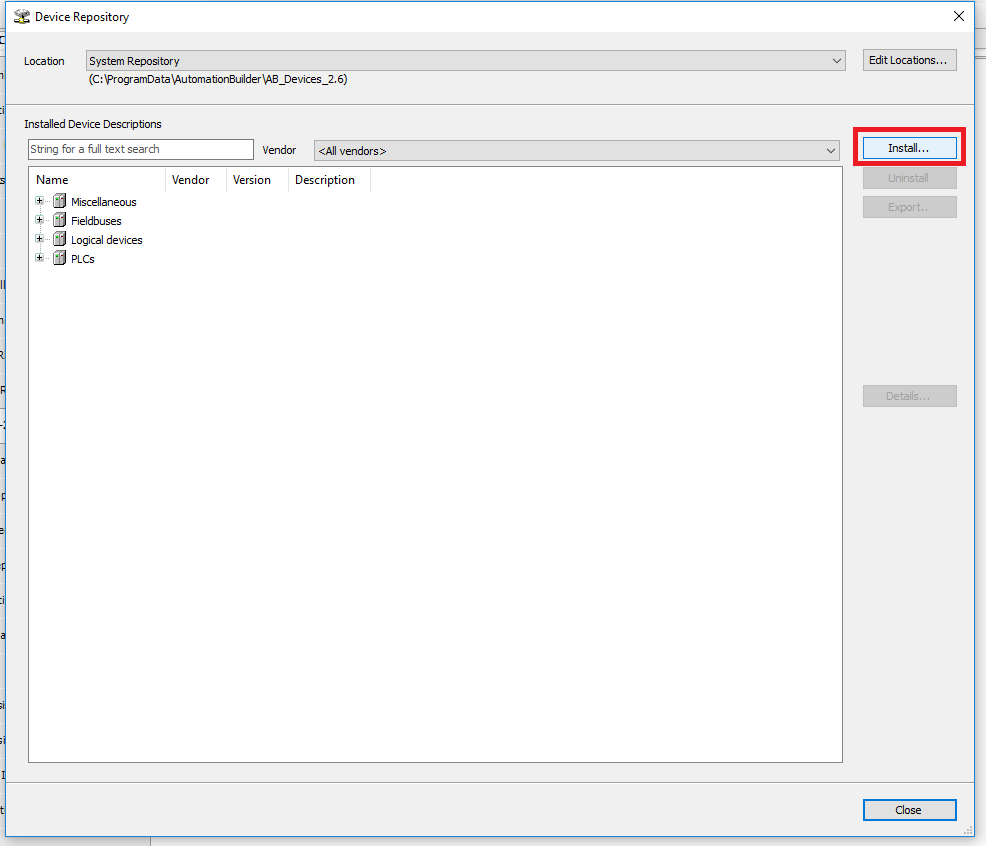
Step 1: Click Tools->Device Repository.
Step 2: In the Device Repository window click the Install button
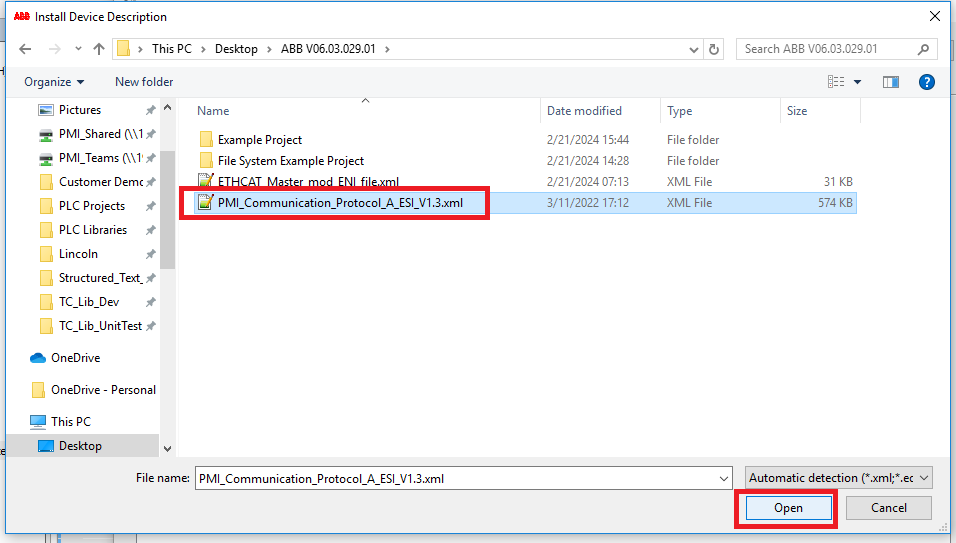
Step 3: Navigate to the PMC ESI xml file and click Open
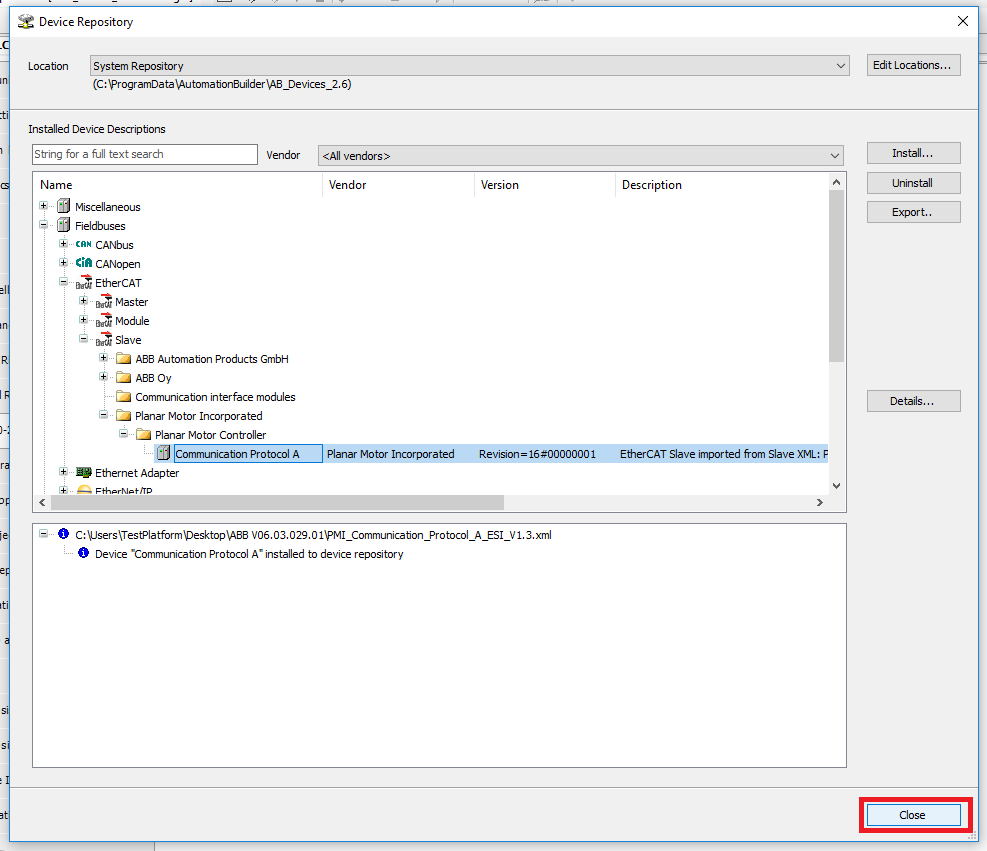
Step 4: Click Close once the PMC ESI is installed
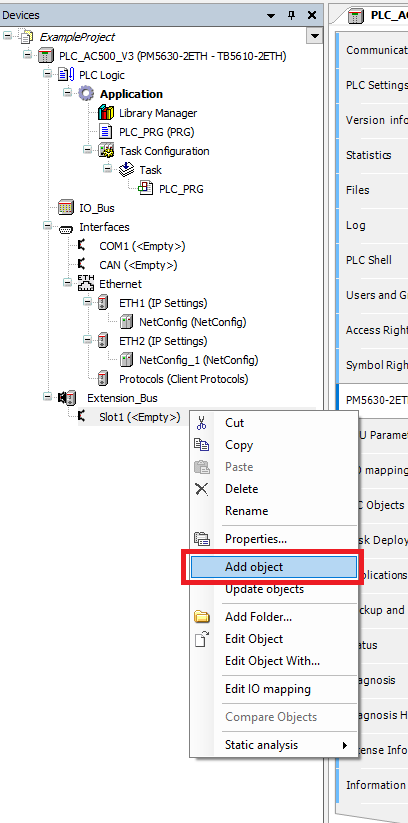
Step 5: In the Devices tree, right click an empty Extension Bus slot and click Add object
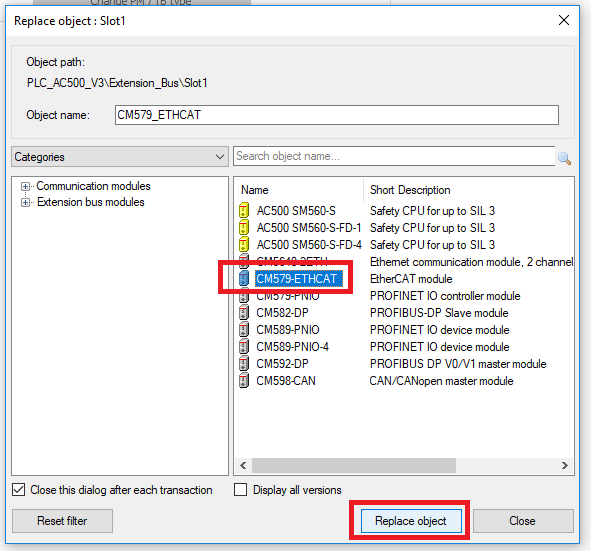
Step 6: In the Replace object window, select the fieldbus module you are using. For this example CM579-ETHCAT ethercat module. Then click Replace object
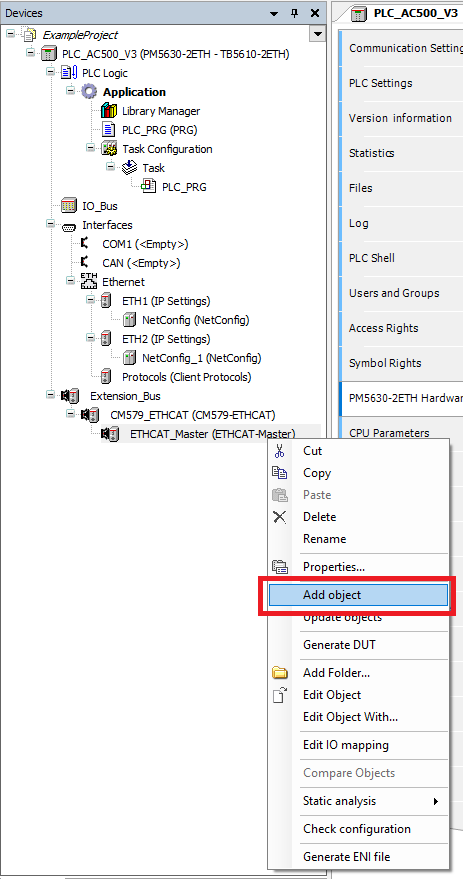
Step 7: Right click the ETHCAT_Master and click Add object
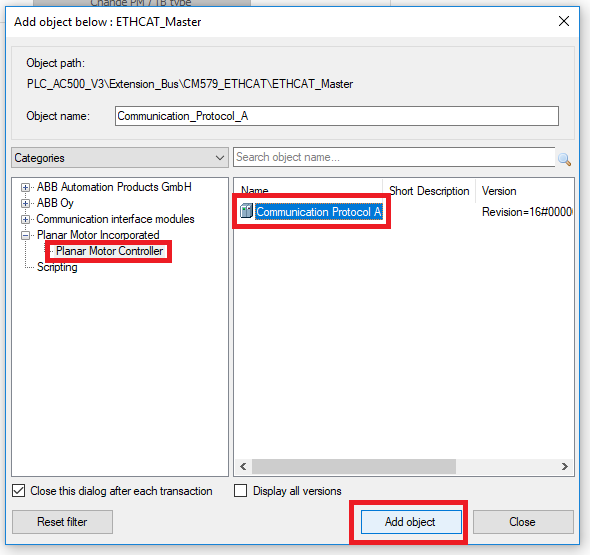
Step 8: Select the Planar Motor Controller->Communication Protocol A then click Add object
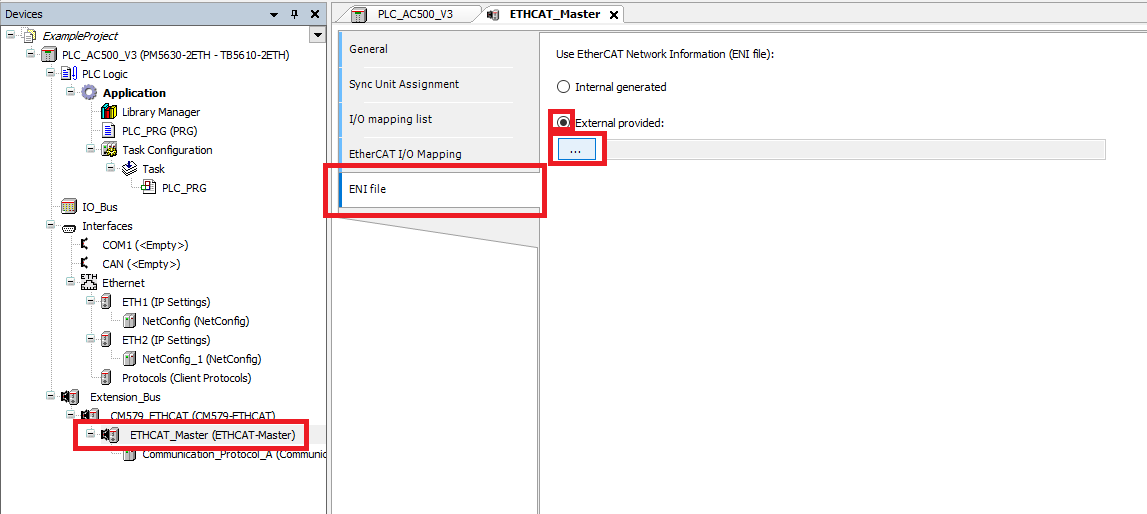
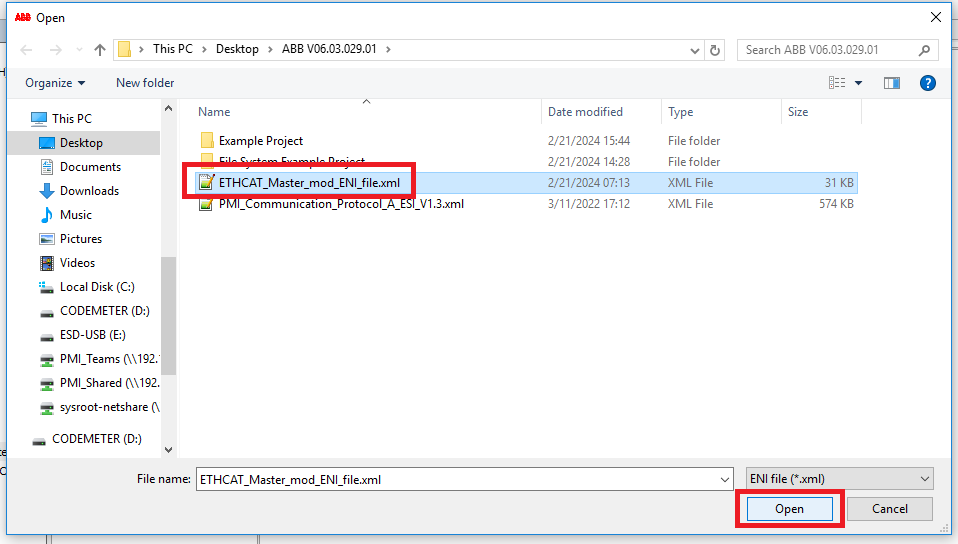
Step 9: Note: as of Automation Builder V2.7 there is a bug with the ENI generator that requires a custom ENI file to resolve. Click ETHCAT_Master, select the ENI file tab, choose External provided, then click the “…” button
Step 10: Navigate to the modified ENI file, then click Open. ABB has told PMI that they will be fixing the ENI generator bug in future releases of Automation Builder
Import and use library
Steps 1-3 are only if you haven’t used the PMC on this Automation Builder install.
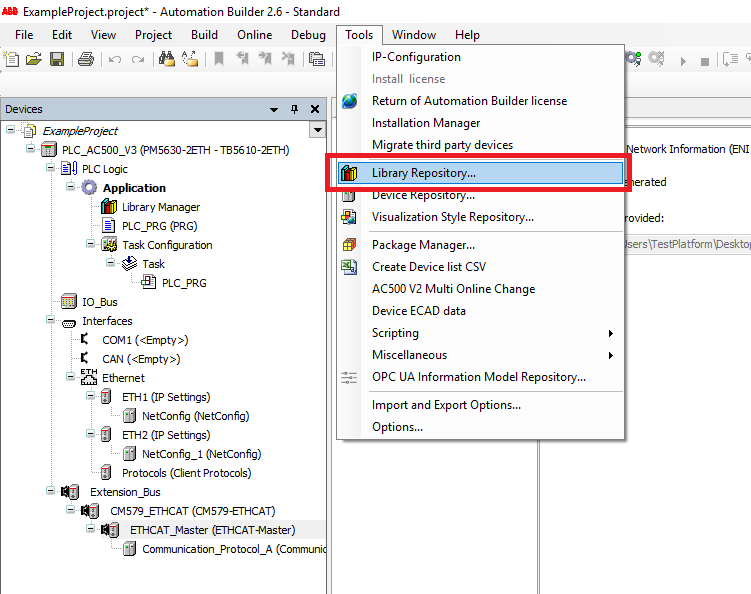
Step 1: Click Tools->Library Repository
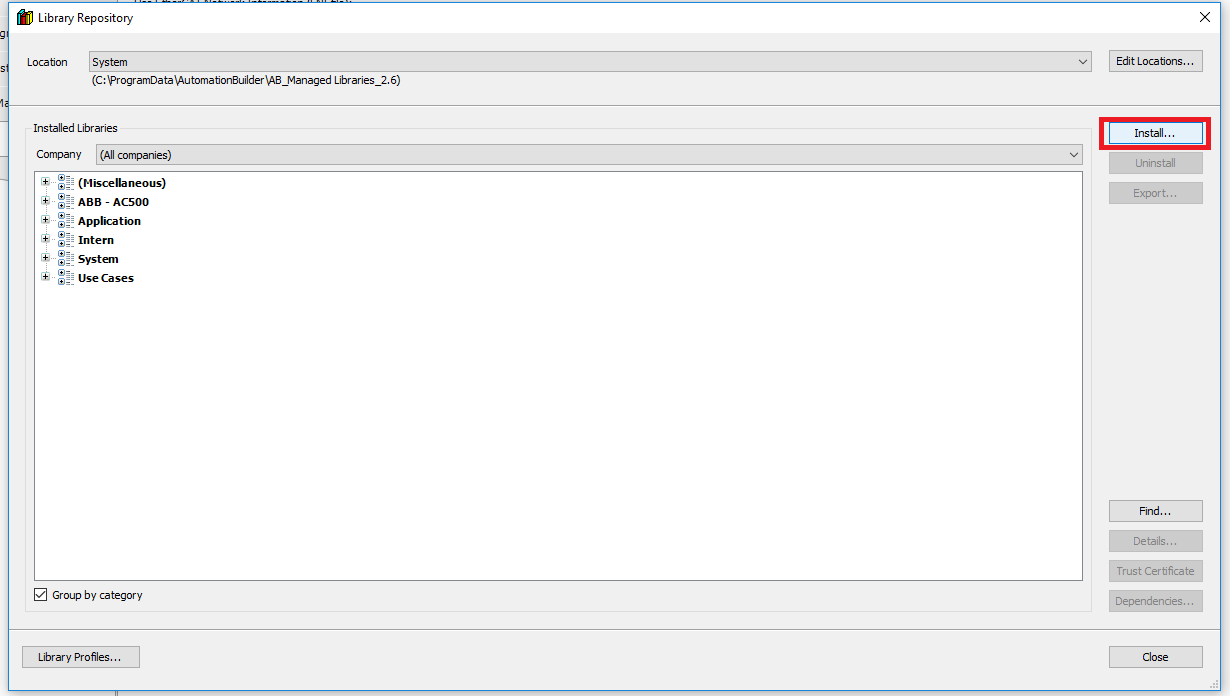
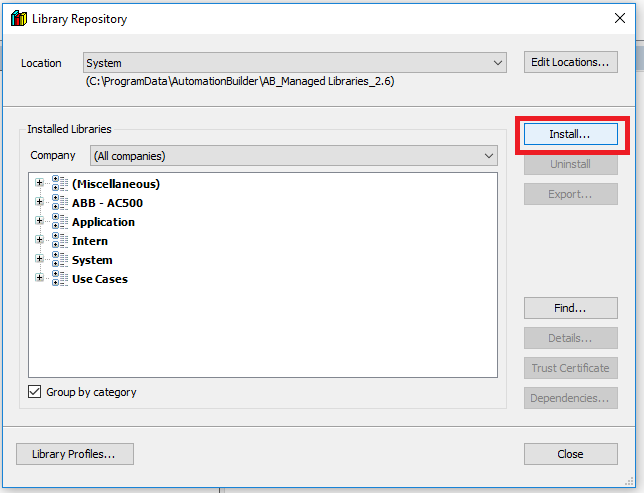
Step 2: In the Library Repository window click Install
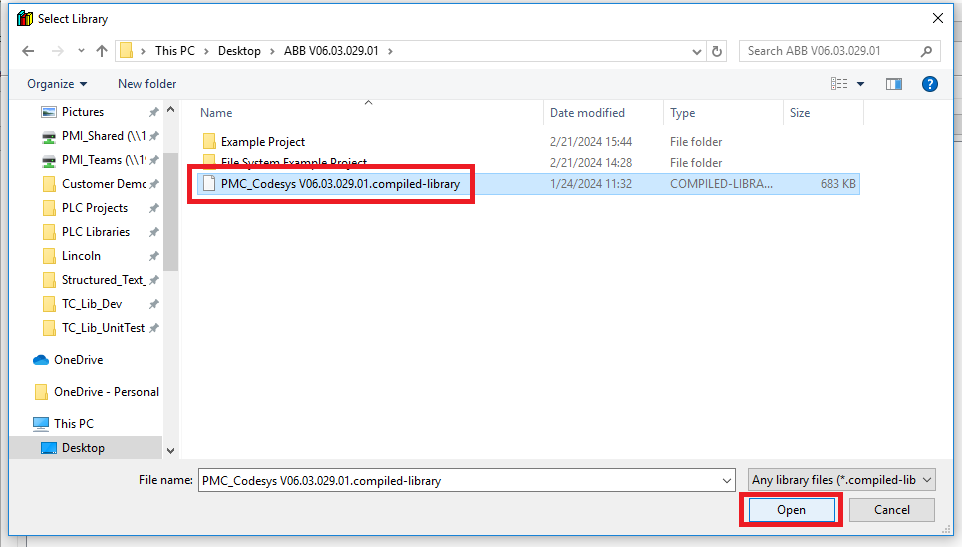
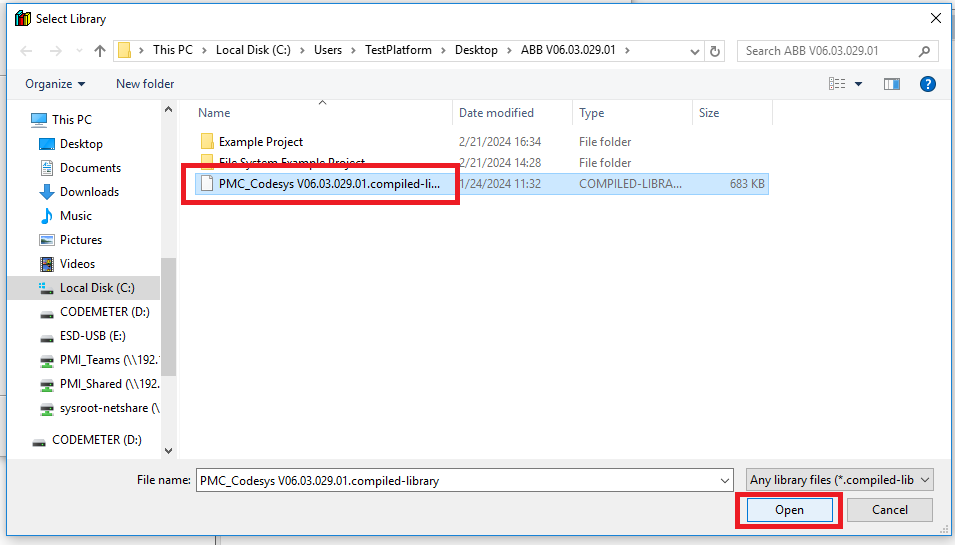
Step 3: In the Select Library window, navigate to the PMC .compiled-library file, select it, and then click Open
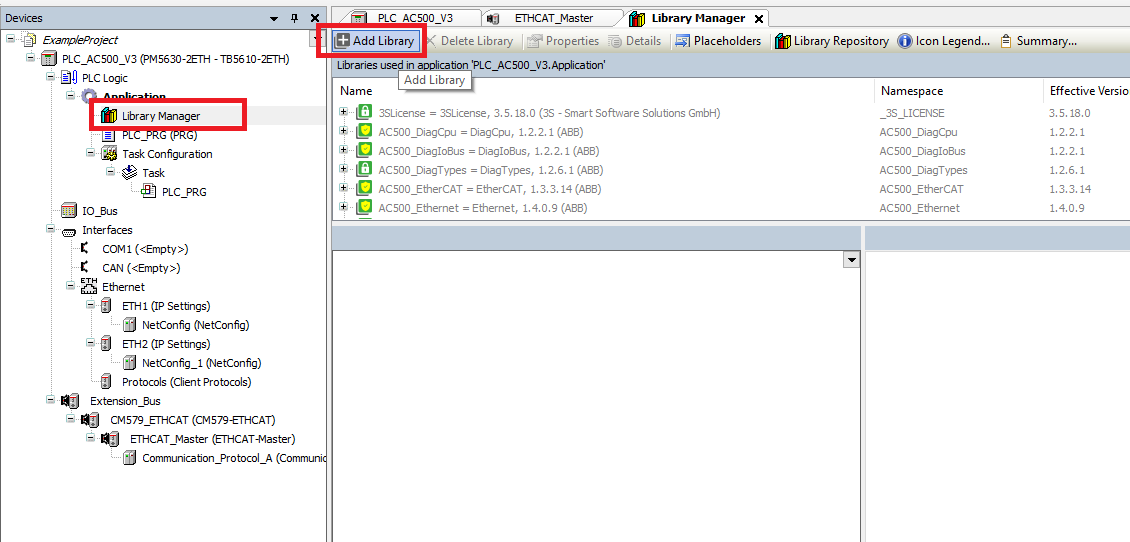
Step 4: Click Library Manager in the Devices tree. Then click Add Library
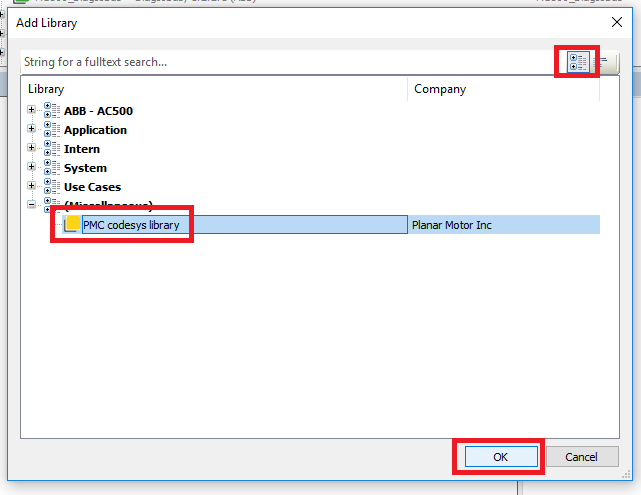
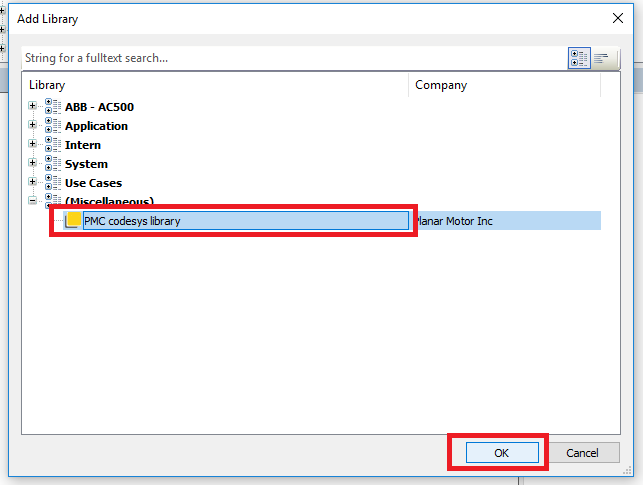
Step 5: In the Add Library window, find the PMC library and then click OK. Switching from List view to Category view is useful here
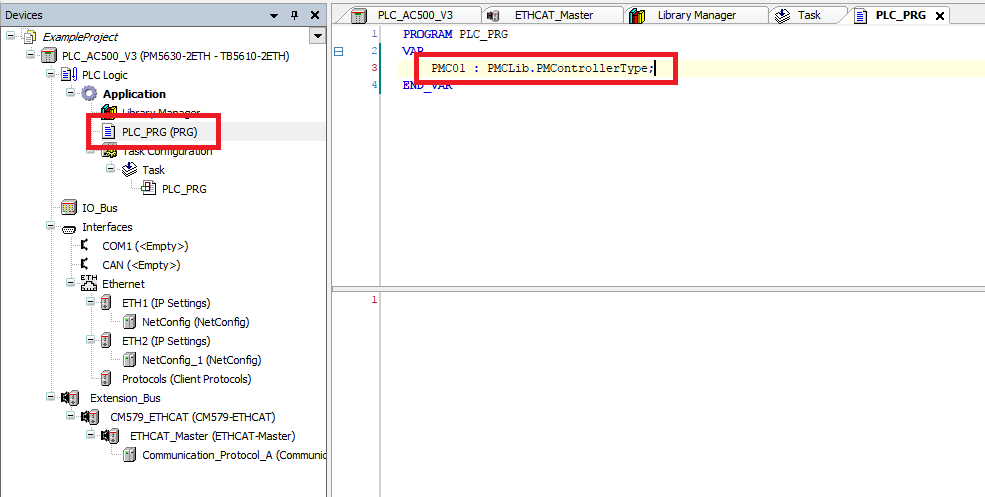
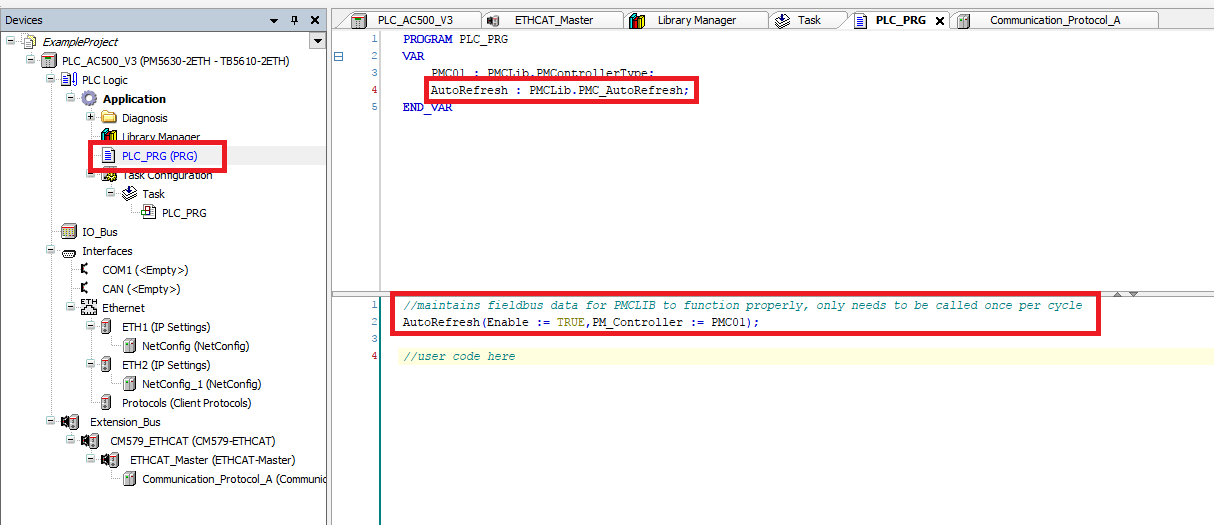
Step 6: Click the PRG in the Devices tree. Declare a PMControllerType variable in the PRG
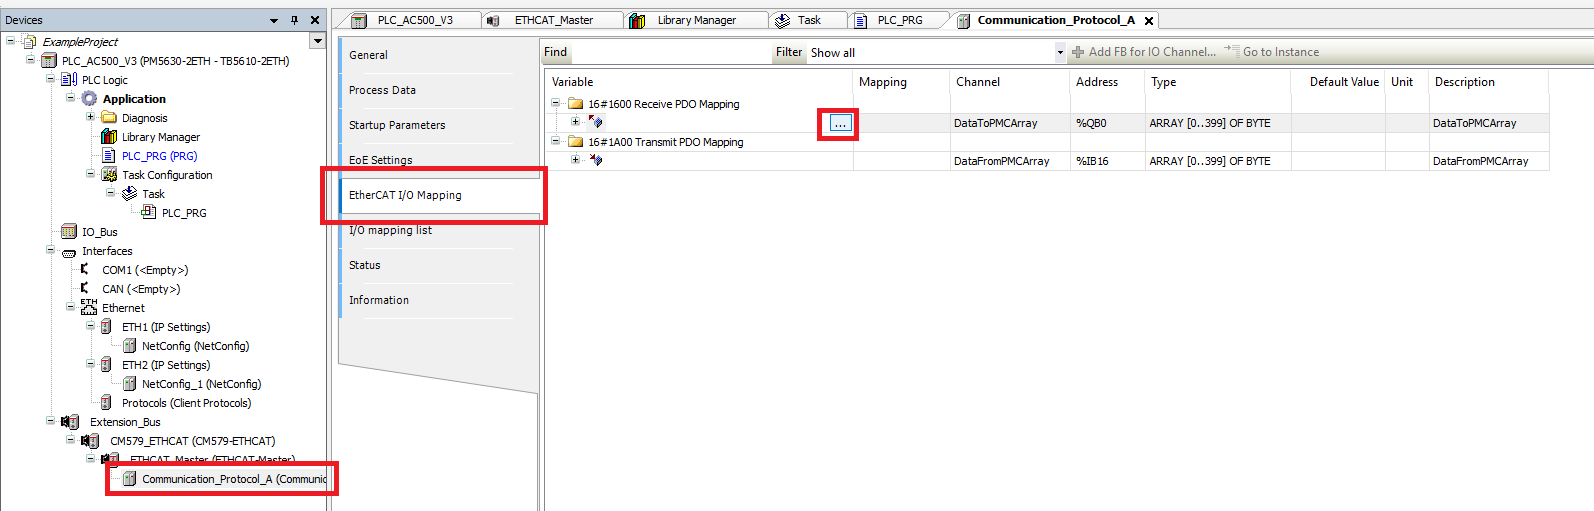
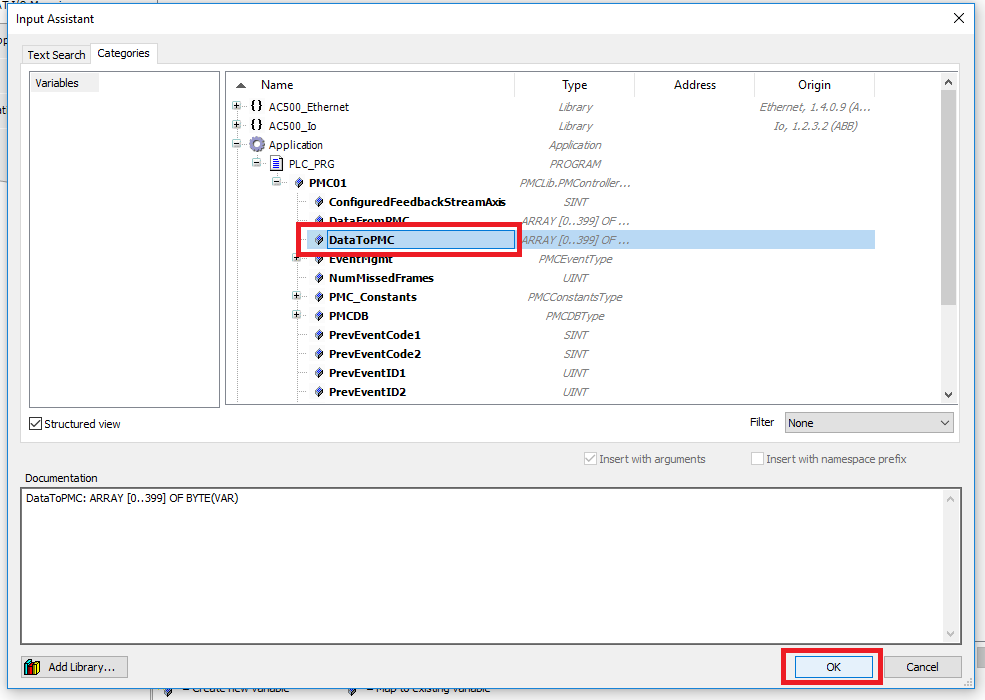
Step 7: Click the PMC Communication_Protocol_A in the Devices tree. In the EtherCAT I/O Mapping tab click the “…” button for DataToPMCArray.
In the Input Assistant select the DataToPMC variable in the PMController variable declared earlier. Then click OK
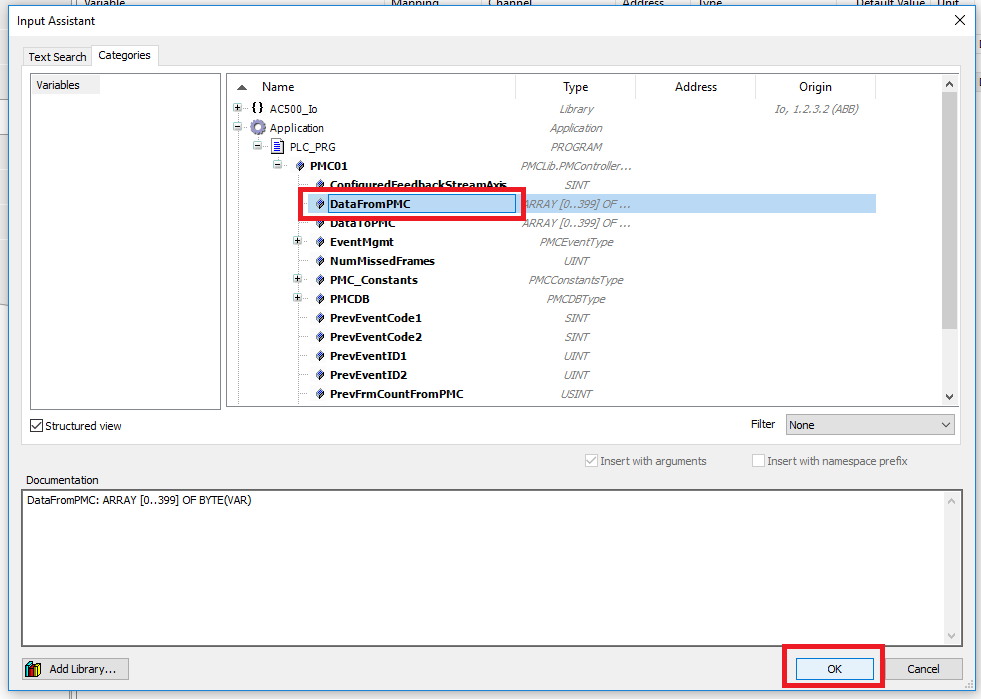
Step 8: Click the “…” button for DataFromPMCArray. In the Input Assistant select the DataFromPMC variable in the PMController variable declared earlier. Then click OK

Step 9: Before using the PMC library, make sure that one and only one instance of the PMC_AutoRefresh function block is declared and that the PMC_AutoRefresh function block is called once and only once per PLC cycle
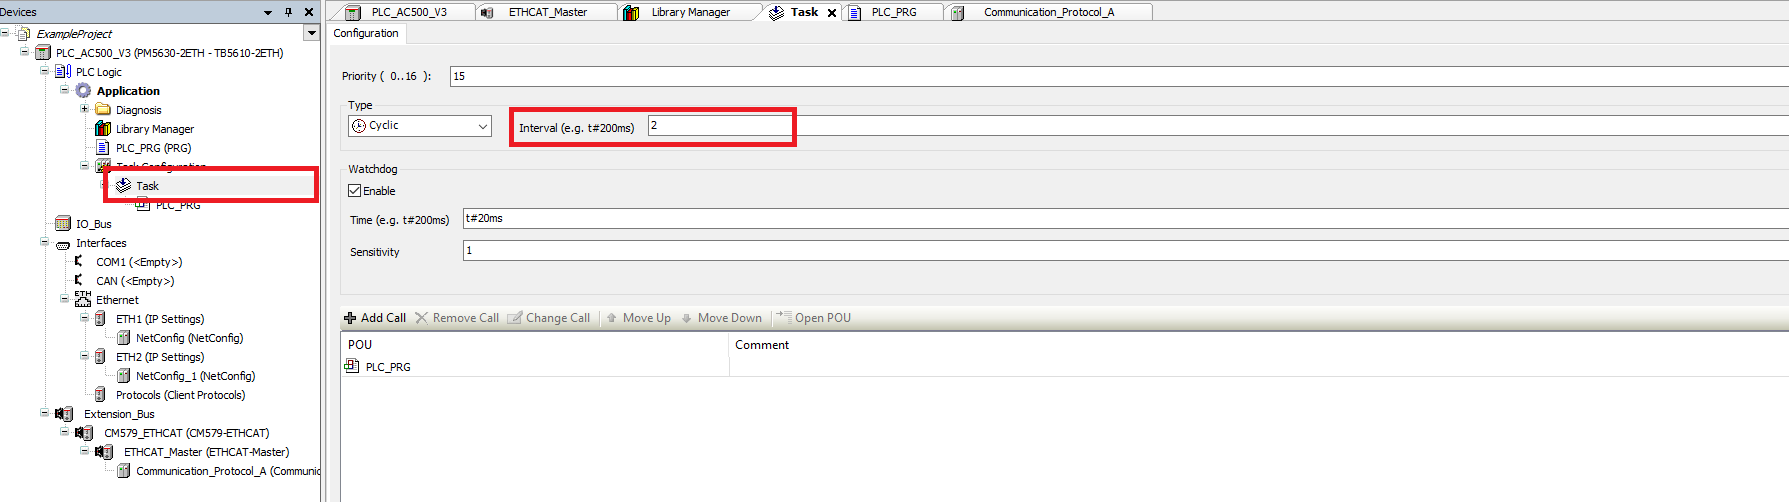
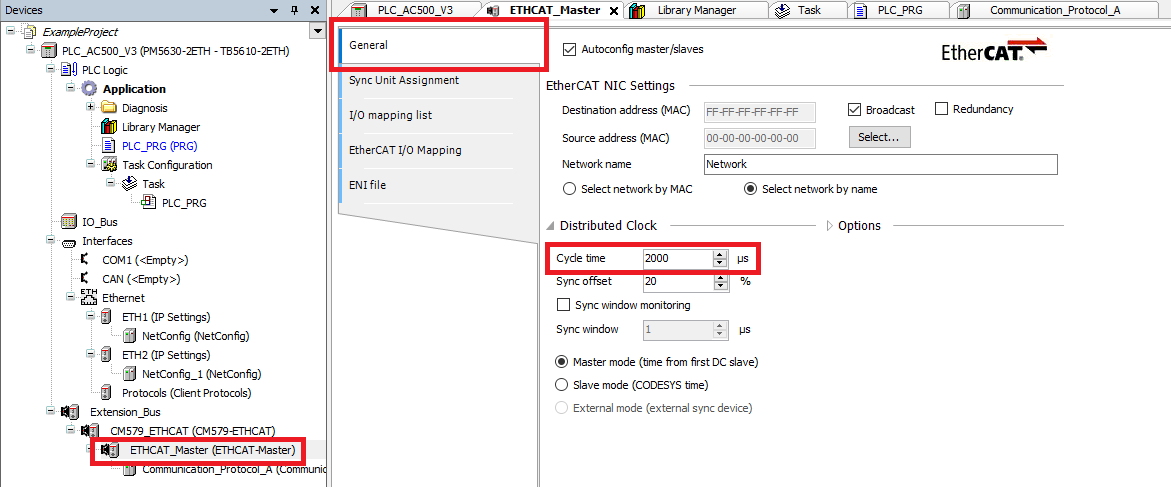
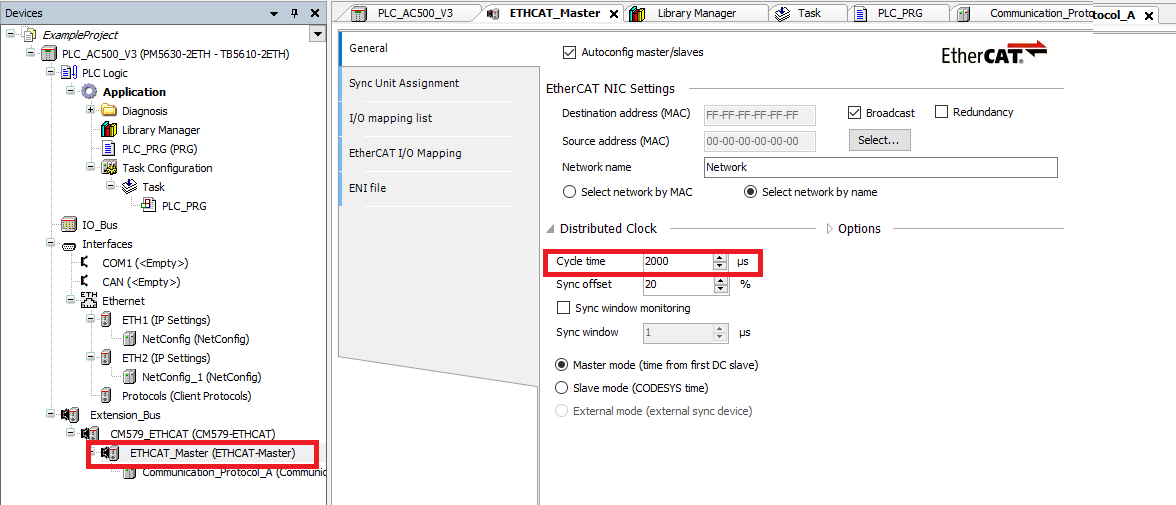
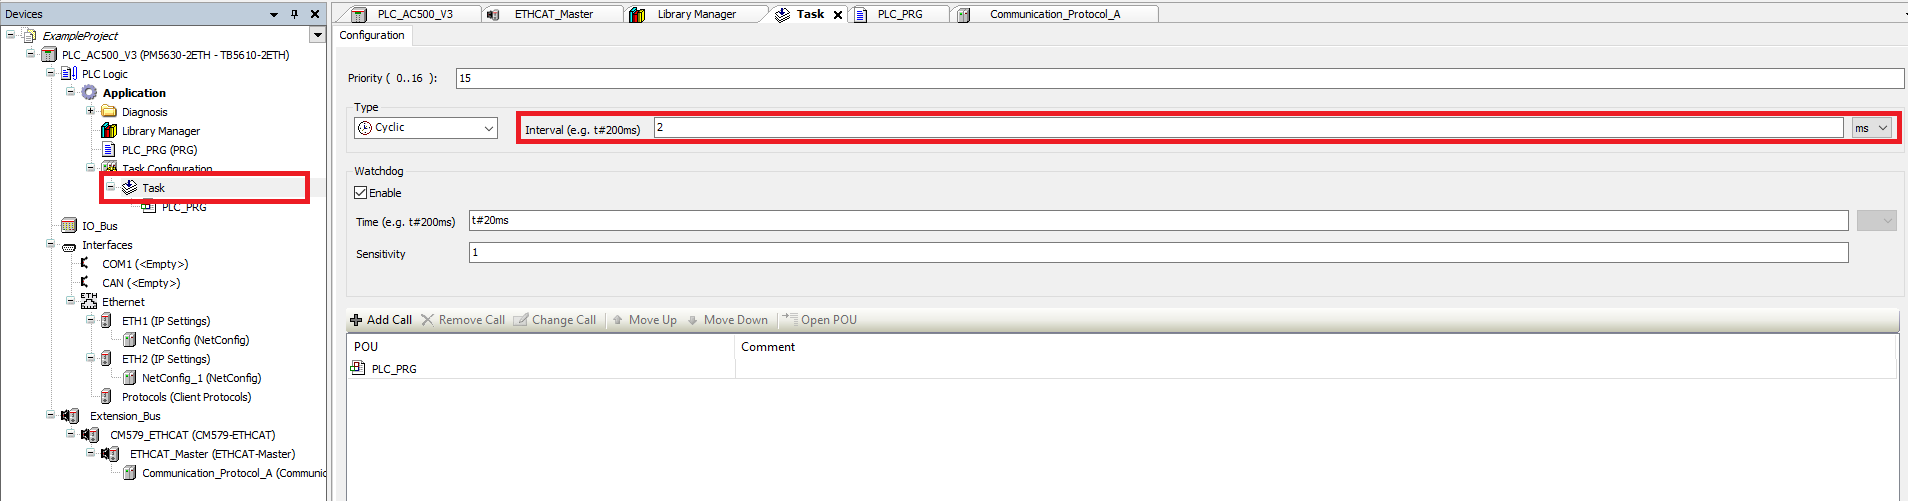
Step 10: Lastly make sure that the Cycle Time of the EtherCAT_Master matches the Cycle Interval of the Task
Upgrade Library
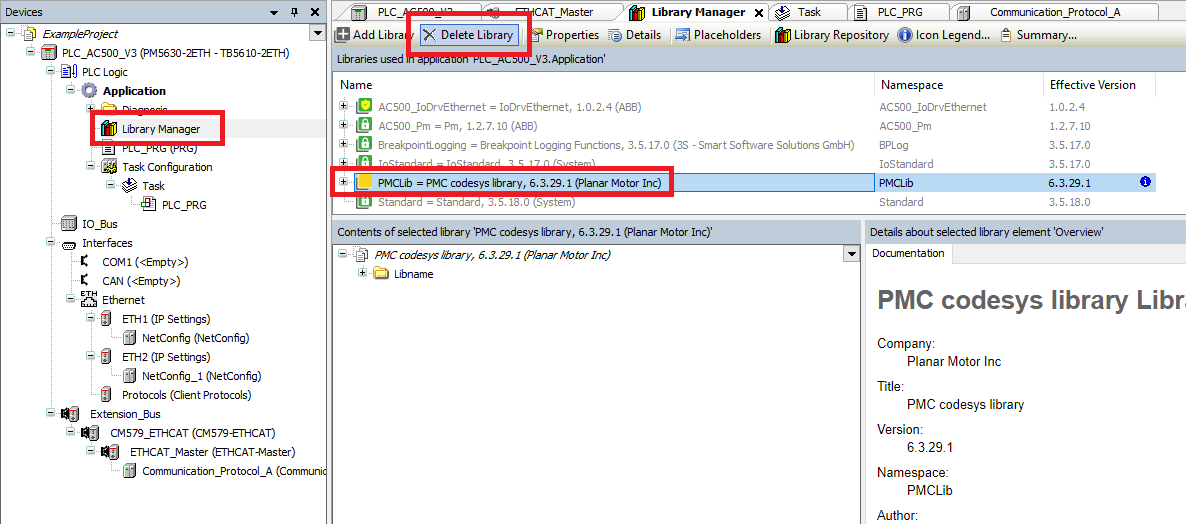
Step 1: Go into the Library Manager. Select the current PMC library and then click Delete Library
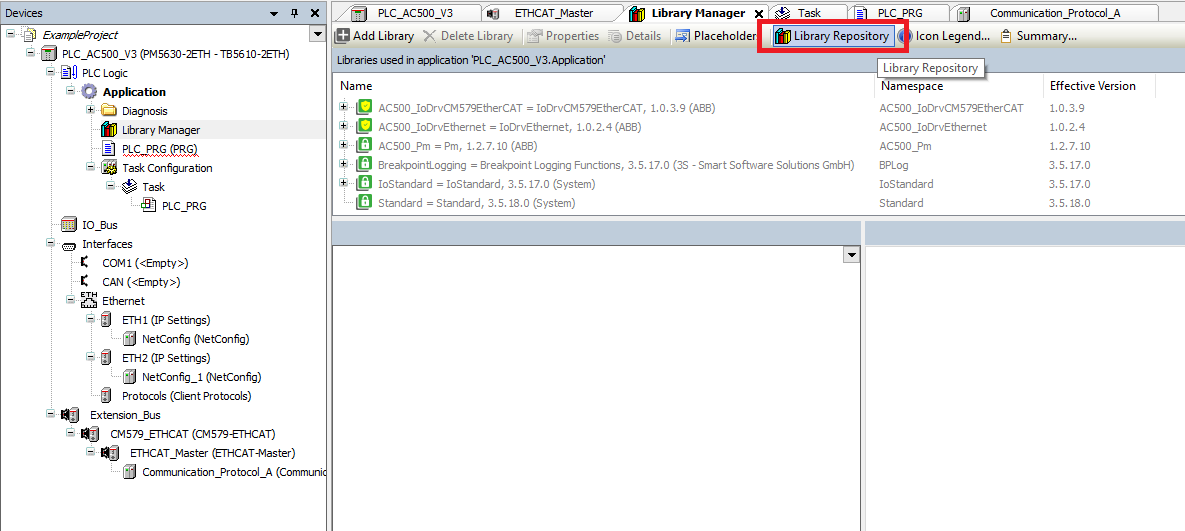
Step 2: Then open the Library Repository
Step 3: Click the Install button
Step 4: Navigate to the new PMC .compiled-library file and click Open
Step 5: Click the Close button in the Library Repository once the library installs

Step 6: Back in the Library Manager click the Add Library button

Step 7: In the Add Library window select the new PMC library then click OK
Setup Streaming (Optional) - only for synchronization with external axis
Step 1: Click the PMC Communication_Protocol_A in the Devices tree. Choose DC for synchronization for the Distributed Clock
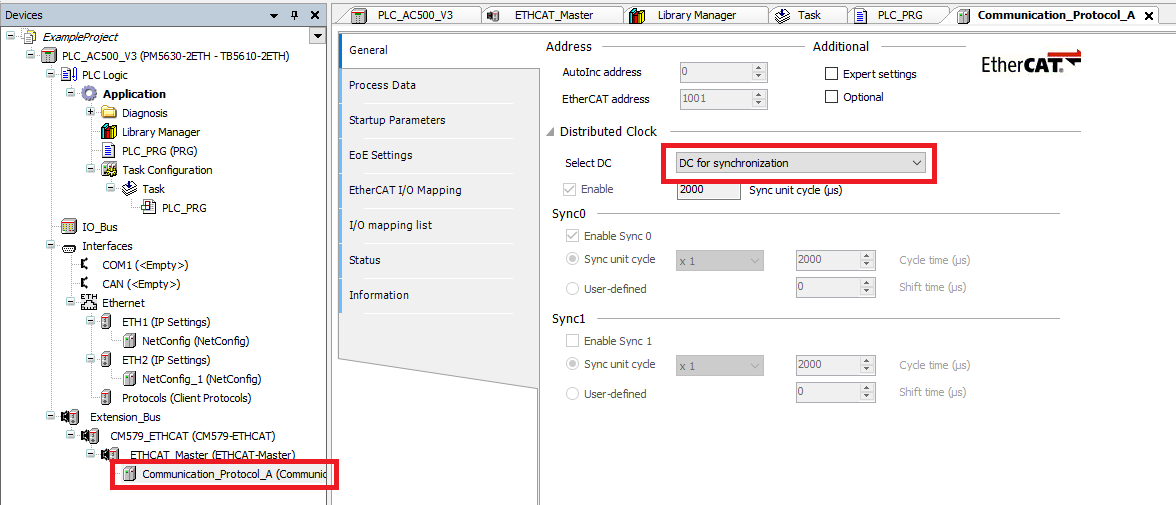
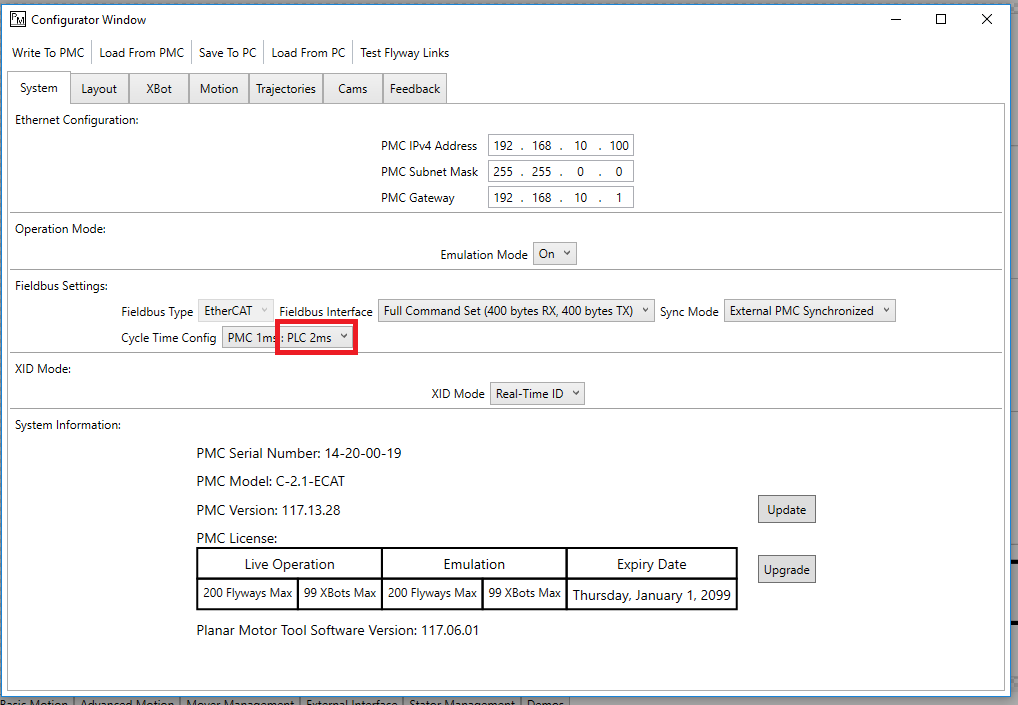
Step 2: Make sure that the Distributed Clock Cycle time, the Task cycle Interval, and the PMC’s Cycle Time Config PLC cycle all match
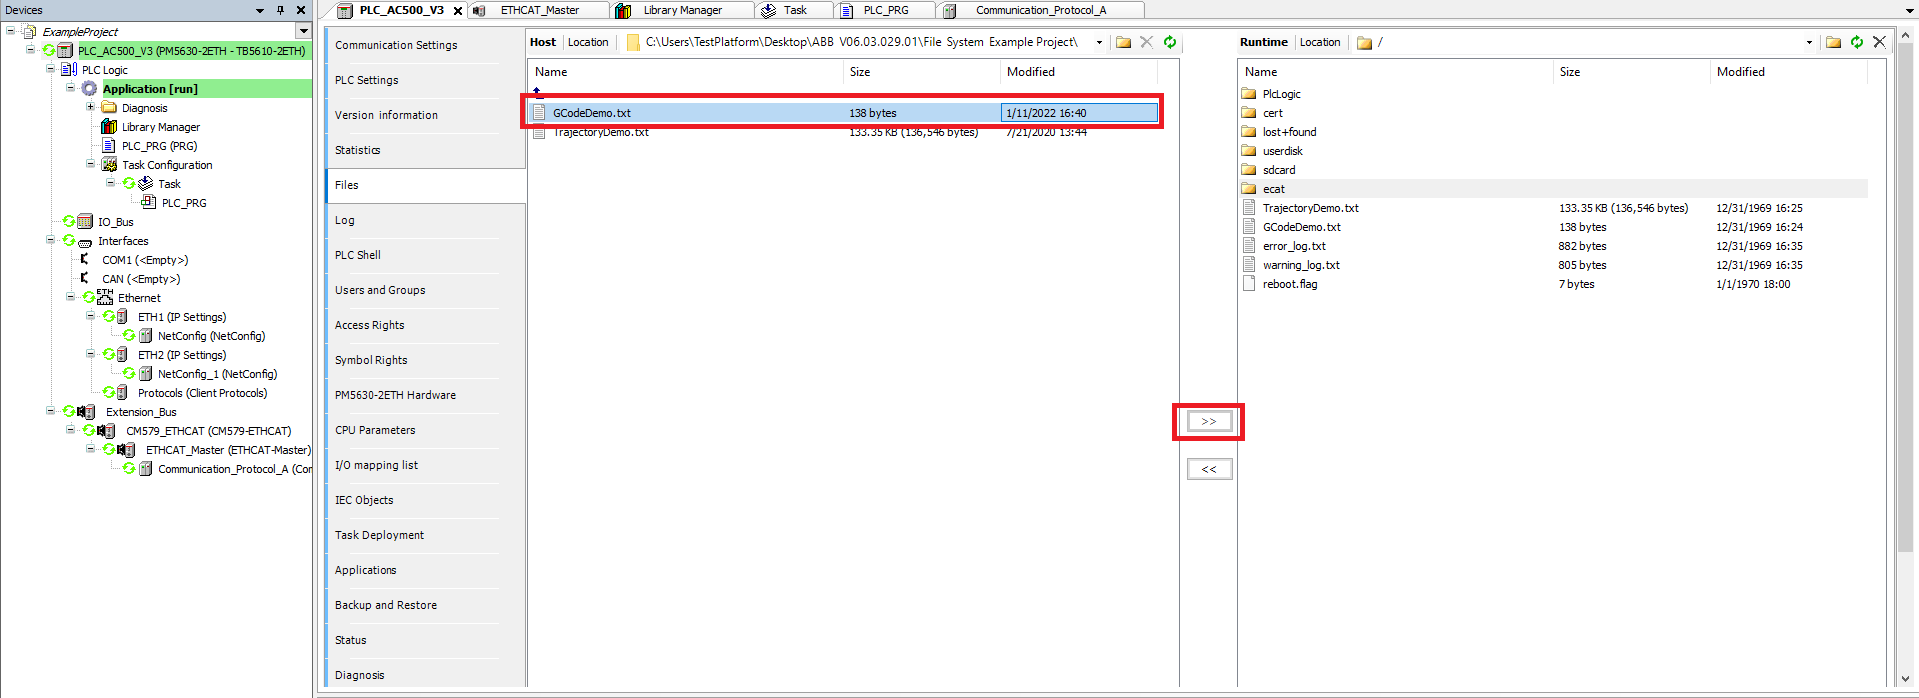
File I/O on the PLC (Optional)
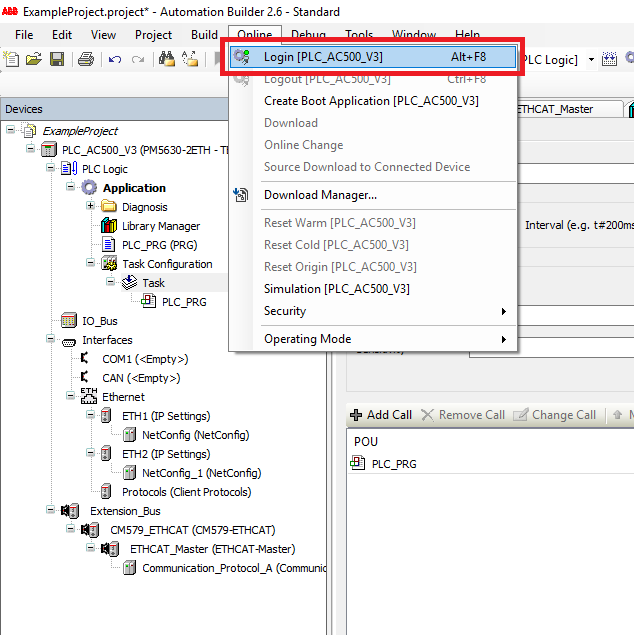
Step 1: You need to be Online to access the PLC’s file system. Click Online->Login
Step 2: Click the PLC in the Devices tree and select the Files Tab. Click the Refresh button on the right to update the PLC files
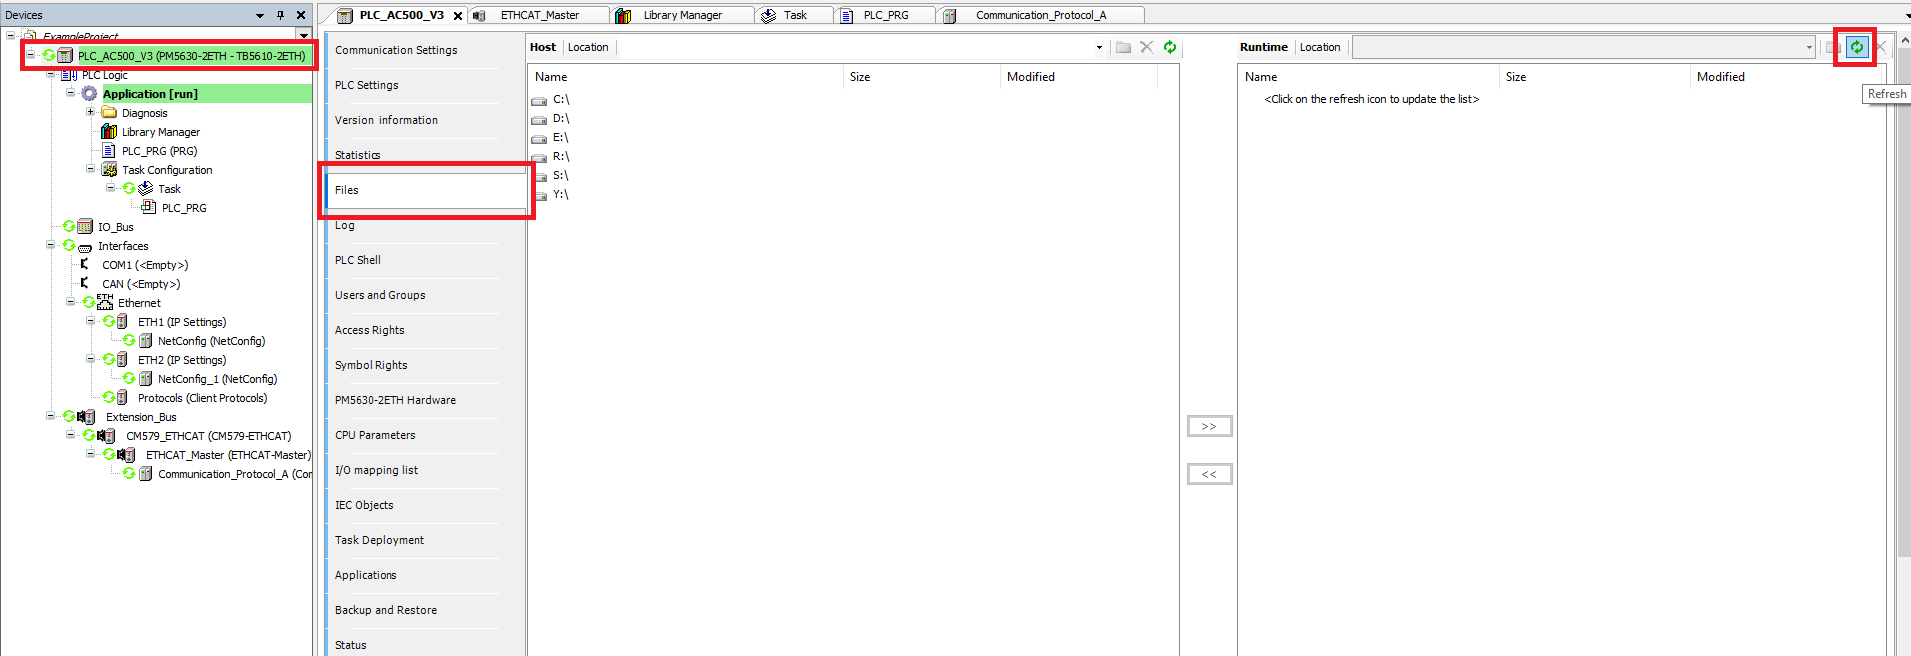
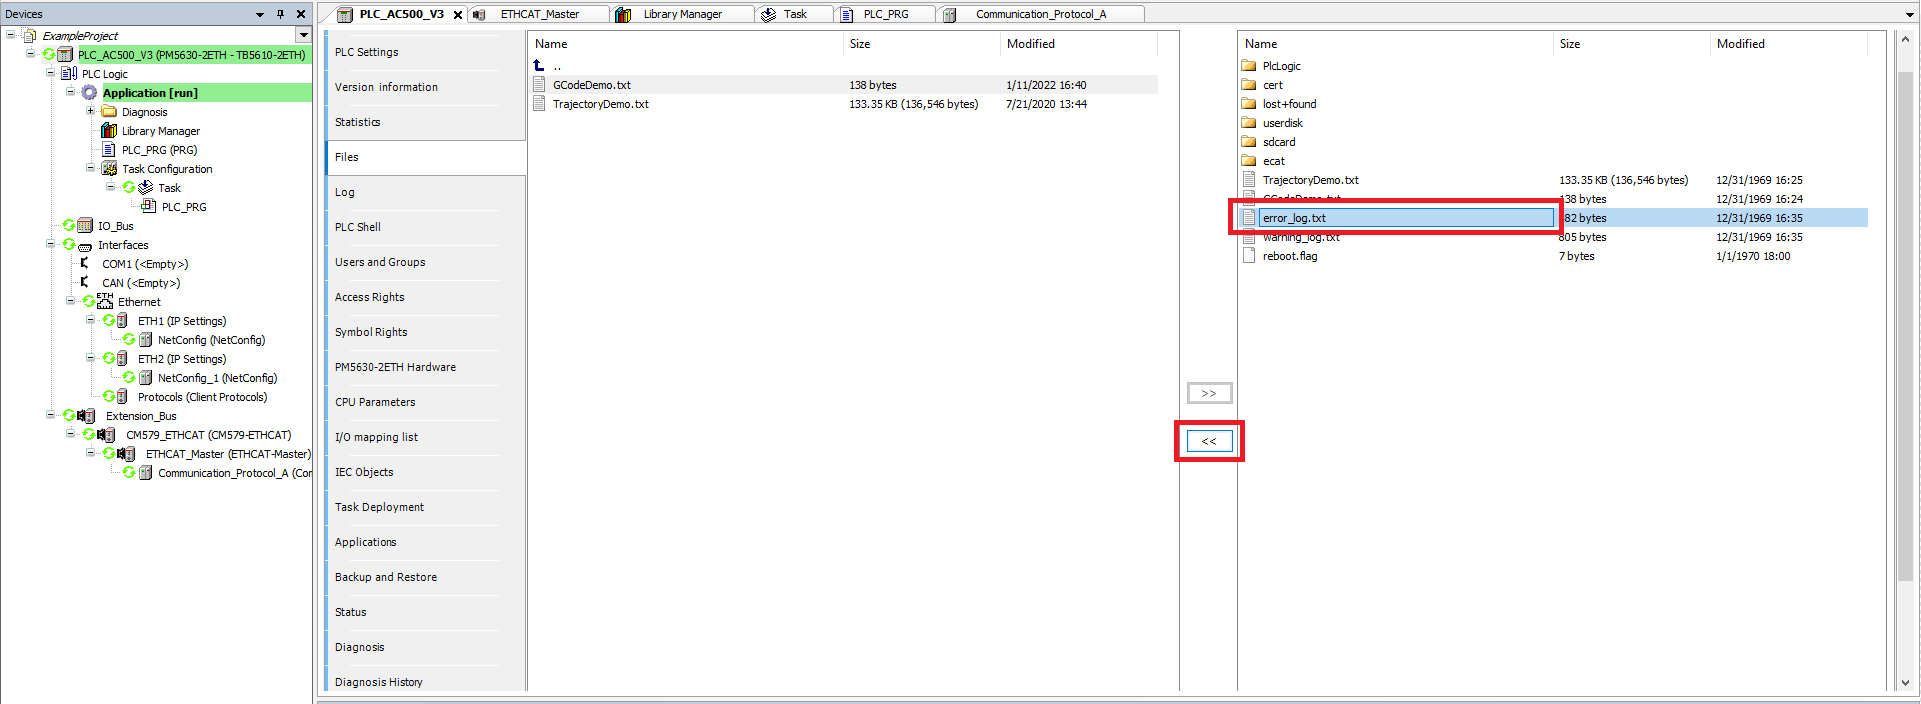
Step 3: You can then select file and use the >> or << buttons to move files from the PC to the PLC or from the PLC to the PC