
Library Setup
Creating a new project
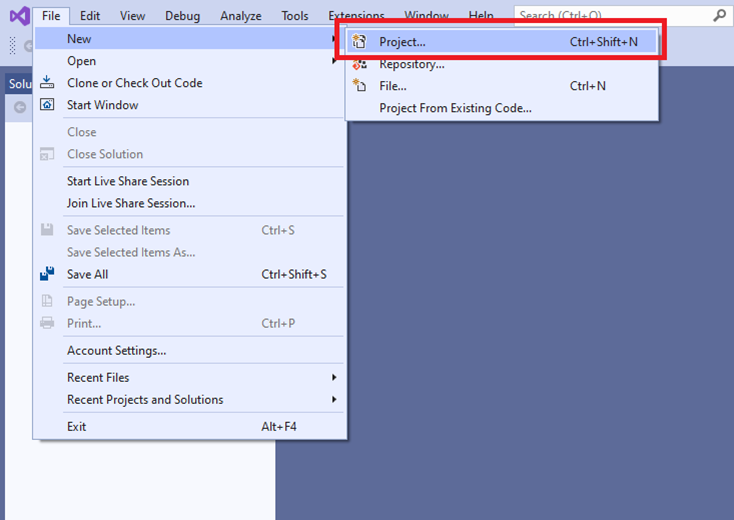
Step 1: In Visual Studio click File->New->Project
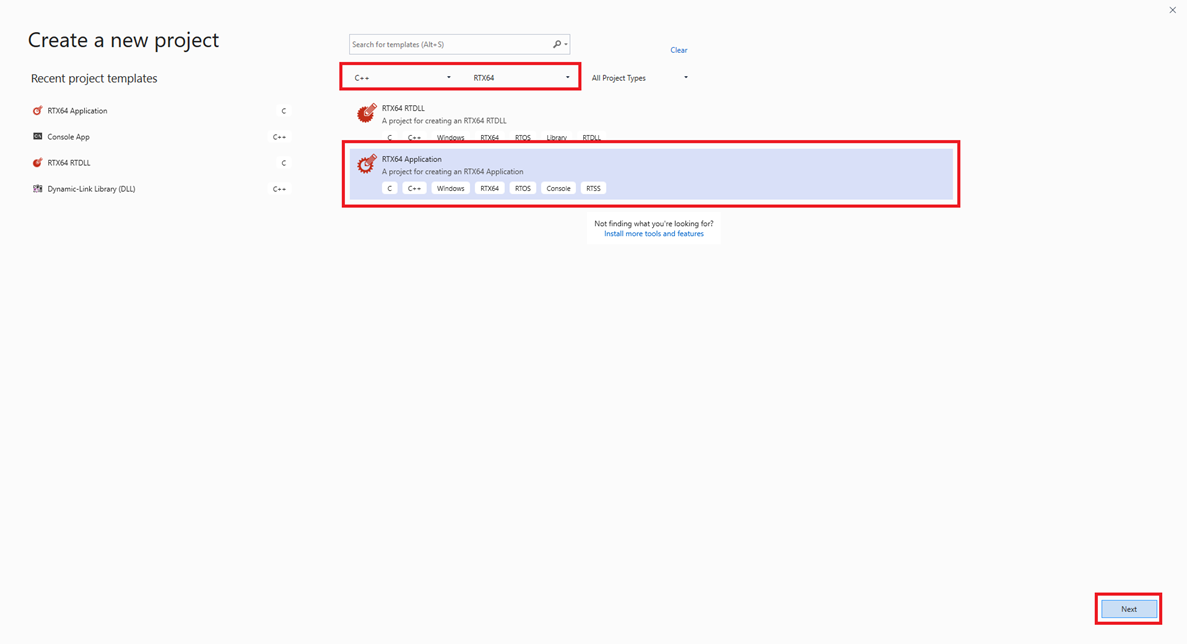
Step 2: Select C++ -> RTX64 then choose RTX64 Application, then click Next
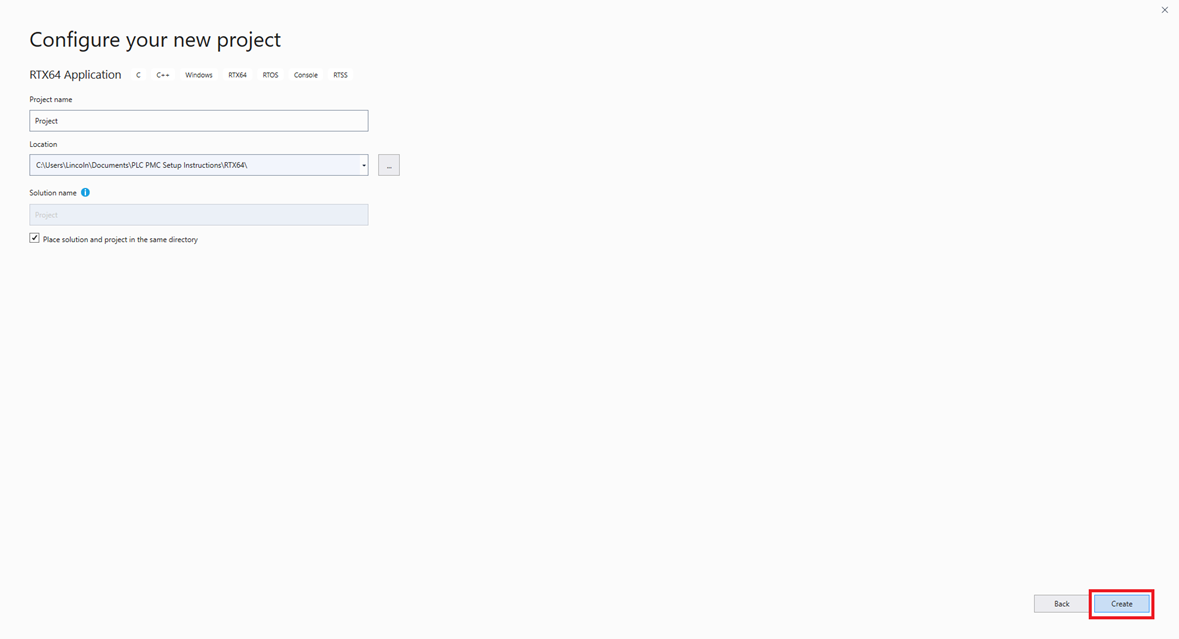
Step 3: In the Configure your new project window choose the project name and location, then click Create
Step 4: In the Create a RTX64 RTSS Application window leave the options on the defaults and click Finish

Step 5: If this error occurs, then follow steps 6 and 7. Otherwise, skip to 8.
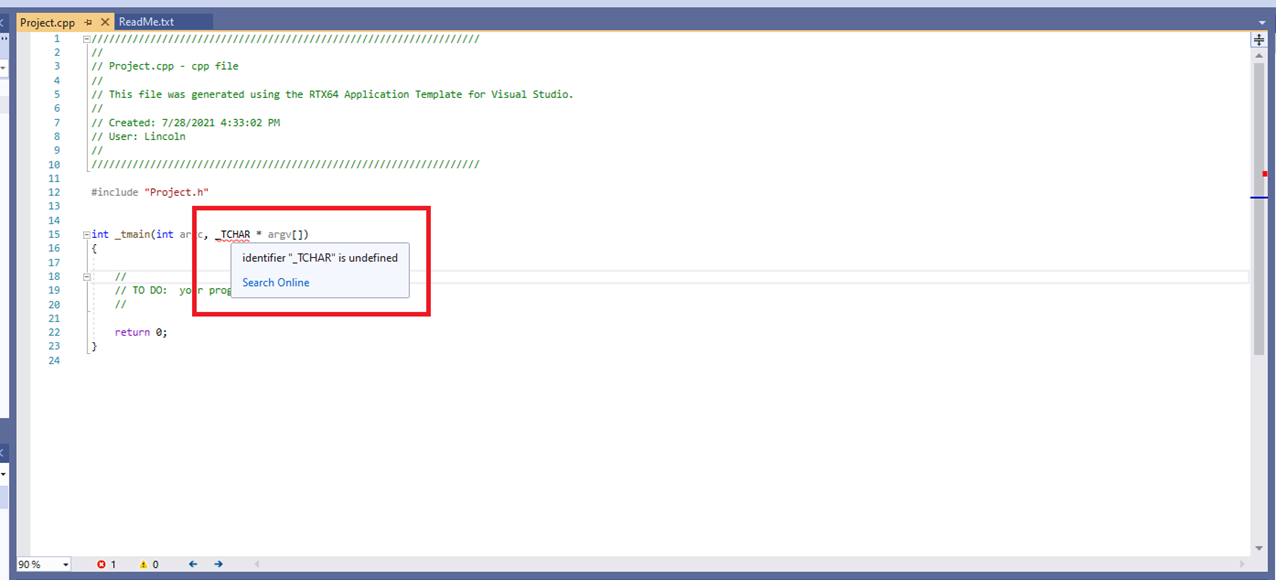
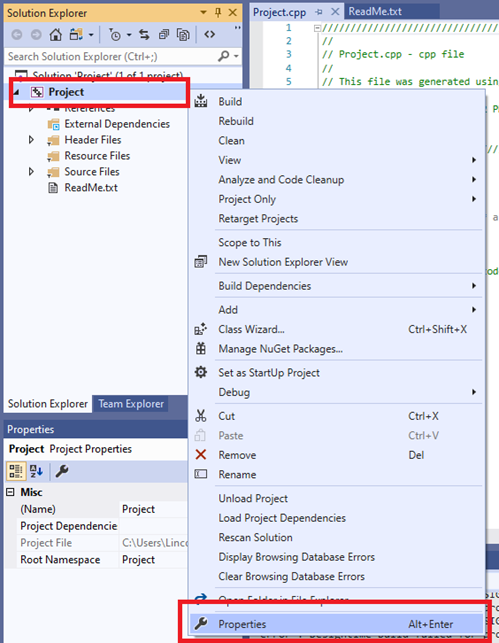
Step 6: Right click on the project in Solution Explorer and click Properties
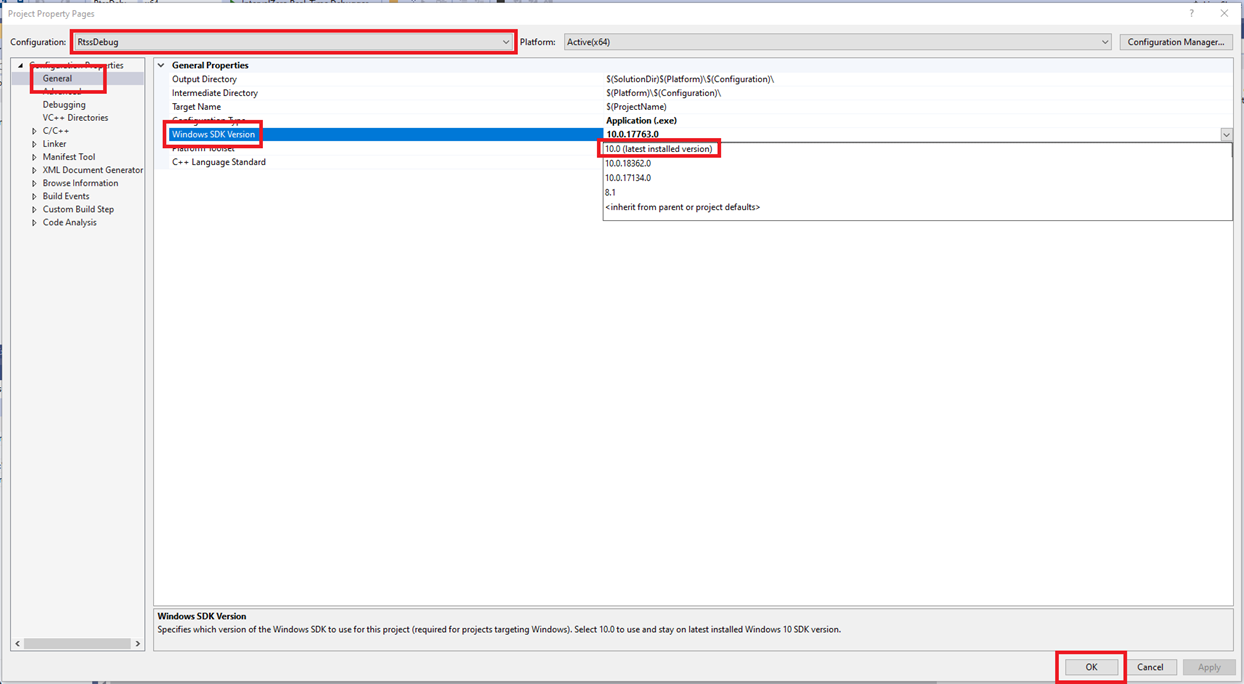
Step 7: In the Project Property Pages, make sure the selected Configuration is either RtssDebug or RtssRelease (whichever one the user is planning on using). In the Configuration Properties, select General, then change the Windows SDK Version to 10.0 (latest installed version).
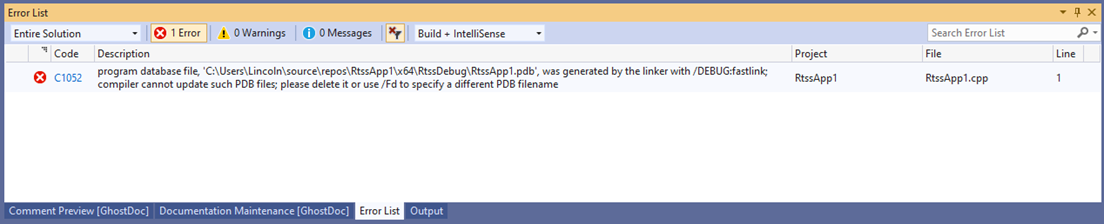
Step 8: If you encounter a C1052 error when performing a partial build follow step 9. Otherwise, the project setup is finished.
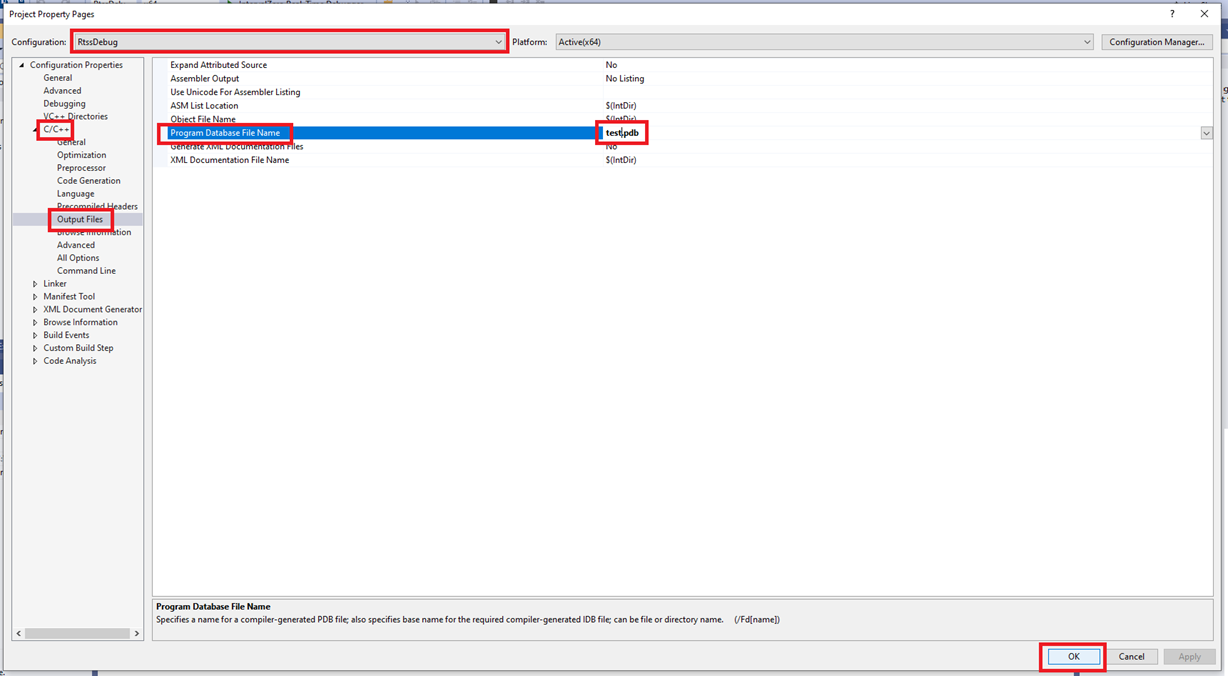
Step 9: Open the Project Property Pages and select C/C++->Output Files in the Configuration Properties, then change the Program Database File Name from the default to a new one, eg. “test.pdb”
Setup Fieldbus
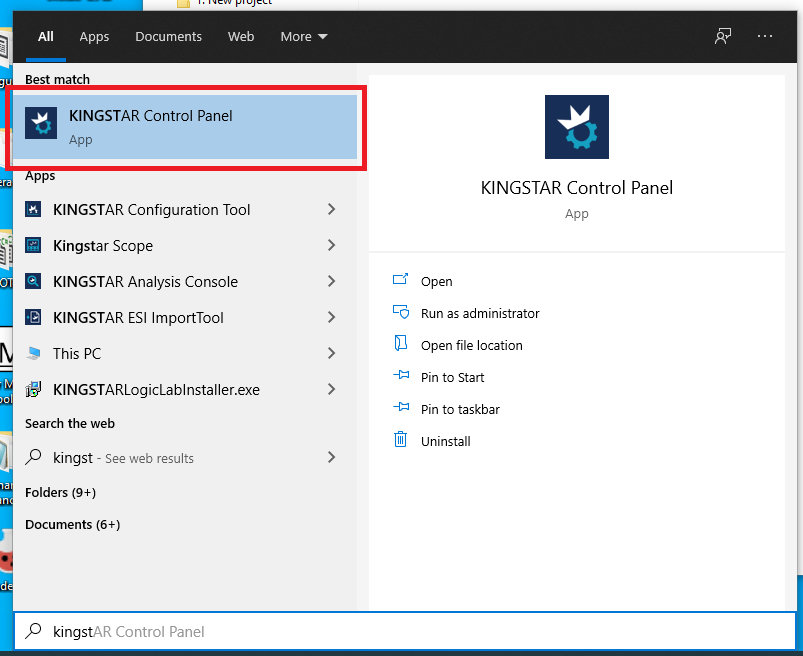
Step 1: Open the KINGSTAR Control Panel
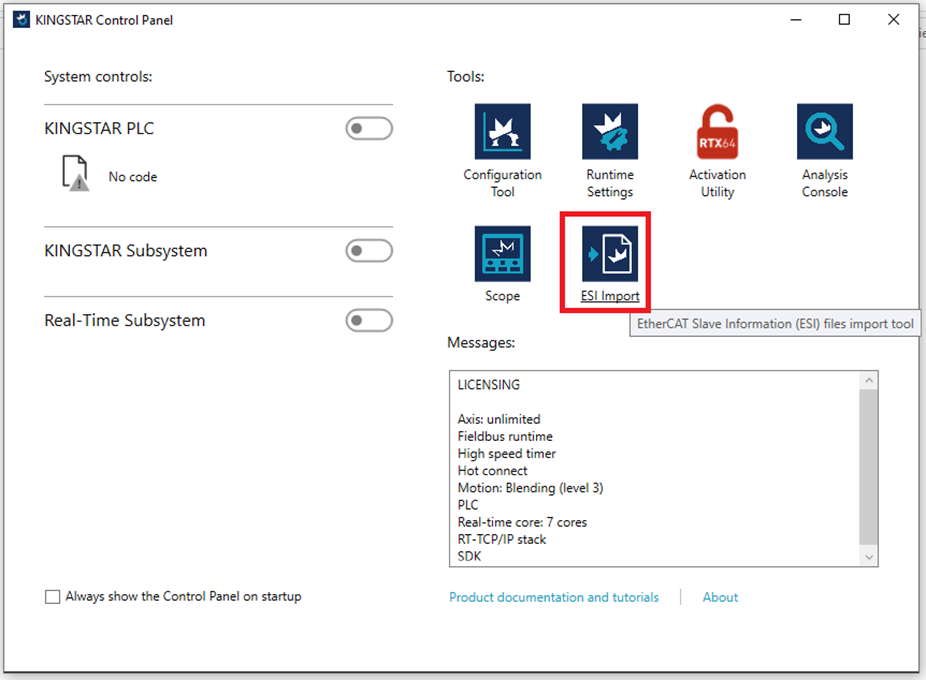
Step 2: In the KINGSTAR Control Panel open the ESI Import tool
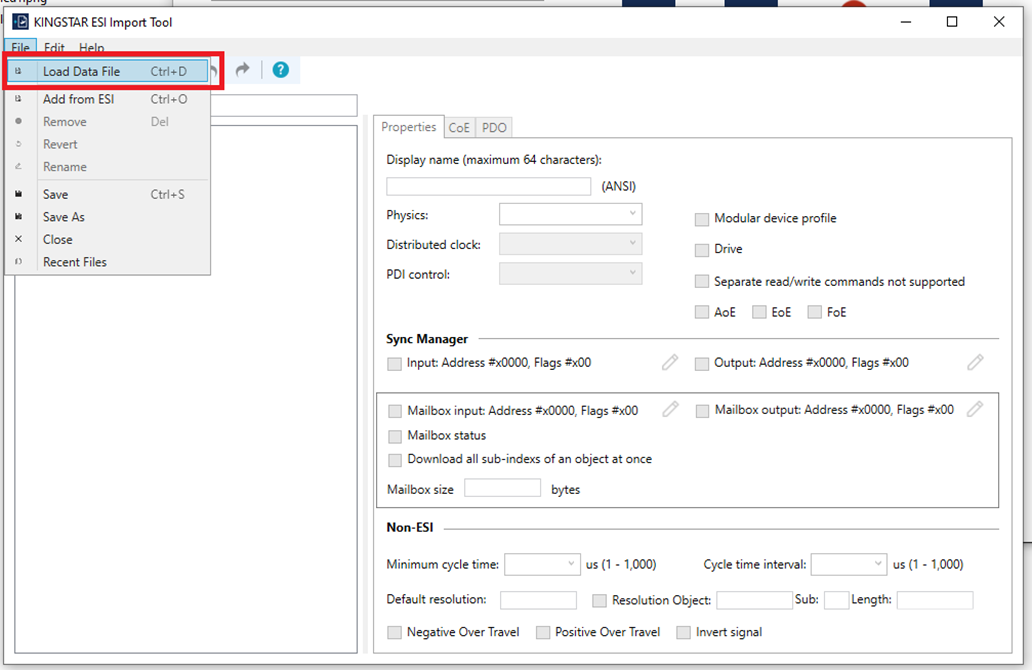
Step 3: In the KINGSTAR ESI Import Tool click File->Load Data File.
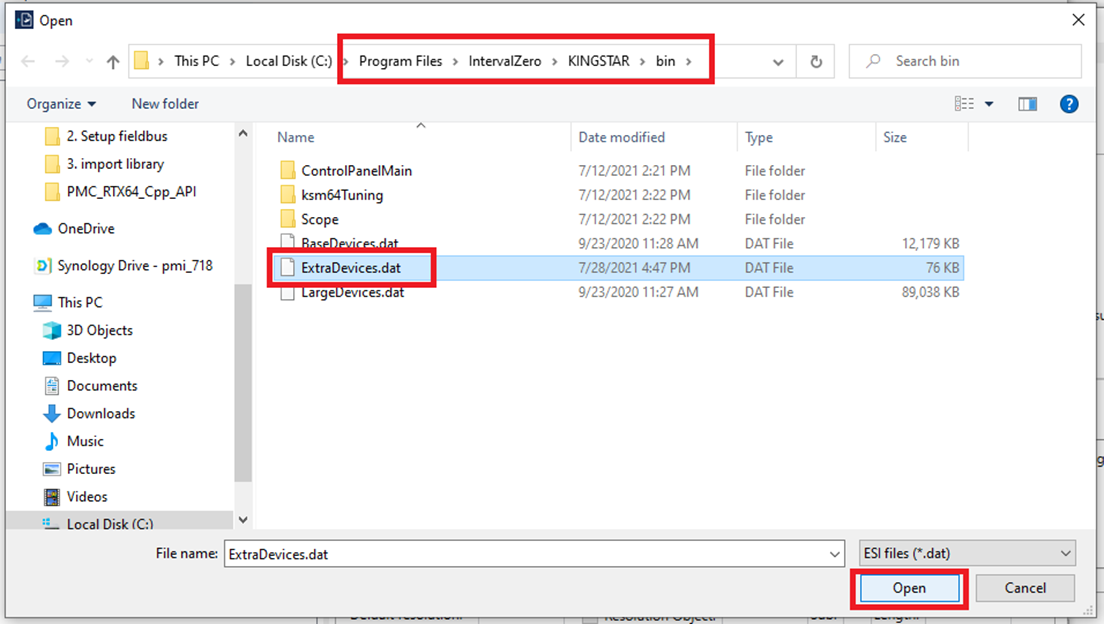
Step 4: Browse to the KINGSTAR directory (Program Files->IntervalZero->KINGSTAR->bin) and select ExtraDevices.data and click Open. If you have imported other ESI files before, then another window will appear asking which of the already imported devices you would like to load. Load all of them
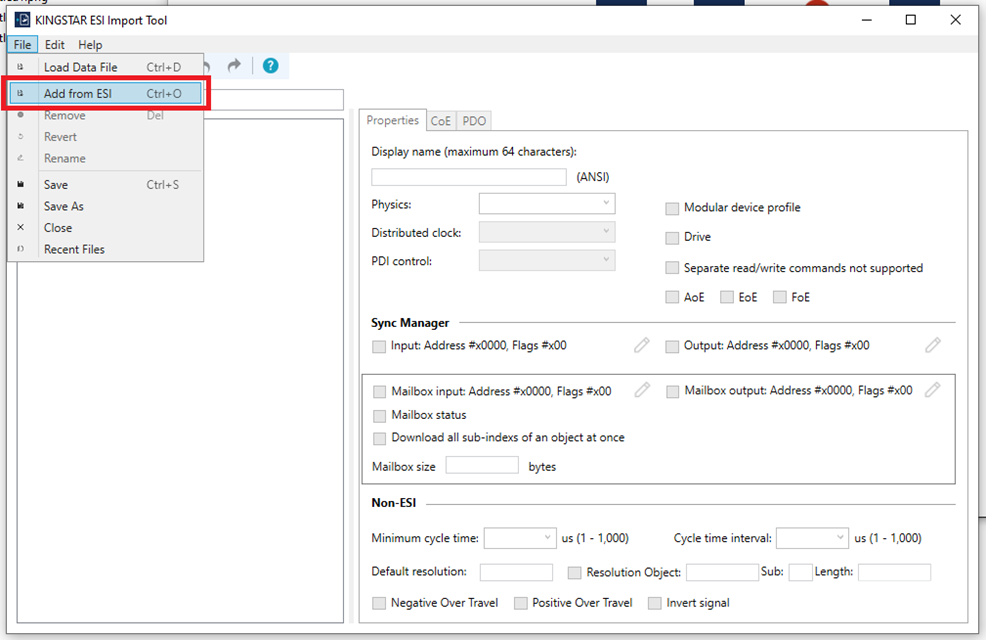
Step 5: Click File->Add from ESI
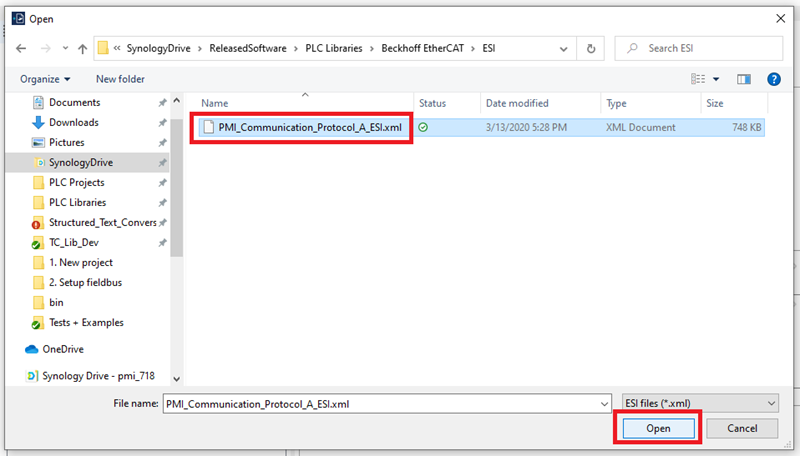
Step 6: Browse to the location of the included PMC ESI file, select it, and then click Open
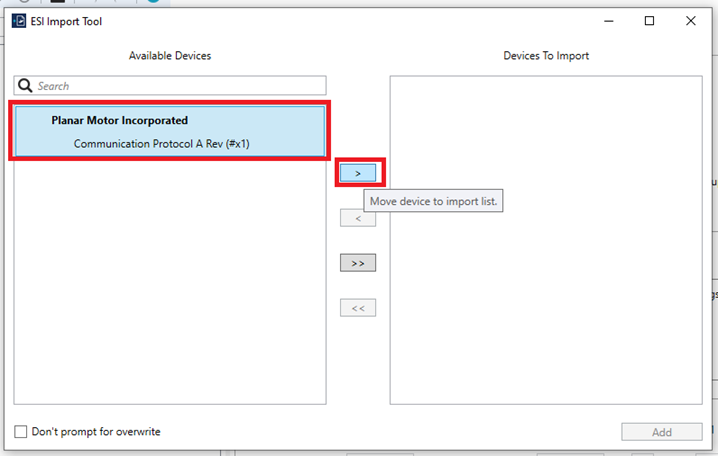
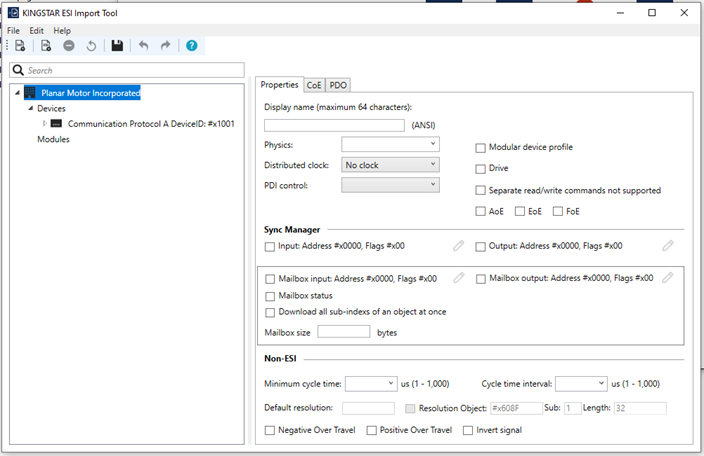
Step 7: In the next window select the Planar Motor Incorporated device in the Available Devices and move the device to the import list
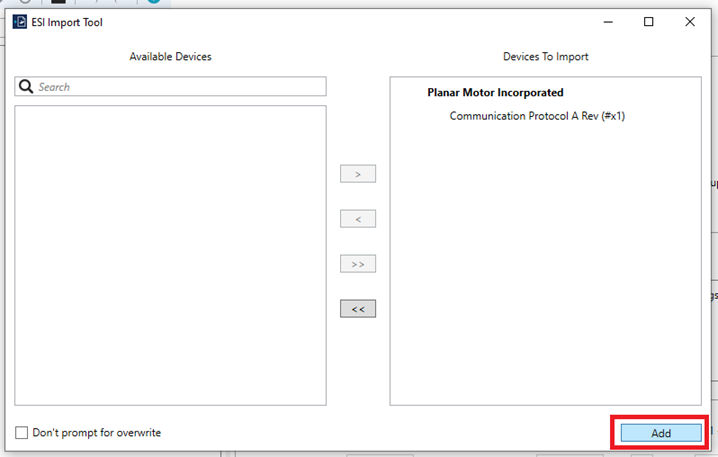
Step 8: Click Add
Step 9: The Planar Motor Incorporated device Conmmunication Protocol A will then appear in the device list
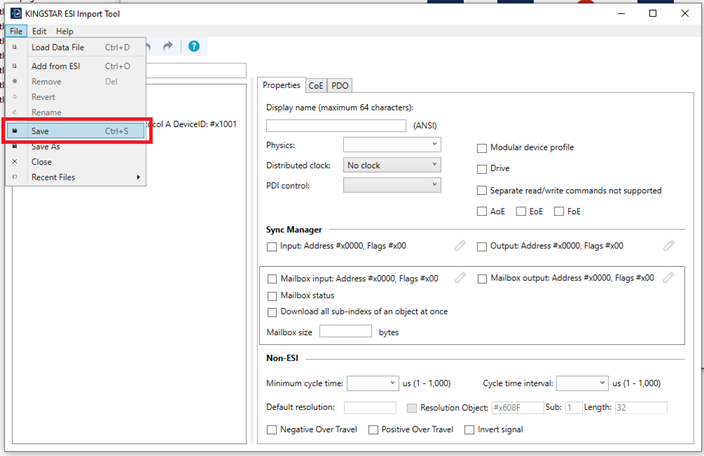
Step 10: Then click File->Save
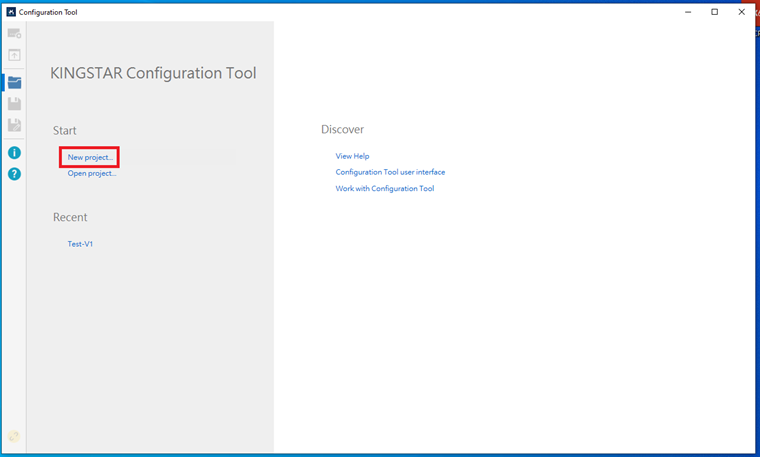
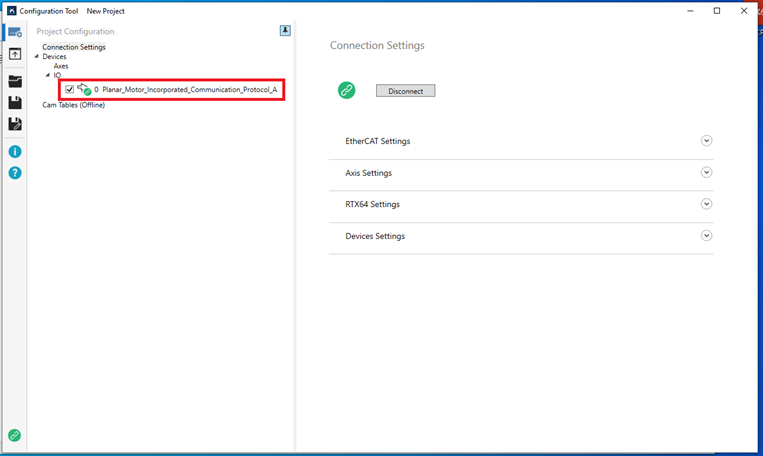
Step 11: Steps 11-14 are for testing the connection with the PMC. In the KINGSTAR Control Panel, open the Configuration Tool

Step 12: In the KINGSTAR Configuration Tool select New project
Step 13: In the Connection Settings click Connect
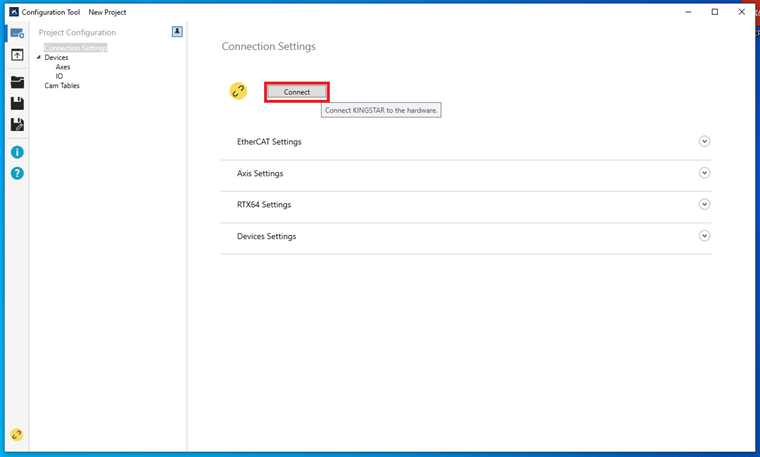
Step 14: KINGSTAR should then automatically detect and connect to the PMC. If it does not detect the PMC verify that the PMC’s EtherCAT port is connected to the correct port on the Network Interface Card that RTX64 is using
Import and use library
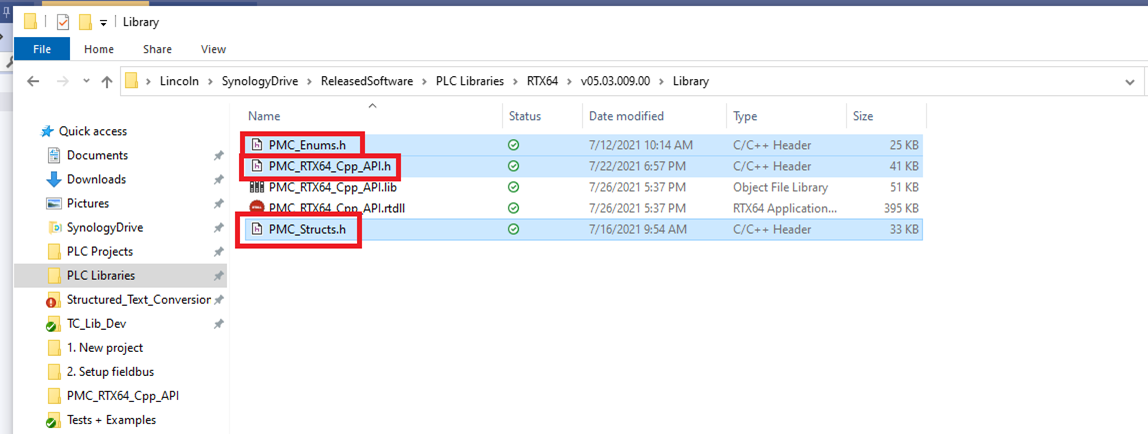
Step 1: Navigate to the location of the three header files in the library (PMC_Enums.h, PMC_RTX64_Cpp_API.h, PMC_Structs.h)
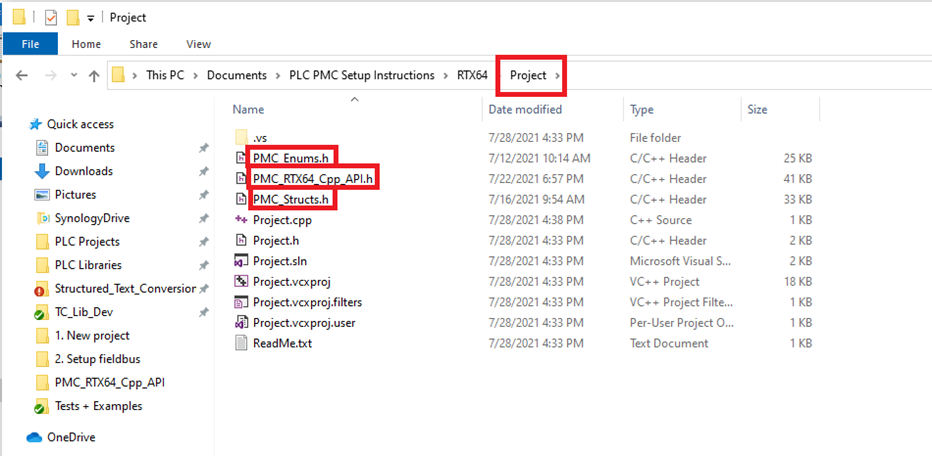
Step 2: Copy the three header files into the project directory.
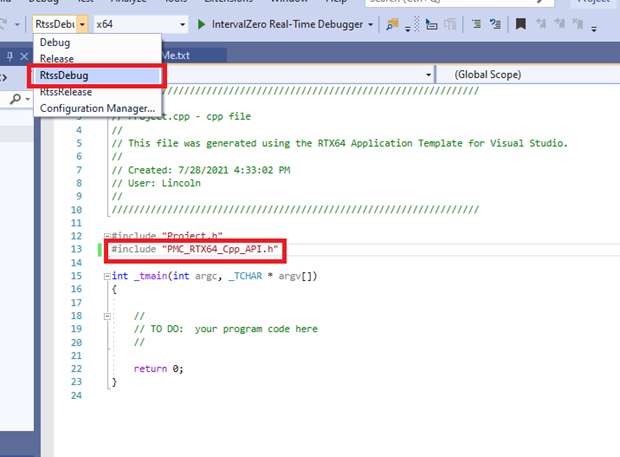
Step 3: #include PMC_RTX64_Cpp_API.h in the project and make sure that build configuration (RtssDebug or RtssRelease) matches the one selected in "Creating a new project" step 7
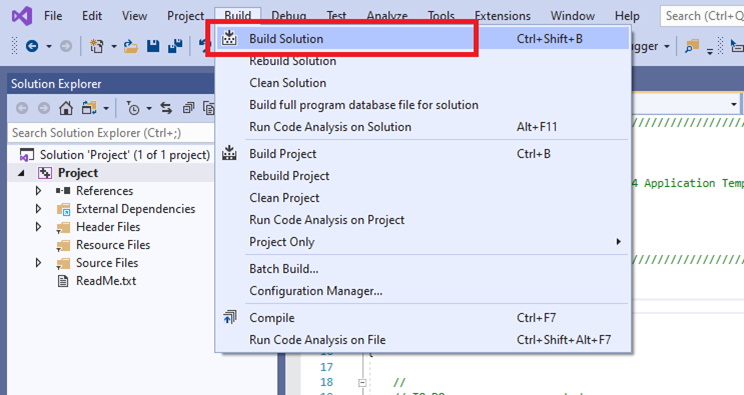
Step 4: Build the project by clicking Build->Build Solution
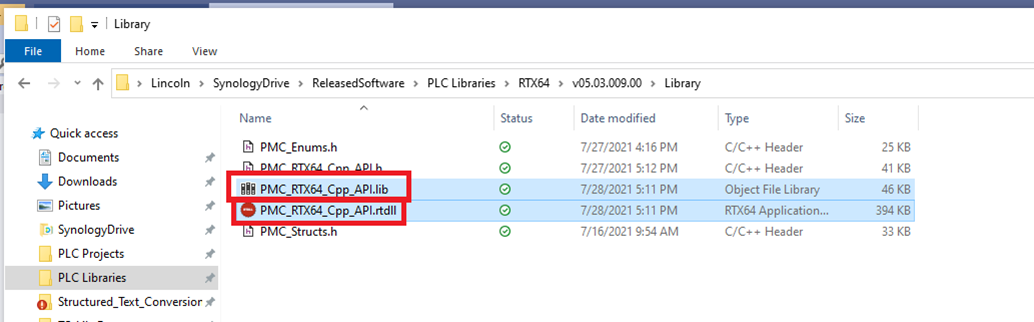
Step 5: Take the PMC_RTX64_Cpp_API.lib and PMC_RTX64_Cpp_API.rtdll files.
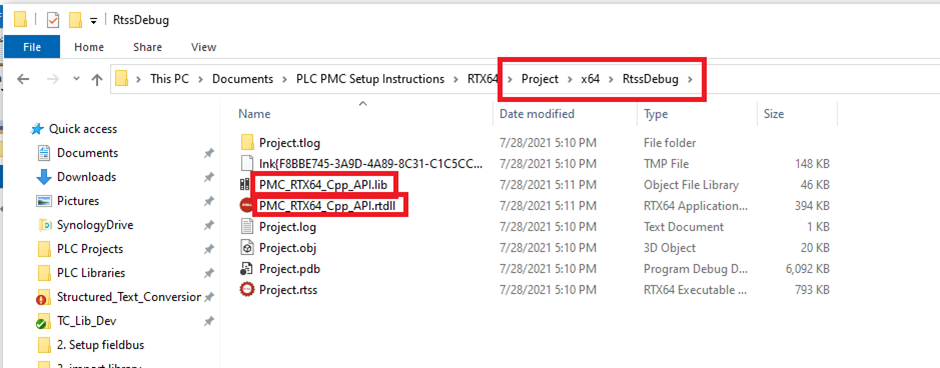
Step 6: And put them in the output directory of the project
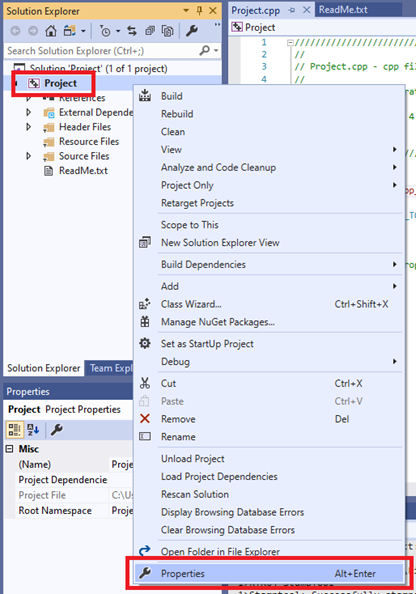
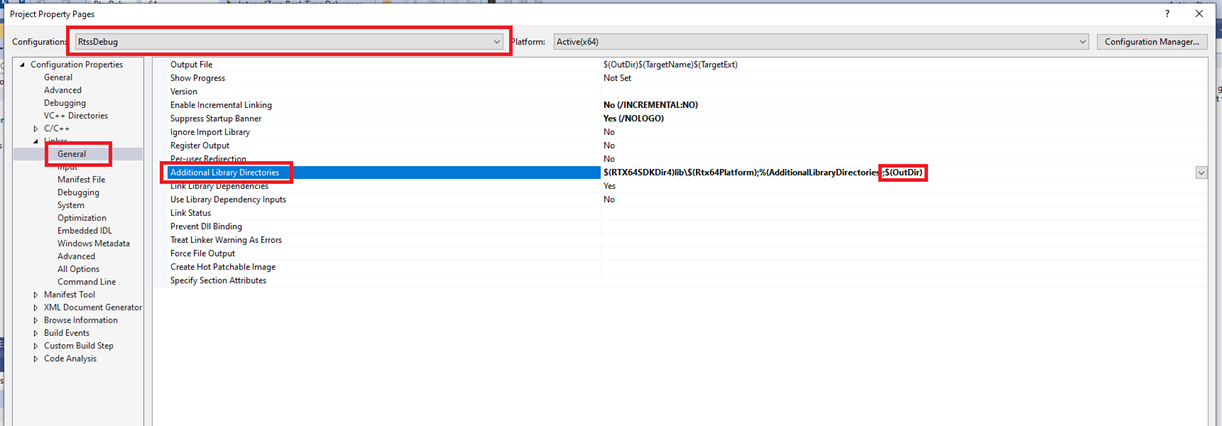
Step 7: Right click on the project in the Solution Explorer and click Properties.
Step 8: Make sure that the selected configuration is the one that you are building with. In the Configuration Properties select Linker->General. Add $(OutDir) to the Additional Library Directories.
Step 9: Then select Linker->Input. Add ksapi_rtss.lib and PMC_RTX64_Cpp_API.lib to Additional Dependencies and click OK.

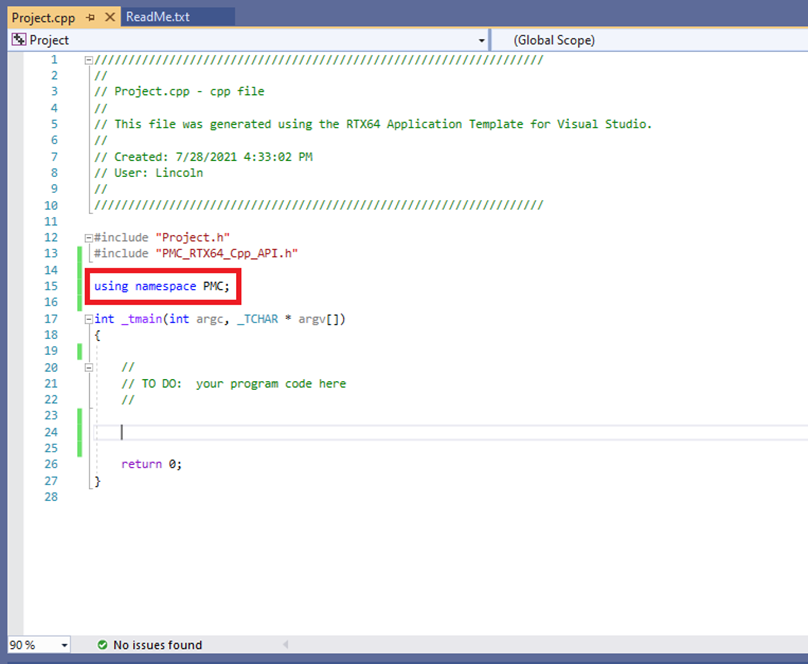
Step 10: It is advised to add “using namespace PMC;” to the project to avoid having to add “PMC::” in front of all PMC function calls and variable declarations.
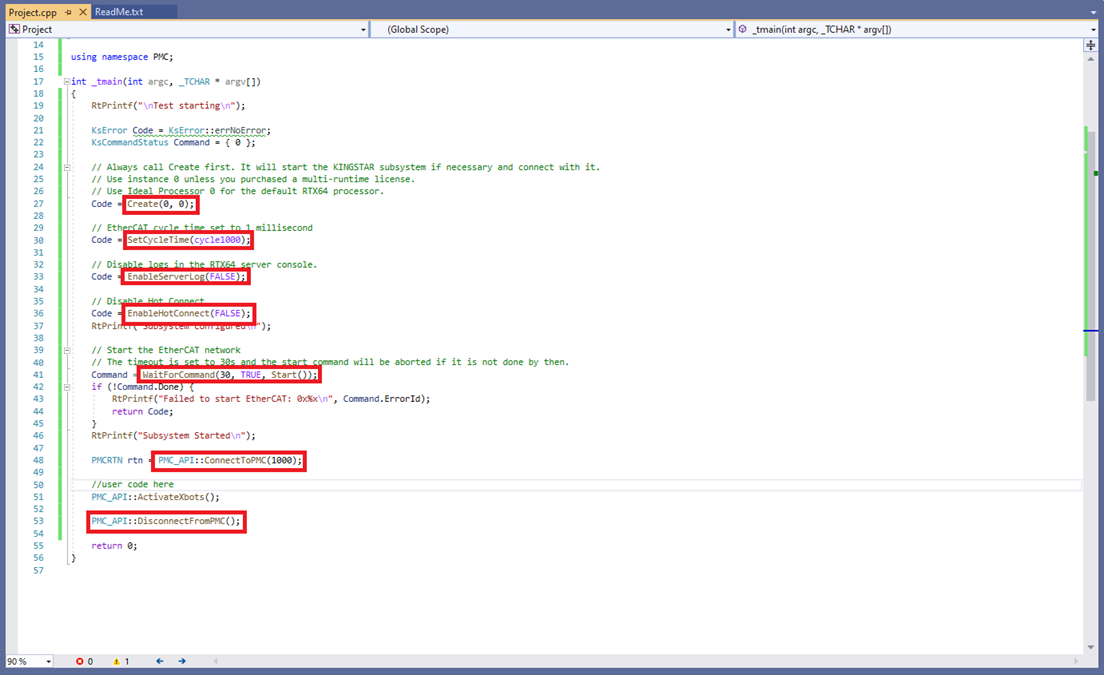
Step 11: When using the PMC library, several Kingstar and PMC functions need to be called before and after the library functions. The functions Create (to start the KingStar subsystem), SetCycleTime (to set the EtherCAT cycle time), EnableServerLog (to disable server logging), EnableHotConnect (to disable hot connect), Start (to start EtherCAT), and ConnectToPMC (to set the cycle time of PMC communications and start PMC communications) must be called prior to using the library. DisconnectFromPMC must be called after the application has finished using the PMC library.
Note that PMC communications has a minimum cycle time of 1 millisecond or 1000 microseconds.
Upgrading the Library
Step 1: To upgrade to a new version replace the library header files (PMC_Enums.h, PMC_RTX64_Cpp_API.h, and PMC_Structs.h) and the library files (PMC_RTX64_Cpp_API.lib, PMC_RTX64_Cpp_API.rtdll) with the newer versions

Step 2: Also replace the files in the output directory
