
Library Instructions
These instructions were written for S3-A Flyways and M3 XBots in earlier versions of the library. While all the functionalities are still the same, the names of the components may differ from what is currently available.
Getting Started
-
If Visual Components is running, please close the application before proceeding
-
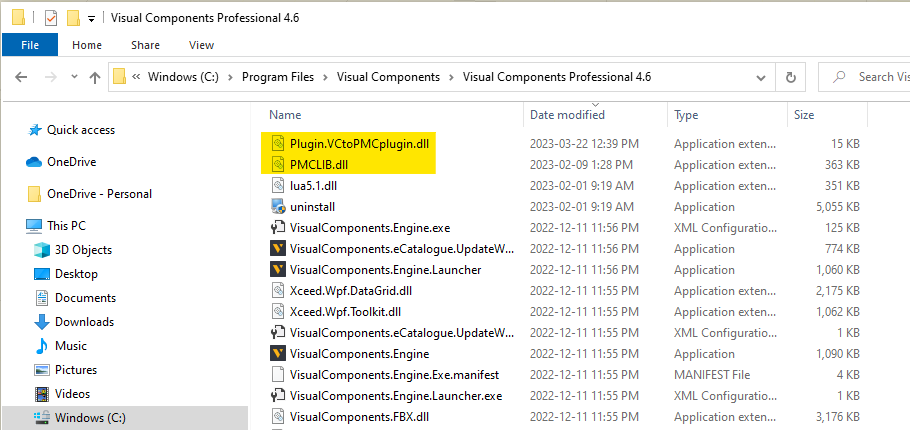
Unzip the files and add
Plugin.VCtoPMCplugin.dllandPMCLIB.dllto the Visual Components root folder, roughly located at C:\Program Files\Visual Components\Visual Components Professional X.X
-
Visual Components may be opened at this point
-
Add the XBot and Flyway models to the My Models folder, roughly located at C:\Users\[UserName]\Documents\Visual Components\X.X\My Models. All the models should stay together in the same folder
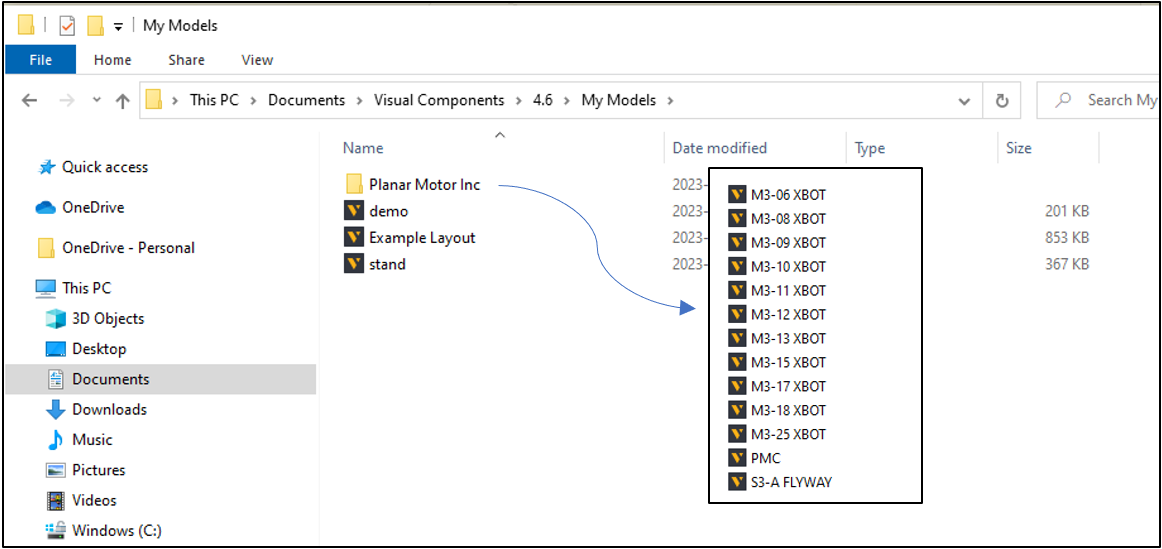
The XBot and Flyway models may already be included in the public library of Visual Components. Check under Advanced Motion > Planar Motor Inc and skip Step 4 if the models are available. Please note that the following instructions assume that the models have been imported by the user and therefore refer to the “My Models” folder.
Using the Components
Flyways
The Flyways are the tracks upon which the XBots move. The Flyway components can be arranged in a custom layout to create the desired configuration.
If you already have a Planar Motor Configuration file and would like to import it, please skip to Importing a Planar Motor Configuration file.
Inserting a Flyway
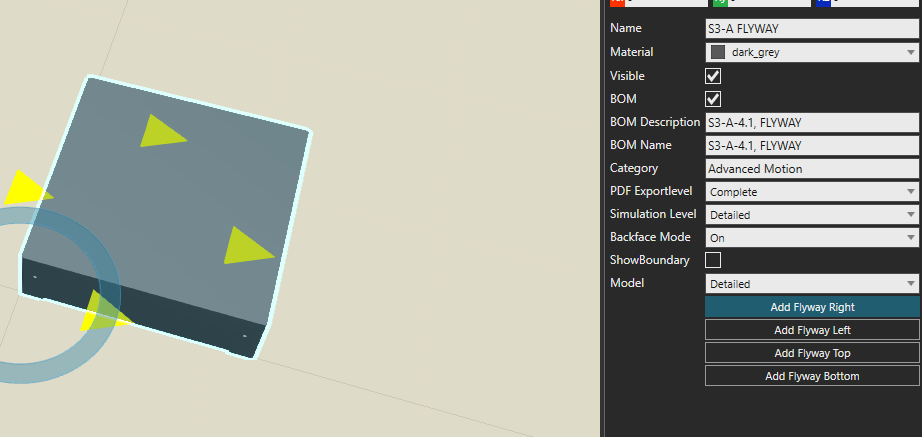
To manually create a layout, drag and drop, or double-click a Flyway model from the eCatalog into the world. It will be under My Models > Planar Motor Inc > S3-A Flyway.
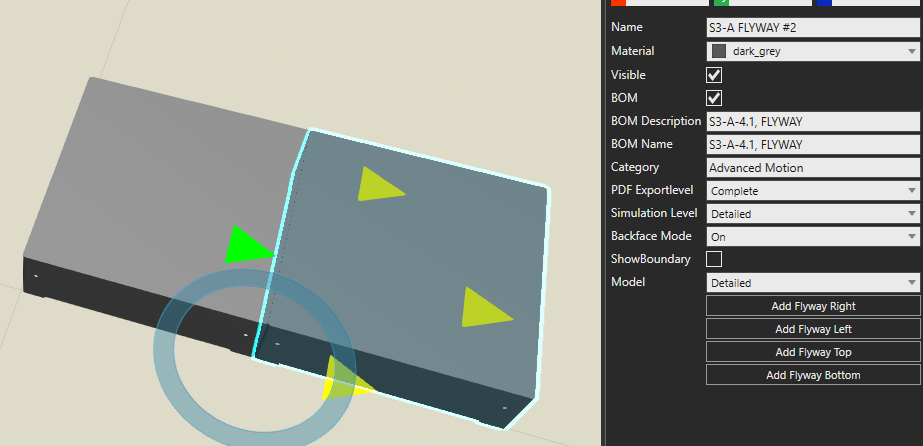
Adding Flyways for Small Configurations
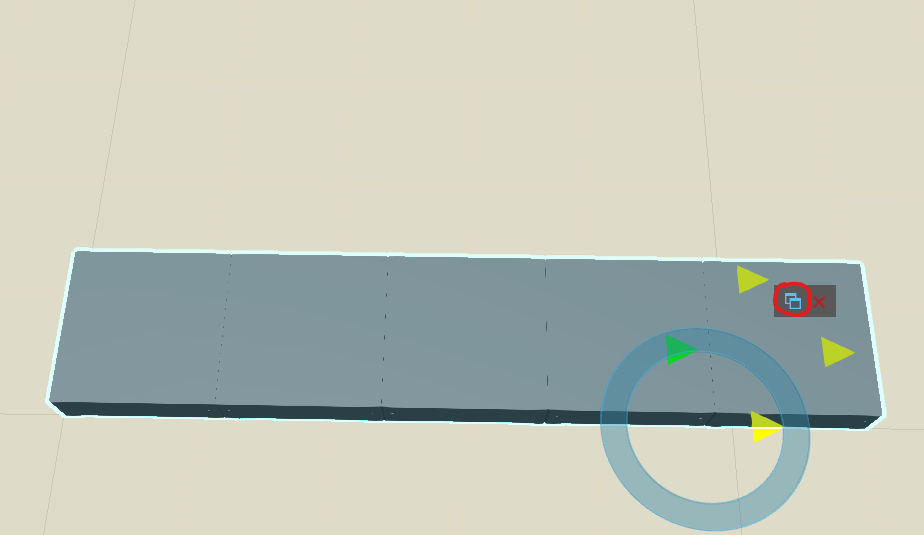
To add an adjacent Flyway quickly, use the buttons available in the Component Properties window to create a Flyway in the desired direction.
Adding Flyways for Large Configurations
To create large and rectangular configurations, it is recommended to use the Clone (or Copy and Paste) or the Pattern features.
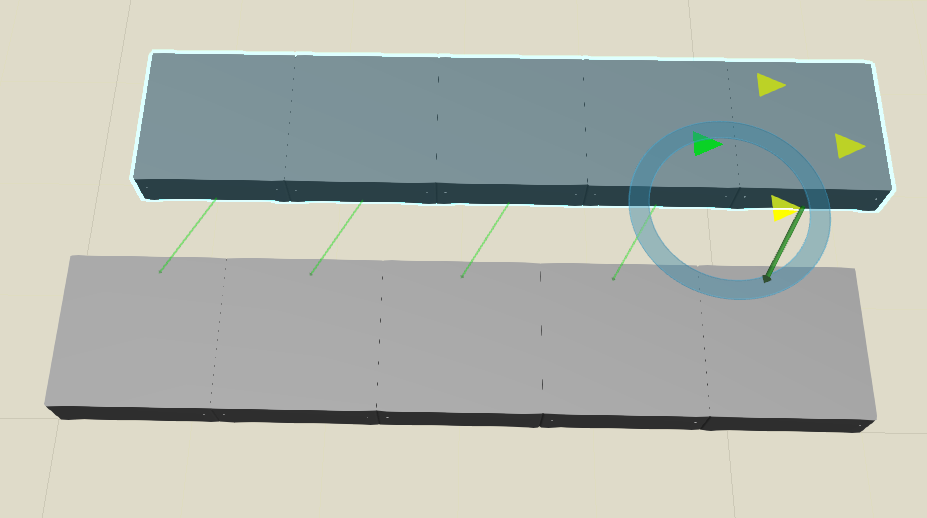
Clone (or Copy and Paste):
-
Select the Flyways by holding the Ctrl key and clicking on the components, or by using the Select tool in the Manipulation section of the Home tab
-
Click on the Clone icon or Right-click > Copy or Ctrl + C
-
If the Flyways were copied, Right-click > Paste or Ctrl + V to paste the components
-
Drag the new Flyways to the desired location
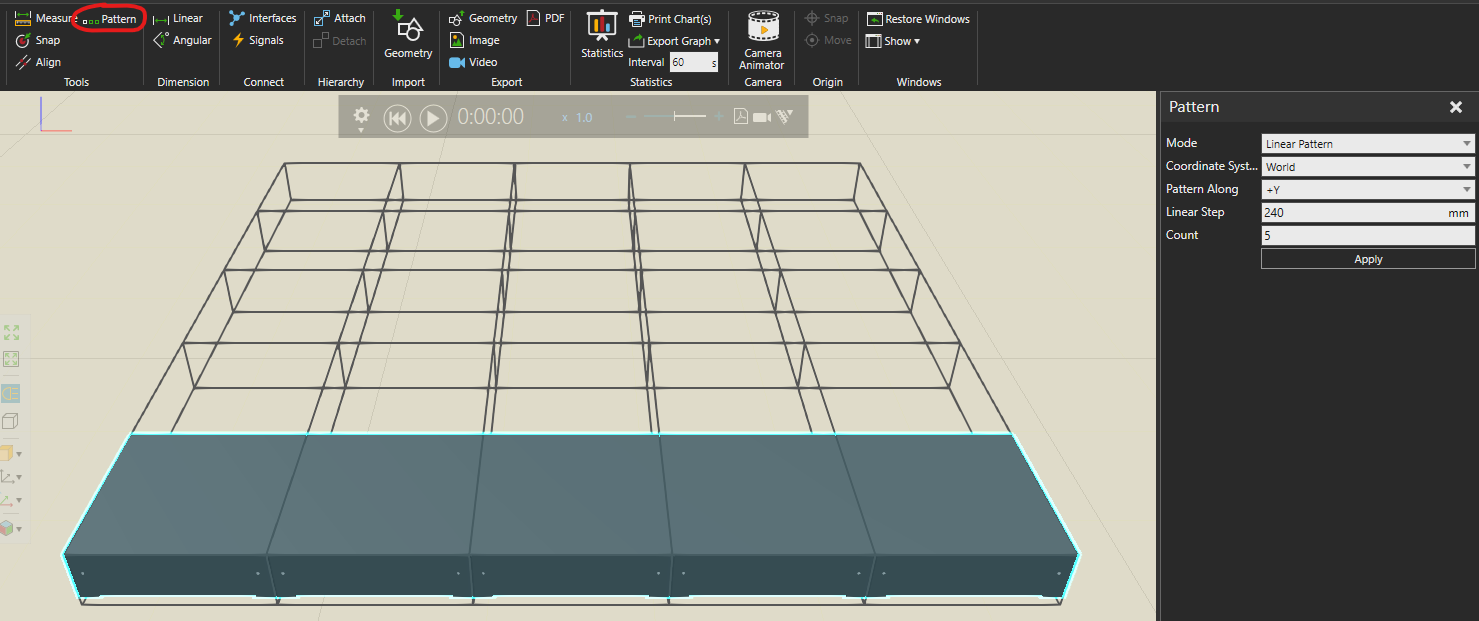
Pattern:
-
Select the Flyways by holding the Ctrl key and clicking on the components, or by using the Select tool in the Manipulation section of the Home tab
-
Click on the Pattern button in the Tools section of the Home tab
-
Choose the correct direction and desired count for the pattern
-
Click Apply
Key Properties
-
ShowBoundary- Toggles the visibility of a boundary indicating the edges of the Flyway -
Model- Switch between a more detailed visualization of the Flyway or a simpler one
XBots
XBots move on top of Flyways in Six Degrees of Freedom and are controlled by the Planar Motor Controller (PMC). In Visual Components, it is possible to control the XBots without the need for a PMC.
Inserting an XBot
Similar to the Flyway, simply drag and drop, or double-click an XBot model from the eCatalog into the world. It will be under My Models > Planar Motor Inc > M3-XX XBOT.
Additional XBots can be cloned from existing XBots in the world if they are to be of the same type, or inserted from the eCatalog for other types.
Controlling XBots via Visual Components
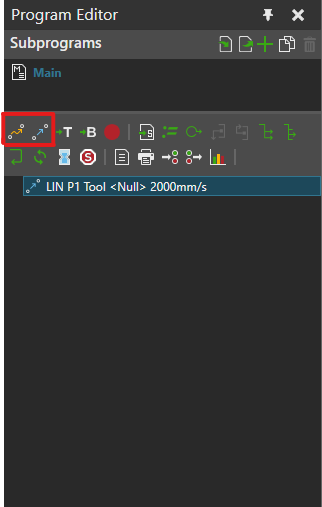
To move the XBot along a specific path during simulation, the Program Editor from the Program tab can be used.
-
Select the XBot to program and change the Manipulation to Jog
-
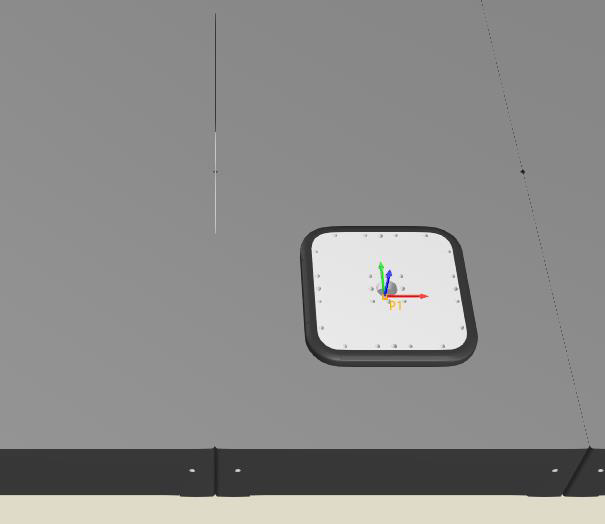
Use the arrows to drag the XBot to the desired location
-
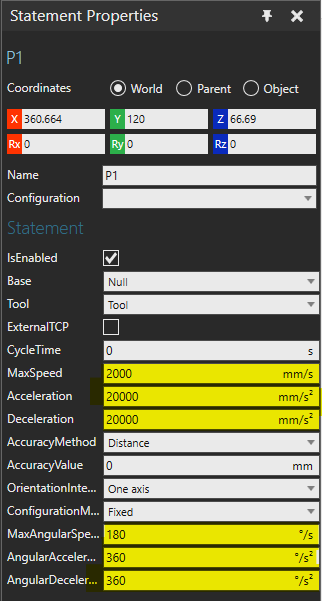
Click on PTP Statement or Linear Statement buttons to create the motion, and change the speed and acceleration as needed in the Statement Properties window
-
Repeat until all motions have been created
Other statements can also be used with the XBots, such as Wait for Binary Input, similar to other robots available in Visual Components. Before running the simulation, ensure that the RobotExecutor of the XBot is enabled.
Digital Twinning XBots with the PMC
To visualize the XBots being controlled by the PMC, insert a PM Controller component and then Connect to the PMC.
Before running the simulation, make sure the following properties of the XBot component are correct:
-
The
XBotIDmatches that of the XBot in the PMC it will follow -
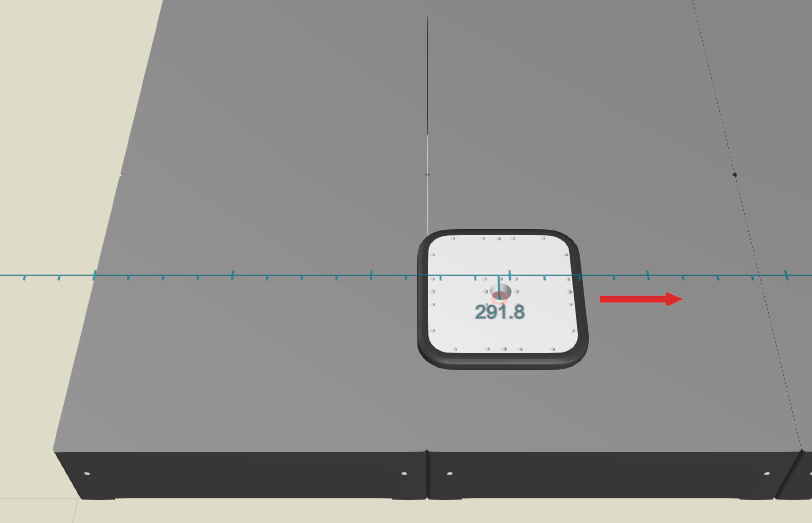
The origin of the XBot in the World (blue ring) corresponds to the user-defined origin in the PMC
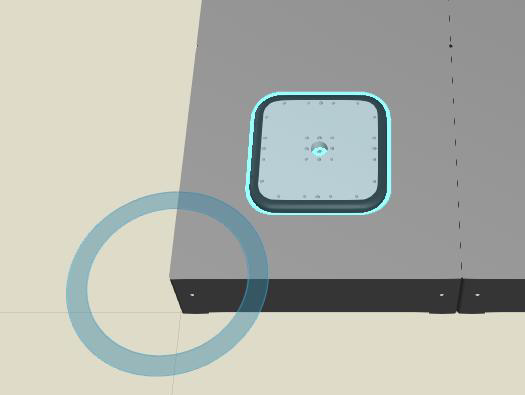
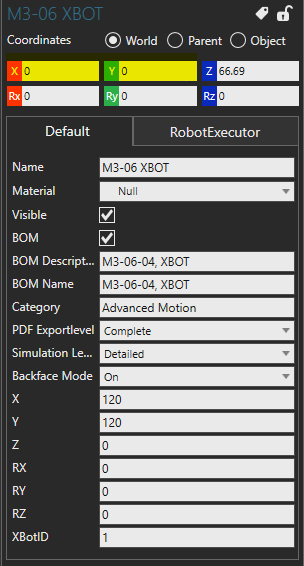
This can be changed by dragging the XBot or by entering the adequate values in the X and Y Coordinates field at the top of the Component Properties window
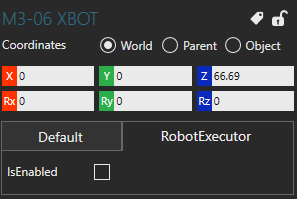
-
The
RobotExecutoris not enabled
Key Properties
-
XBotID– Unique ID of the XBot, starting at 1. It is automatically generated when the component is inserted. It is used to follow the corresponding XBot when connected to the PMC -
RobotExecutor– Toggles whether the XBot is controlled through the Program context. It should be off when connected to the PMC -
X,Y,Z,RX,RY,RZ– Indicates the XBot position relative to its origin
PM Controller
The PM Controller component is used to connect with the Planar Motor Controller (PMC). It can also be used to load a layout from a Planar Motor Configuration file into the world.
Inserting a PM Controller
Drag and drop, or double-click the PM Controller from the eCatalog into the world. It will be under My Models > Planar Motor Inc > PM Controller.
Connecting to the PMC
Enter the IP Address of the PMC to connect to in the Component properties window. Before clicking on Connect to PMC, make sure that the desired number of XBots have been loaded to the world. (Extra XBots will switch to invisible). The PMC will ignore any XBot component added after connecting.
If you wish to add more XBots after having connected, simply disconnect using the same button, add more XBots and connect again.
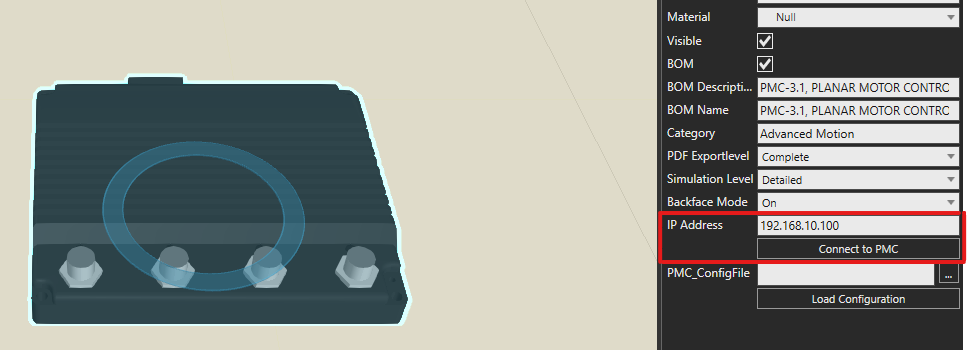
Pay attention to the Output Window for connection messages and possible connection interruptions.
Importing a Planar Motor Configuration file
If you already have a Planar Motor Configuration file and you wish to import it into Visual Components, browse for it using the Component properties window and click the button.
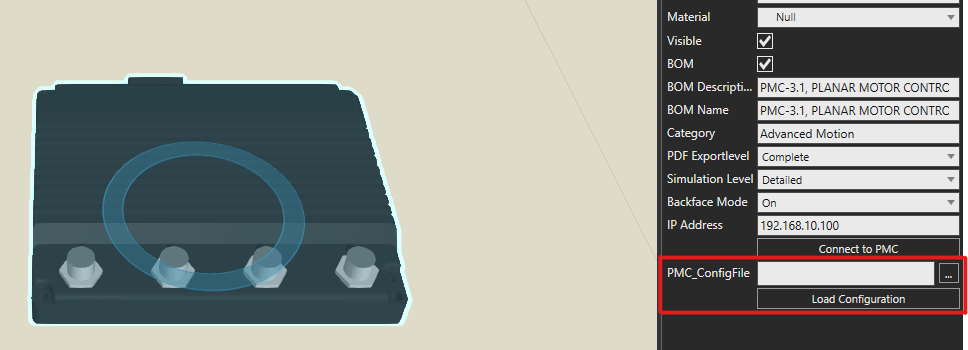
Please make sure that the configuration file is valid, as additional checks are not performed. The new configuration will be loaded at the World Origin and will delete the current Flyways and XBots from the world.