Library Setup
Creating a new project
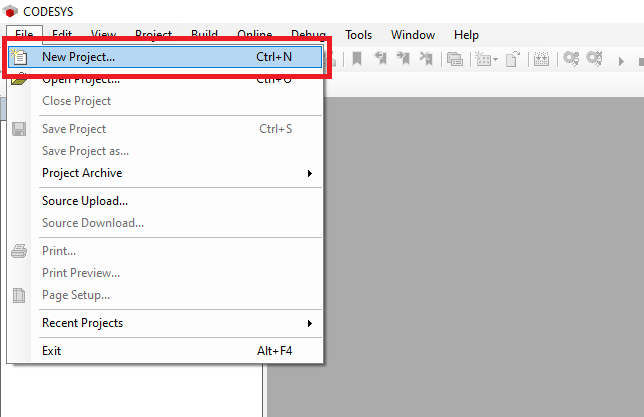
Step 1: Start by clicking File->New Project
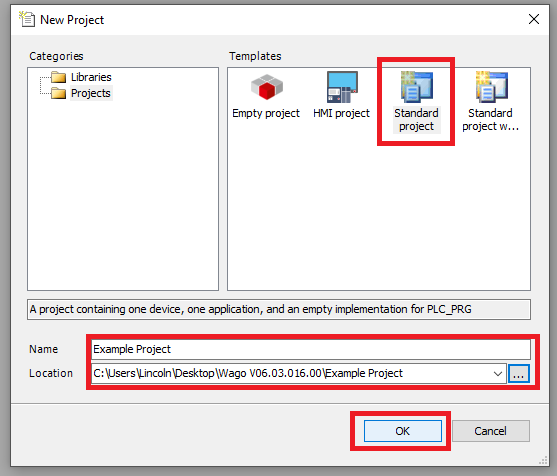
Step 2: In the New Project window select Standard Project as the template. Give the project a unique name and location. Then click OK
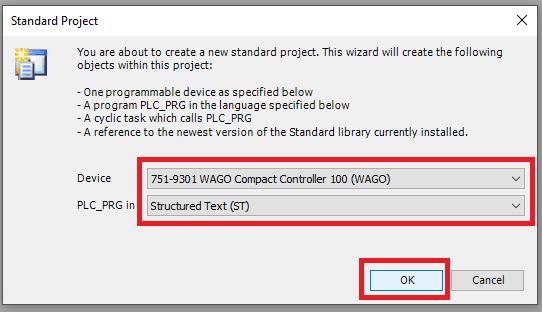
Step 3: In the Standard Project window select the Device to use and the programming language to use for the PLC_PRG. This example uses a WAGO Compact Controller 100 and Structured Text. Click OK when you are done
Setup Fieldbus
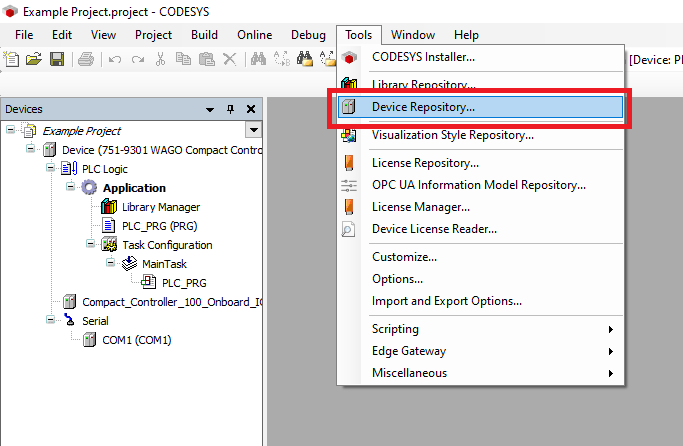
Step 1: Click Tools->Device Repository
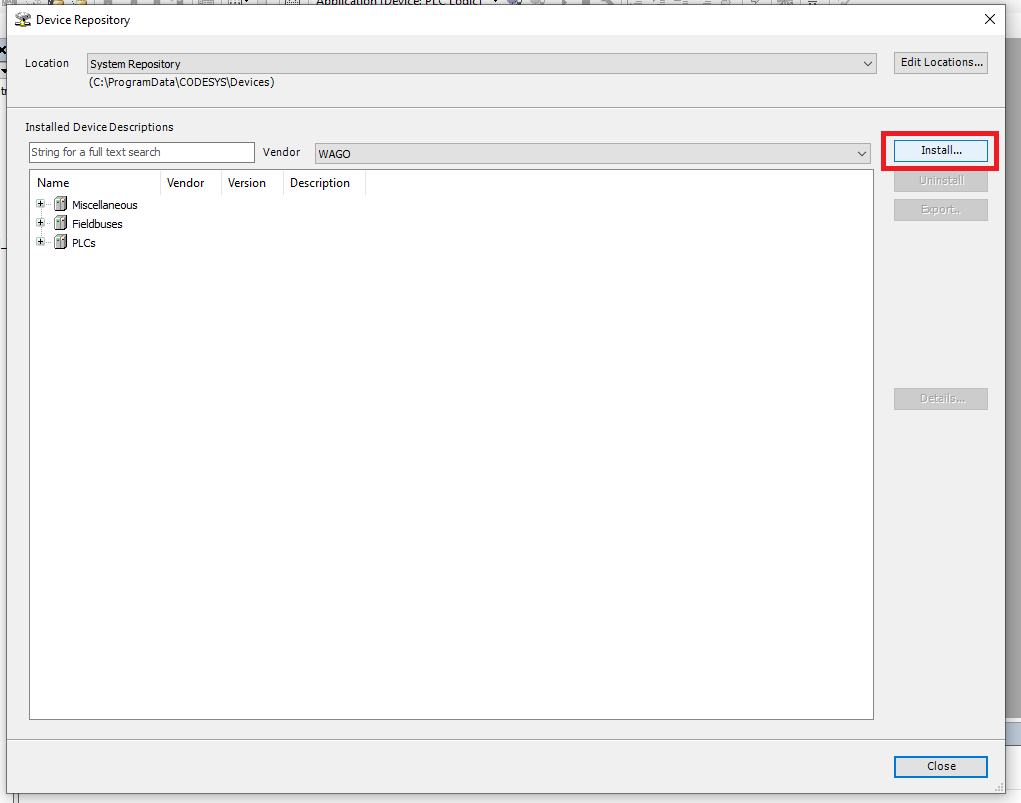
Step 2: In the Device Repository window click "Install..."
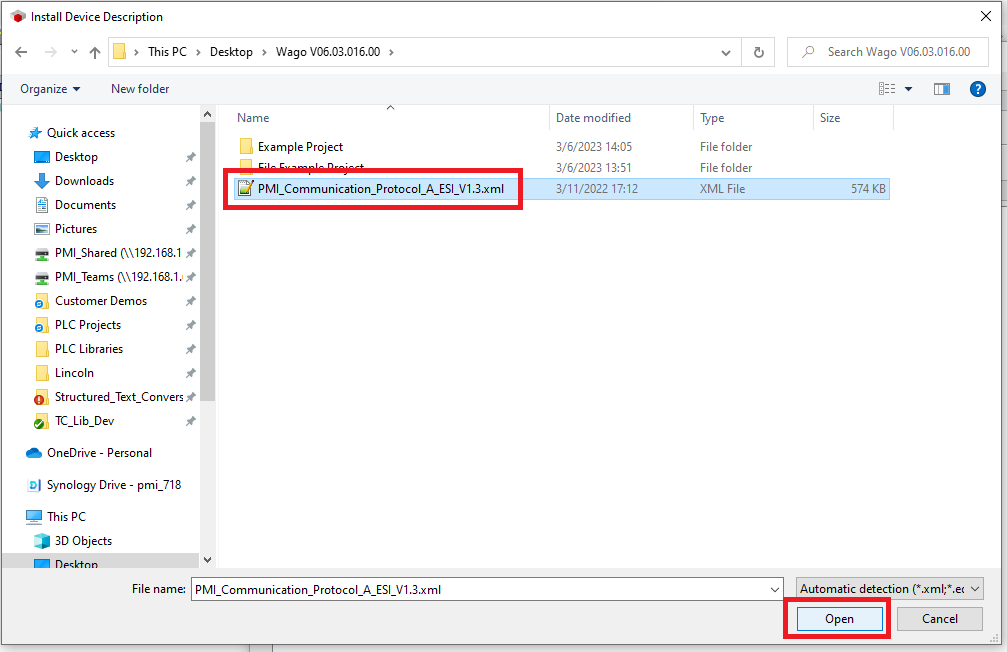
Step 3: In the Install Device Description window browse to the ESI file and then click "Open"
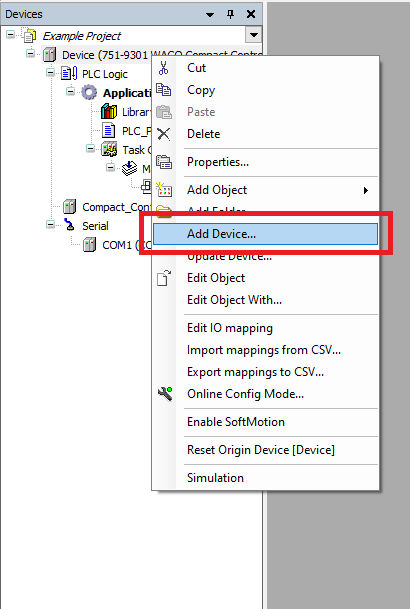
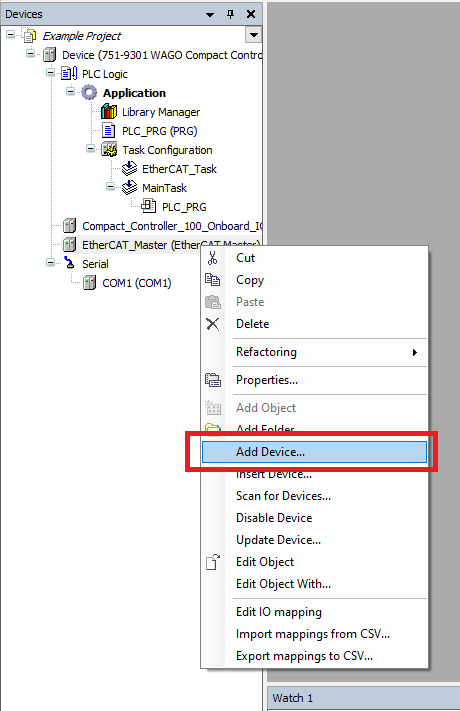
Step 4: In the Devices tree right click on the Controller and click "Add Device..."
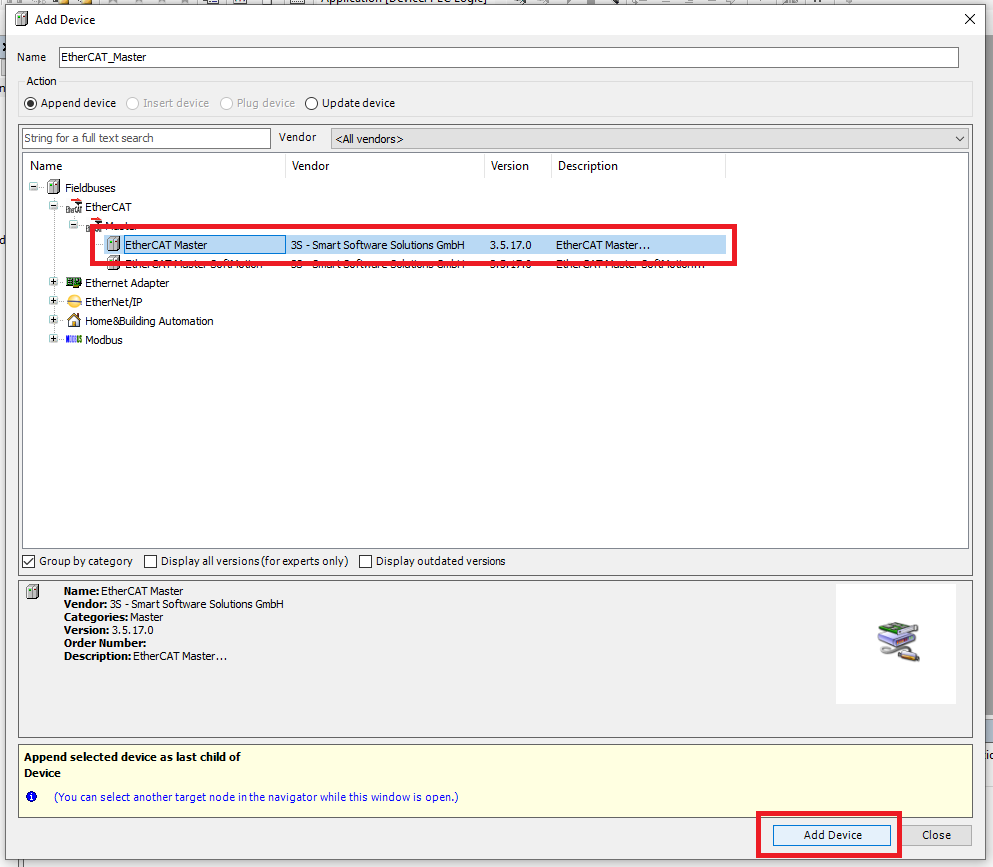
Step 5: In the Add Device window select the EtherCAT Master and click "Add Device"
Step 6: Right click on the new EtherCAT-Master and click "Add Device"
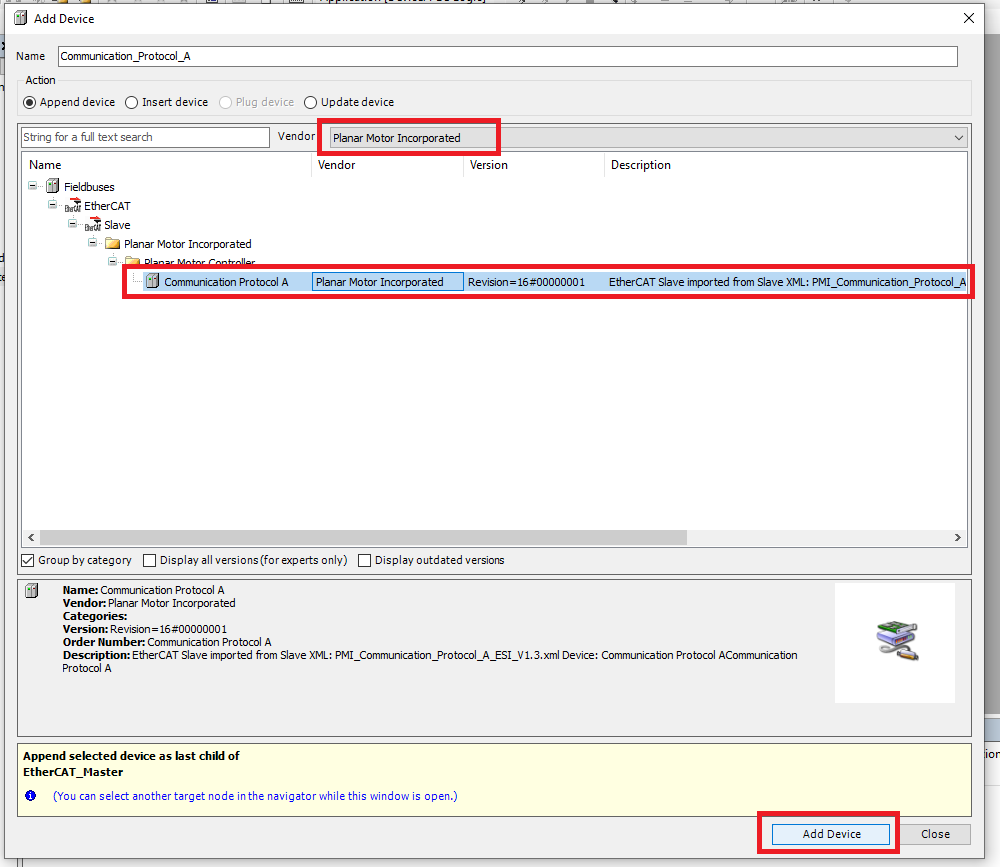
Step 7: In the Add Device window find and select the Planar Motor Controller device and click "Add Device"
Import and use library
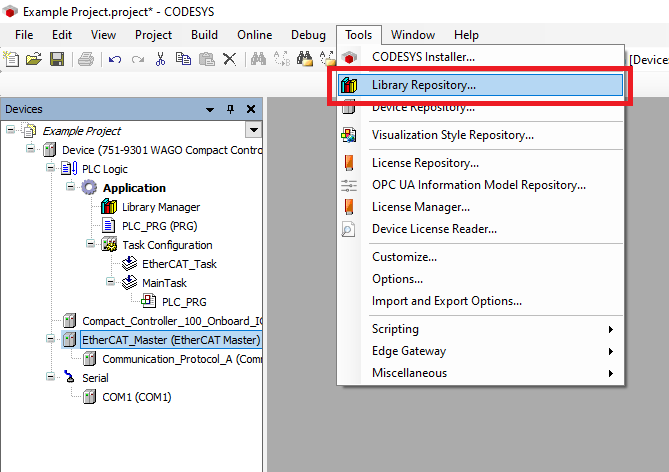
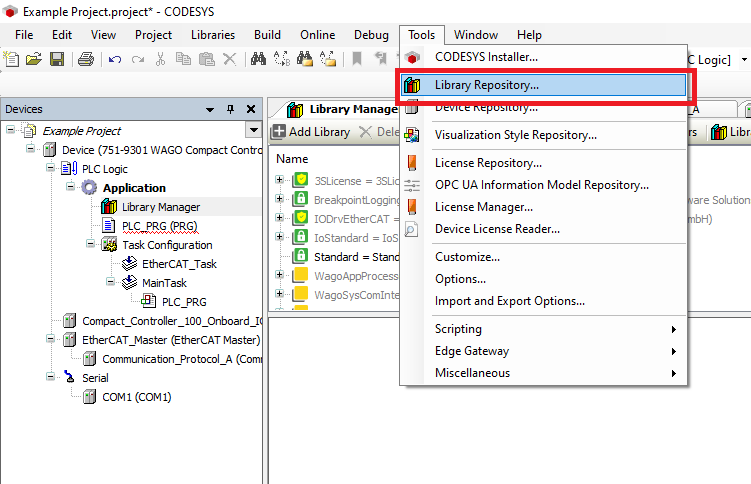
Step 1: Click Tools->Library Repository
Step 2: In the Library Repository window click "Install..."

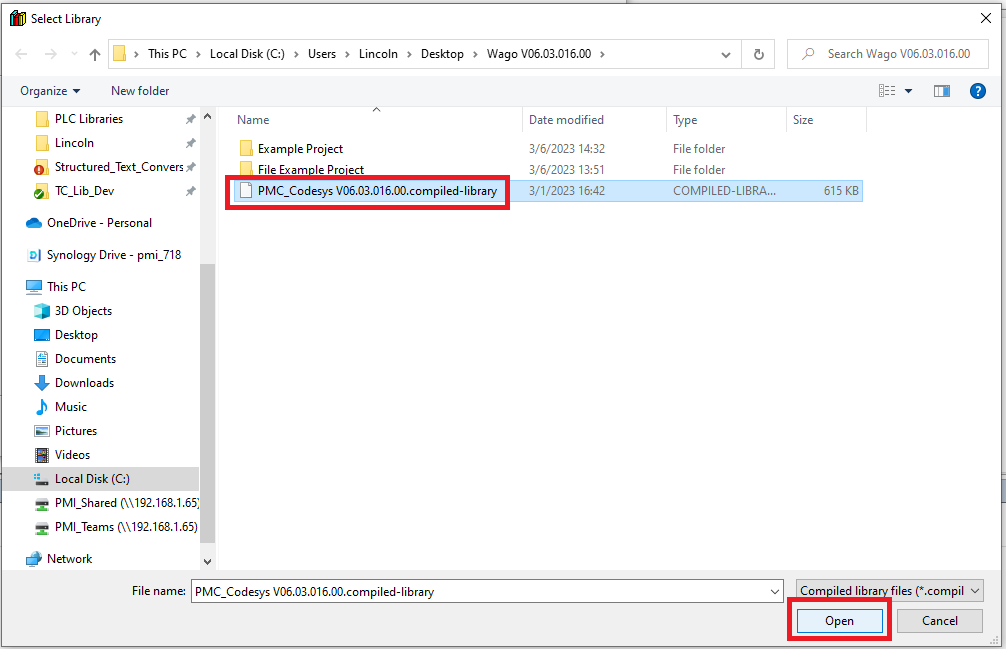
Step 3: In the Select Library window browse to and select the PMC .compiled-library file. Then click "Open"

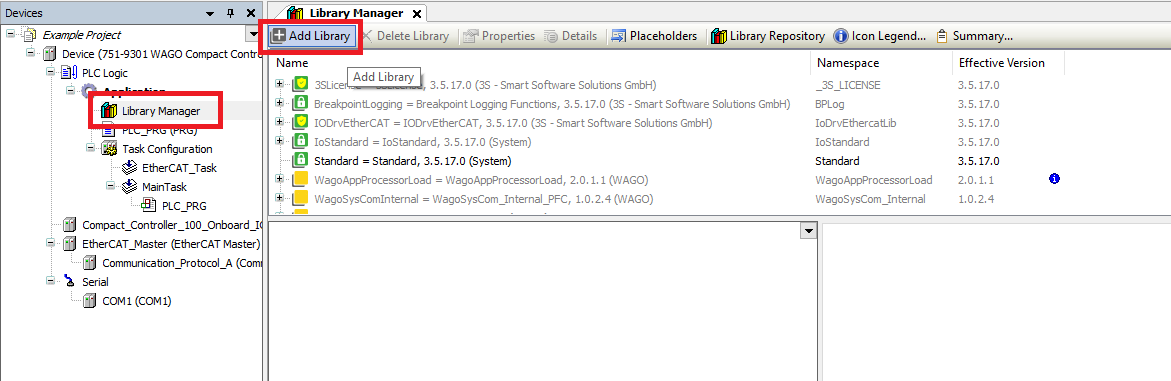
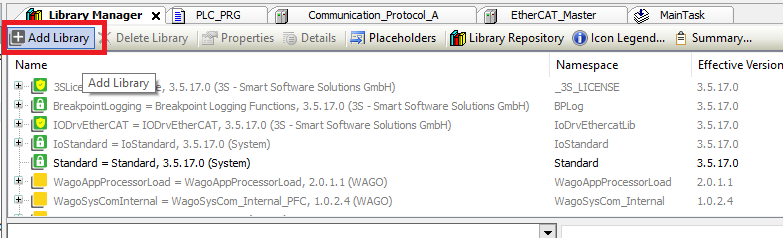
Step 4: Open the Library Manger from the Devices tree. Then click "Add library"
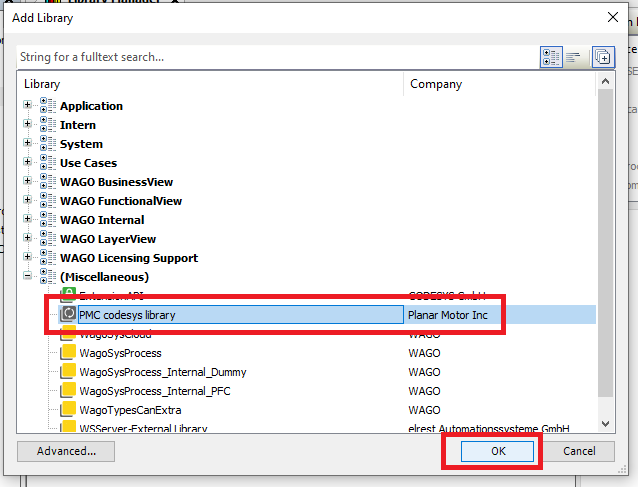
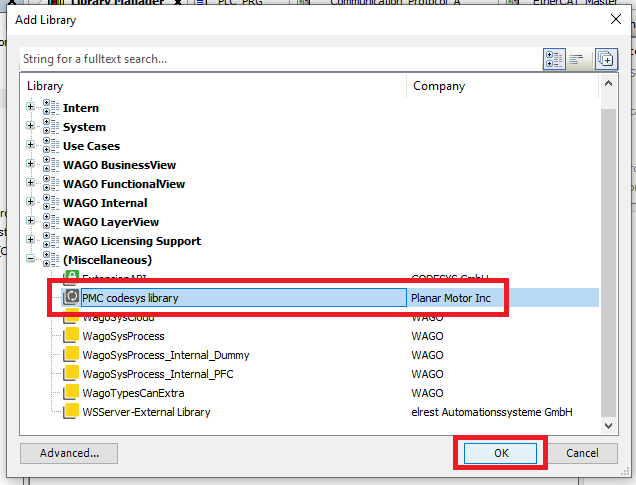
Step 5: Search for and find the PMC library and click "OK"
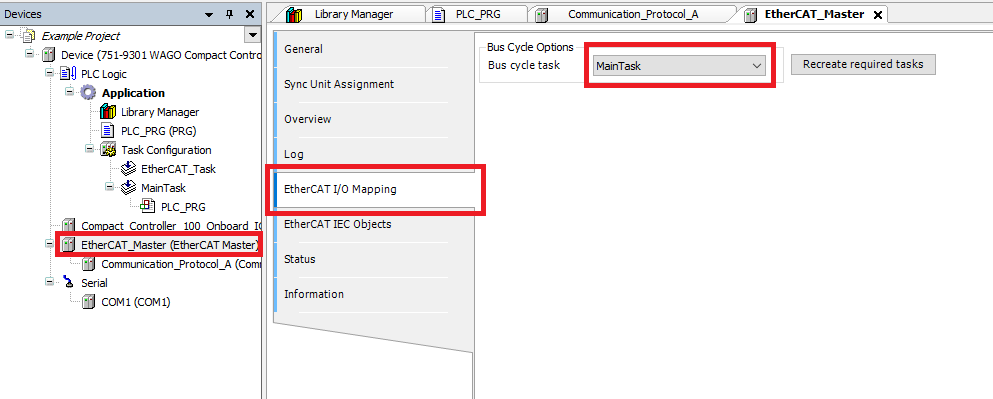
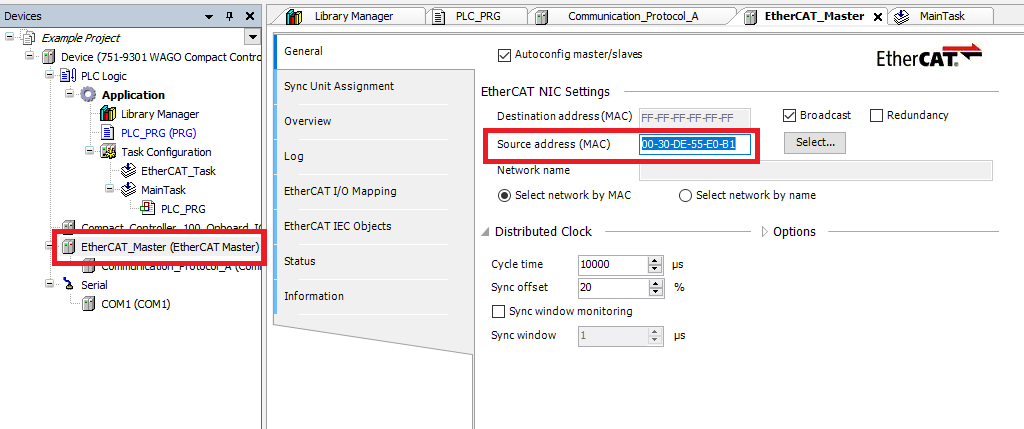
Step 6: The task that calls the PMC function blocks should be the same task responsible for the Ethercat Bus Cycle. You can either move the PLC_PRG to the EtherCAT_Task or give the MainTask the Bus Cycle. This example chooses the later. Double click the EtherCAT Master. Then go the EtherCAT I/O Mapping tab and switch the Bus cycle task to the MainTask
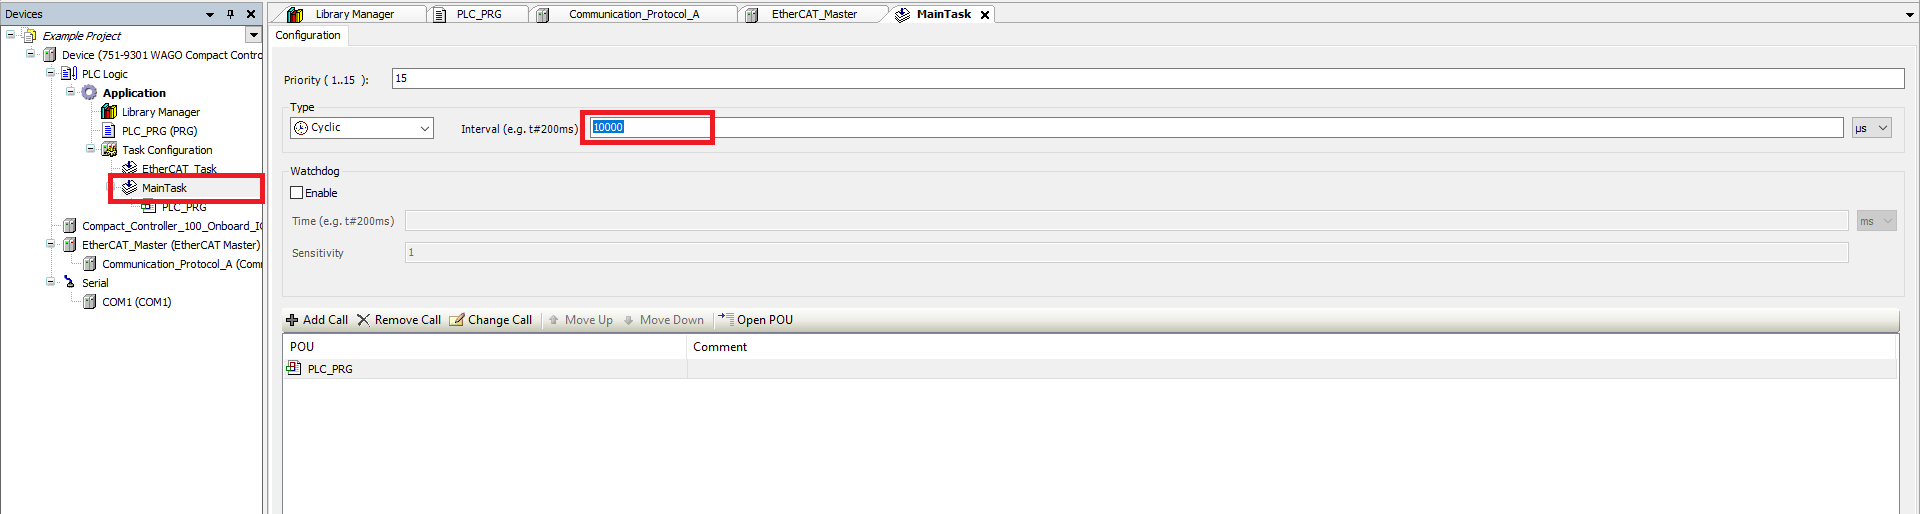
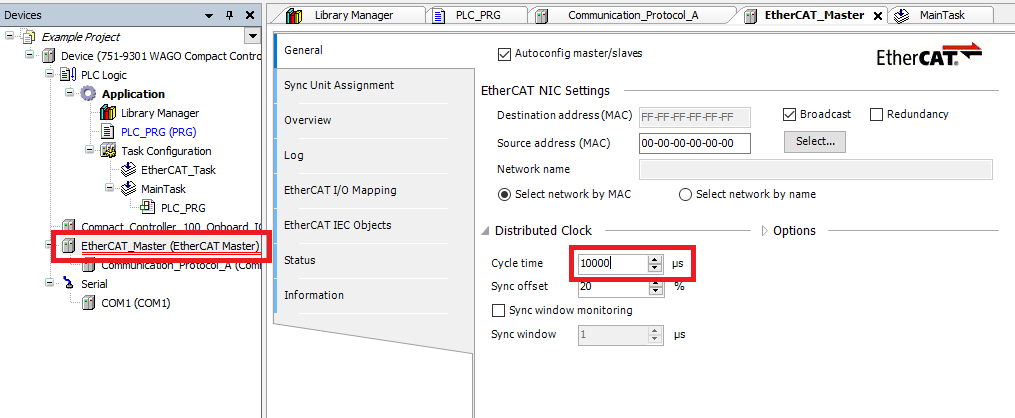
Step 7: Then make sure that the MainTask’s cyclic interval (double click MainTask) and the EtherCAT Master’s cycle time (General tab in the EtherCAT Master) are at the same time. This example uses 10 ms because the Compact Controller 100 is a low power PLC
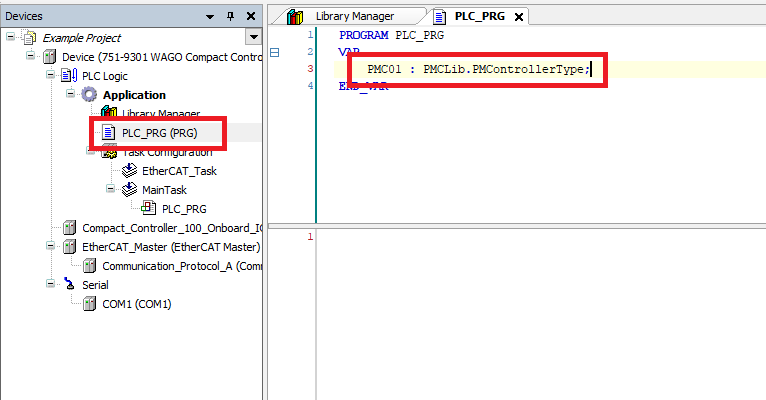
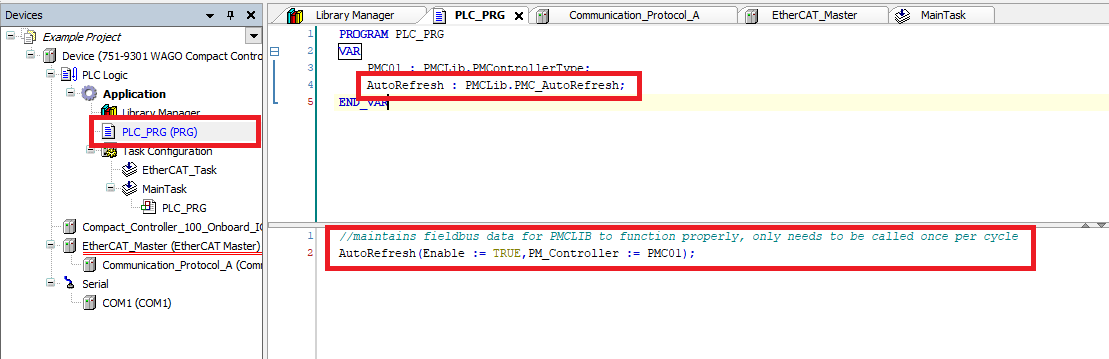
Step 8: In the PLC_PRG POU declare a PMCLib.PMControllerType variable
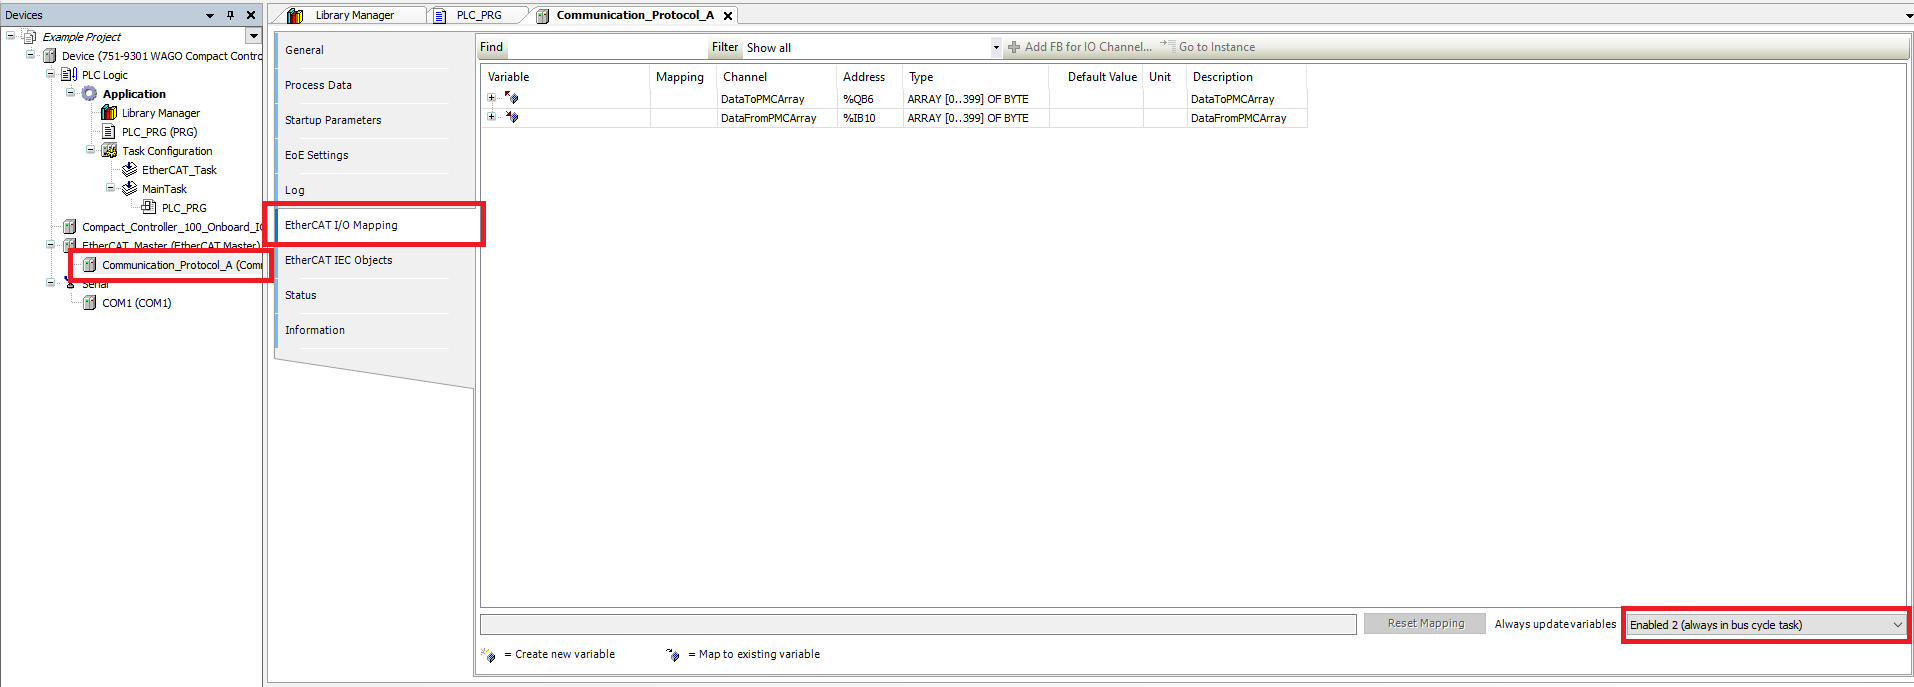
Step 9: Double click the PMC device (Communication Protocol A) and go to the EtherCAT I/O Mapping tab. Switch the Always update variables option to Enable 2 (always in bus cycle task)
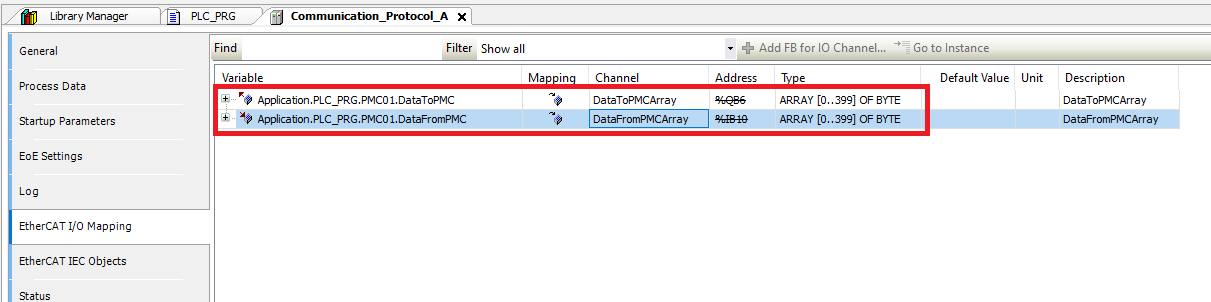
Step 10: Map the DataToPMCArray channel to the DataToPMC member of the PMControllerType variable you declared in the PLC_PRG. Map the DataFromPMCArray channel to the DataFromPMC member of the PMControllerType variable
Step 11: Before using the PMC library, make sure that one and only one instance of the PMC_AutoRefresh function block is declared and that the PMC_AutoRefresh function block is called once and only once per PLC cycle
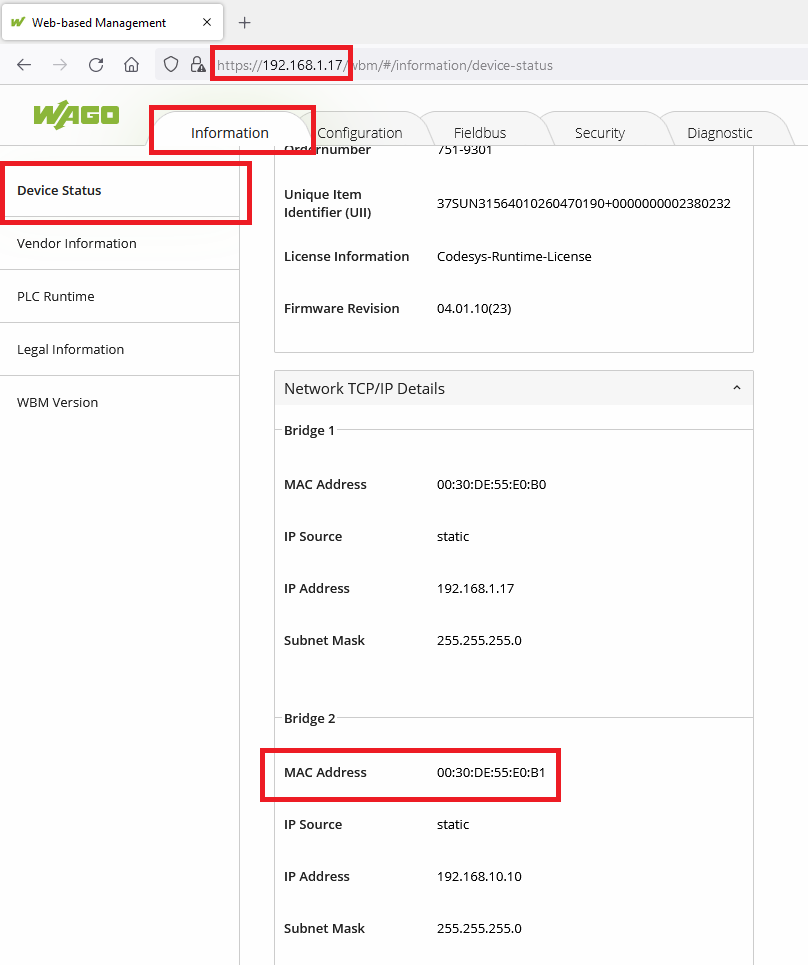
Step 12: Before programming the controller you will need to specify the MAC Address of the RJ45 port that the PMC is connected to. This can be found in the web based management of the controller (accessed via a web browser at the controller’s IP address). It is found in the Information tab, in the Device Status section, under Network TCP/IP Details
Upgrade Library
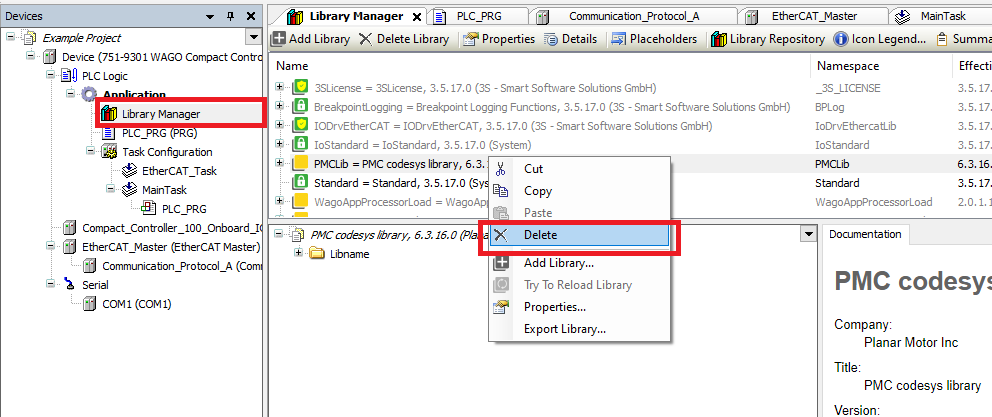
Step 1: Start by opening the Library Manager. Then delete the previous old version of the PMC library
Step 2: Click Tools->Library Repository
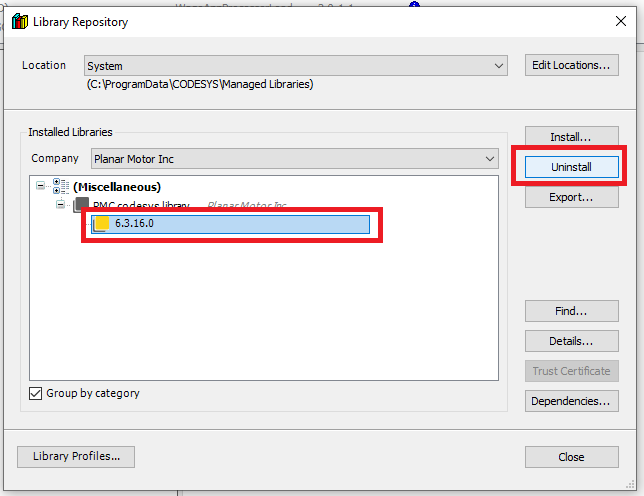
Step 3: In the Library Repository window find the old version of the PMC library and click "Uninstall"
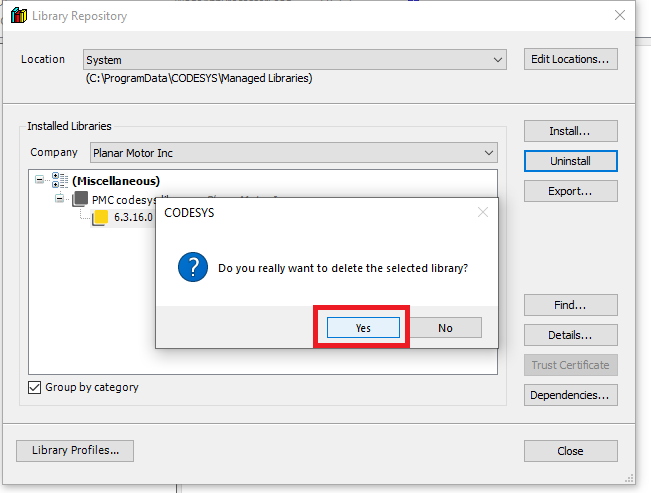
Step 4: Click "Yes" in the confirmation box
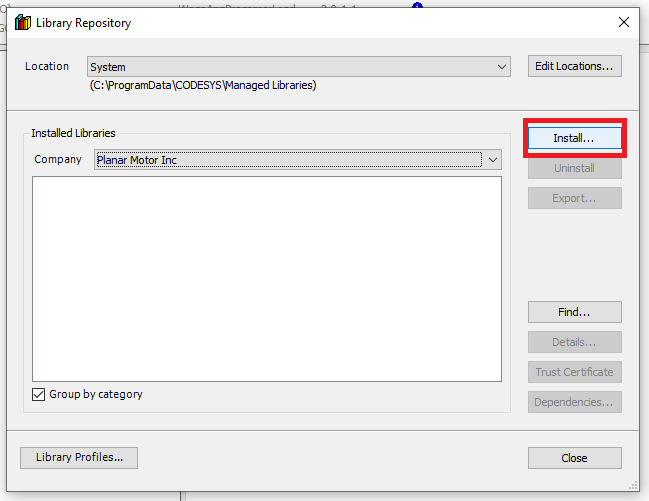
Step 5: When you are back in the Library Repository and click "Install..."
Step 6: Browse to the new version of the PMC library and click "Open"
Step 7: Then in the Library Manager click "Add library"
Step 8: Then in the Add Library window find and select the new PMC library and click "OK"
File I/O on the PLC (Optional)
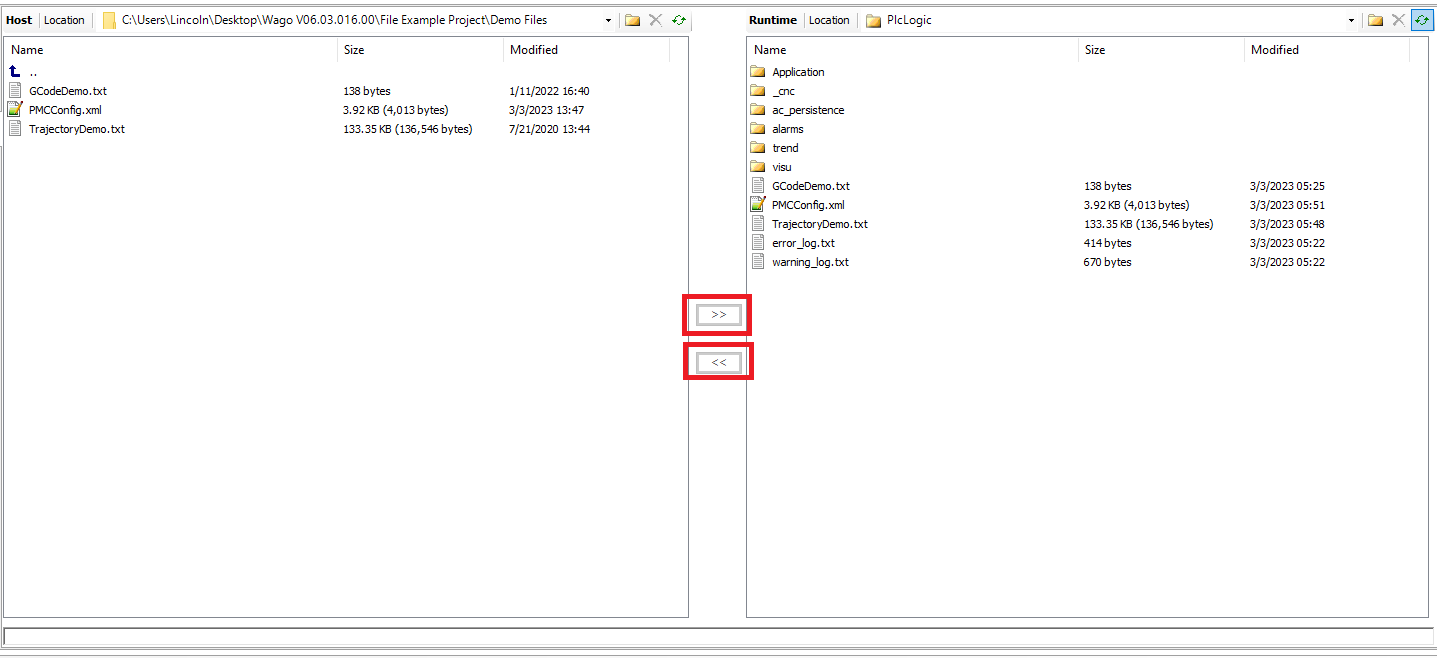
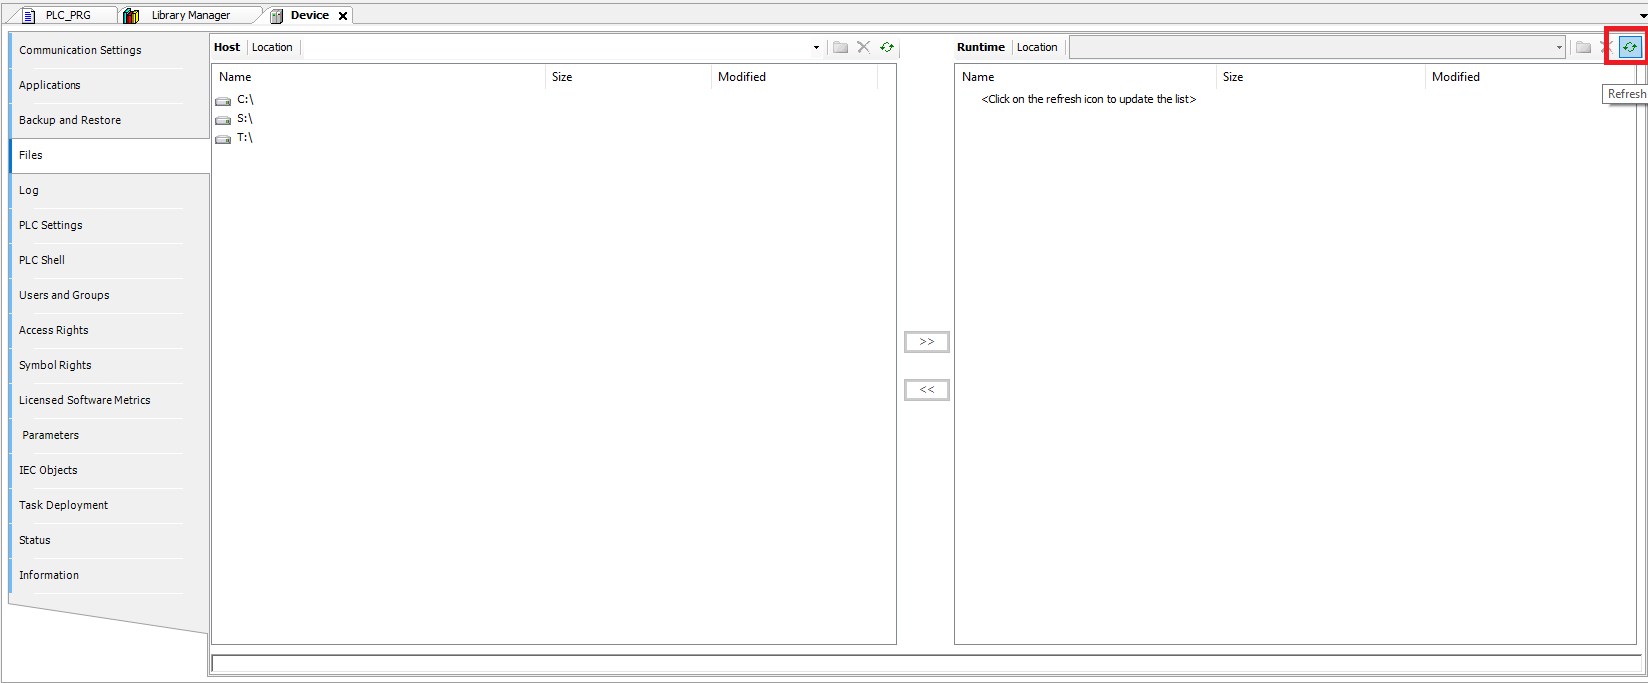
Step 1: First make sure that you are connected to the controller. Then double click on the controller in the Devices panel and go to the Files tab
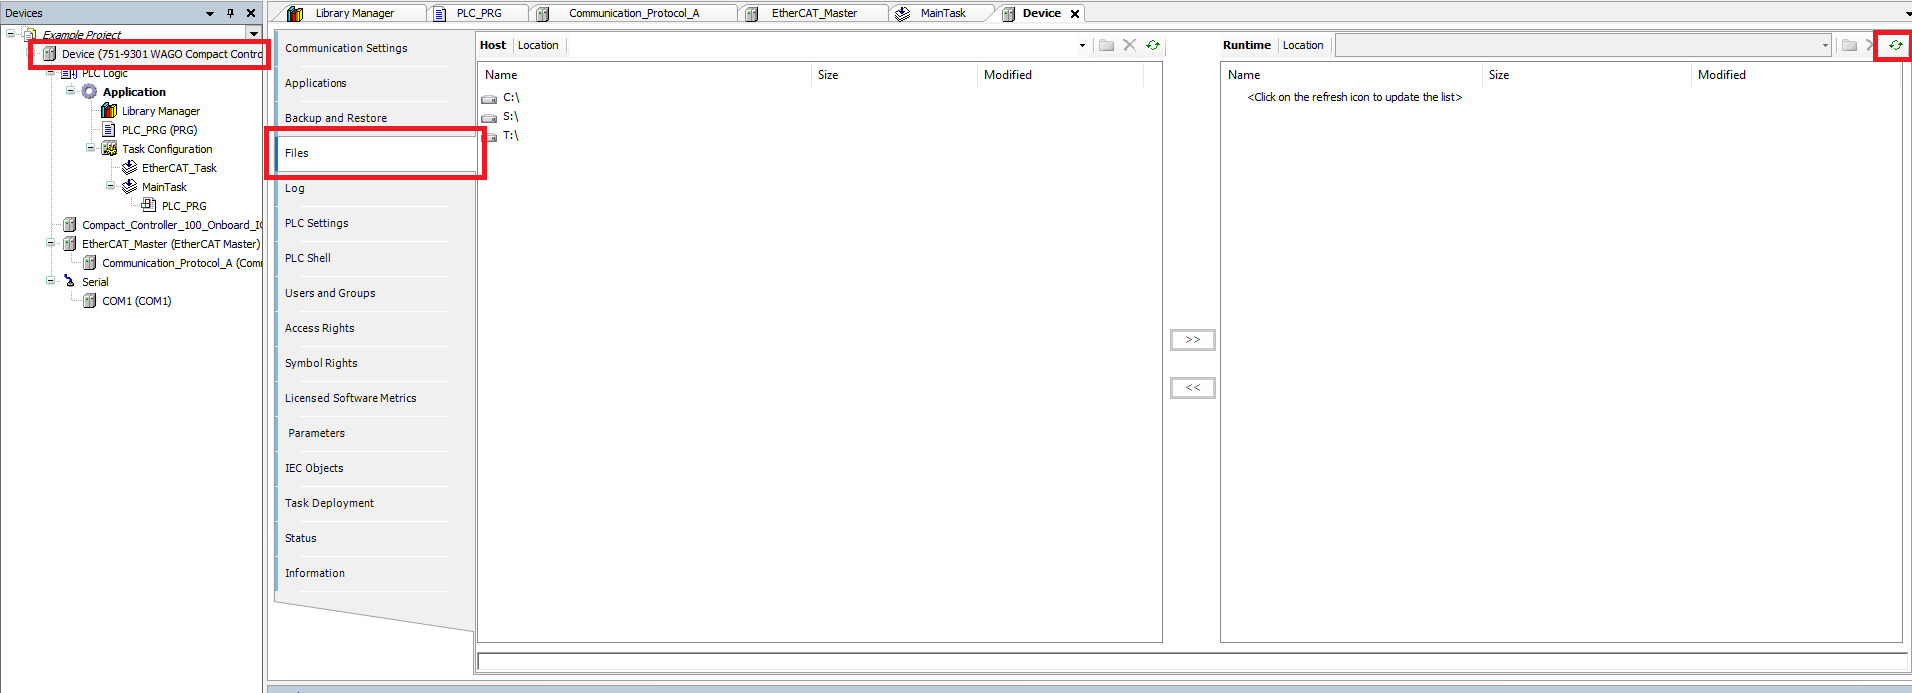
Step 2: On the left (Host) side are the files on the PC, one the right (Runtime) side are the files on the controller. Click the Refresh button on the Runtime side of the page to load the files on the controller
Step 3: On each side navigate to the folder that contains the files you are interested in. Note that the PlcLogic folder on the controller is considered the “Root” folder for controller program file access such as using the SysFile library
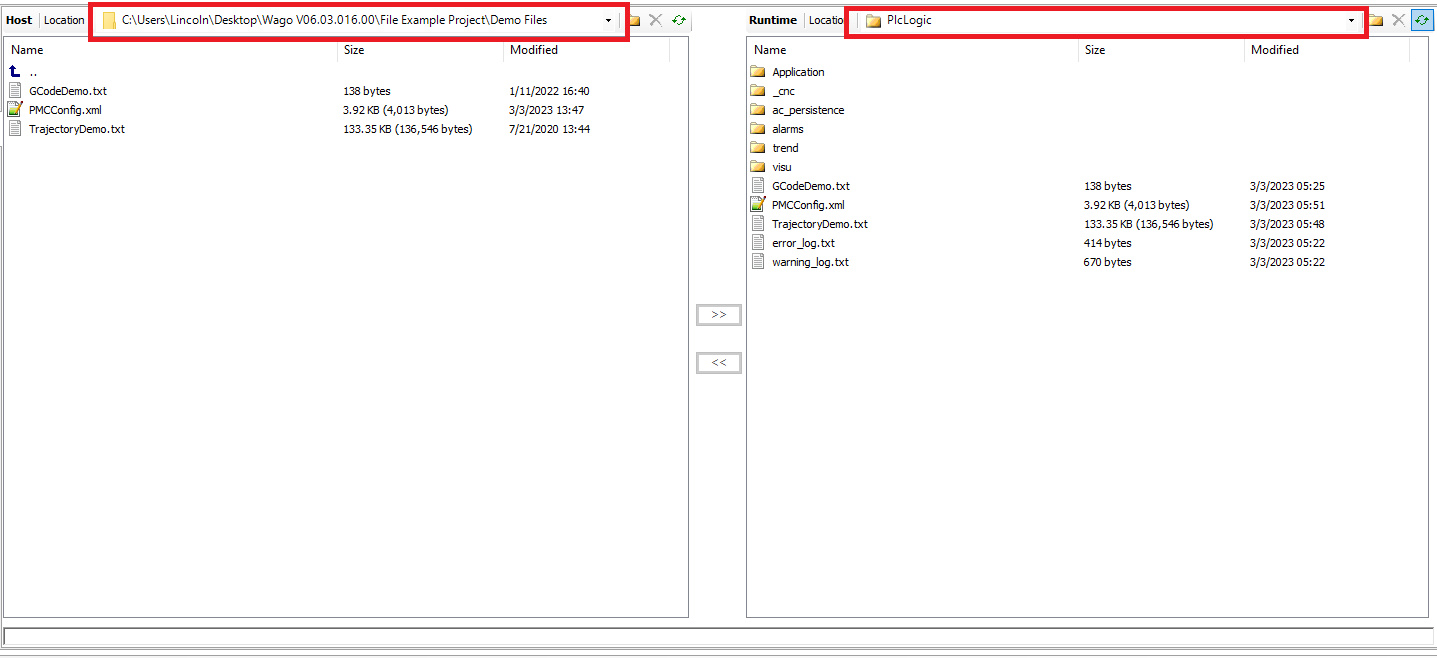
Step 4: Use the << button to copy PLC files to the PC and the >> button to copy PC files to the PLC